Secure Game Hosting with AWS

Table of Contents#
[Overview 1](#overview)
[Diagram 1](#diagram)
[Phase 1 1](#phase-1)
[IAM 2](#iam)
[MackerelProjectRO 2](#mackerelprojectro)
[MackerelProjectAdmin 3](#mackerelprojectadmin)
[VPC 6](#vpc)
[Security Groups 8](#security-groups)
[EC2 10](#ec2)
[Game Server Instance 10](#game-server-instance)
[Web Server Instance 11](#web-server-instance)
[RDS 12](#rds)
[App Database and Permissions 14](#app-database-and-permissions)
[Route 53 16](#route-53)
[Certificate Manager 18](#certificate-manager)
[Public CA 18](#public-ca)
[Build Application Server 20](#build-application-server)
[Building Web Server 27](#building-web-server)
[Load Balancer 33](#load-balancer)
[S3 38](#s3)
[Phase 2 41](#phase-2)
[CloudWatch 41](#cloudwatch)
[Admin 41](#admin)
[DB Alert 41](#db-alert)
[EC2 Alerts 43](#ec2-alerts)
[User 44](#user)
[Lambda with SNS triggers 47](#lambda-with-sns-triggers)
[Testing 51](#testing)
[WAF 52](#waf)
[Security Hub 57](#security-hub)
[Summary 60](#summary)
[Resources 61](#resources)
Overview#
This project aims to take my original AWS project from my self-taught course and turn this into a fully deployed solution. The original iteration of this project consisted of an EC2 Instance with a local database and two security groups, one that allowed connections to the game server auth and world ports and a security group for SSH and MySQL. User account management was done by myself via logging into the EC2 instance directly and manually creating the user account. This was used to host game services for friends. I aim to use the skills learned in this class to build a cloud environment that is segmented, secure, and has visibility.
I want to break this project into two phases: the IAM, VPC, Certificate Manager, EC2 for the Game Server and registration page, RDS, and S3. Once the first phase is completed, I will build the security portion using AWS WAF and Security Hub. I also want to incorporate lambda functions using CloudWatch triggers to send messages to a discord server for communications to relay status alerts for the Application and Web Server.
Diagram#

Phase 1#
IAM#
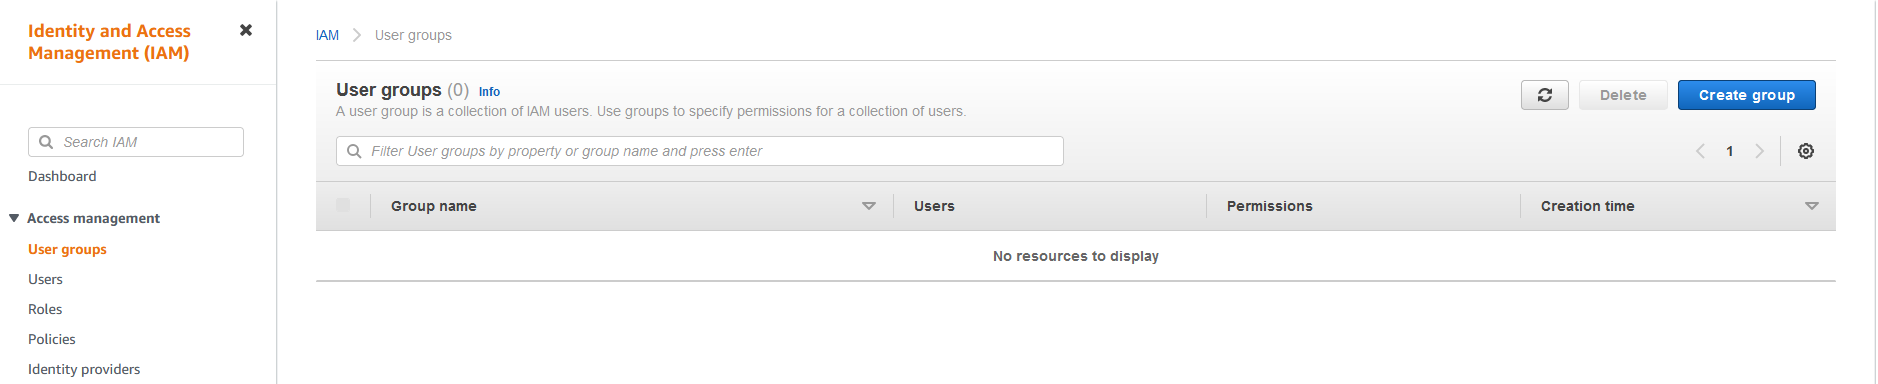
I will set up a read-only user group and an admin group for this project. The read-only group will be used for reviewing information in the environment. The admin group will be the few users that can perform reboots and troubleshoot issues in the environment. I will open the IAM portal and start creating the groups
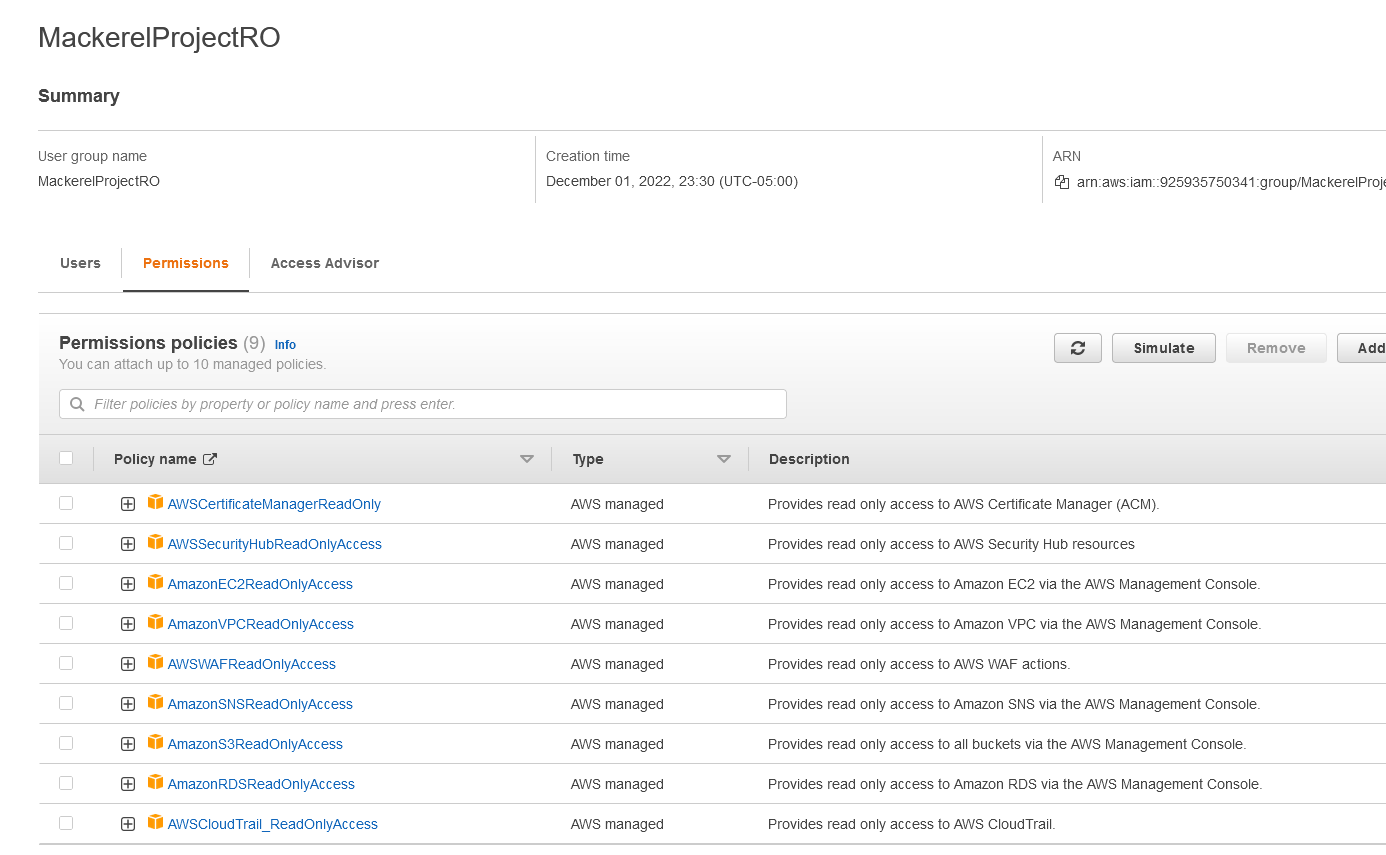
MackerelProjectRO#
Access to the security hub will cover multiple security features, so only one group is necessary. I will add the following permissions to the read only group. This will give the users who need to review the environment insight into all the resources utilized.
AWSCertificateManagerReadOnly
AWSSecurityHubReadOnlyAccess
AmazonEC2ReadOnlyAccess
AmazonVPCReadOnlyAccess
AWSWAFReadOnlyAccess
AmazonSNSReadOnlyAccess
AmazonS3ReadOnlyAccess
AmazonRDSReadOnlyAccess
AWSCloudTrail_ReadOnlyAccess
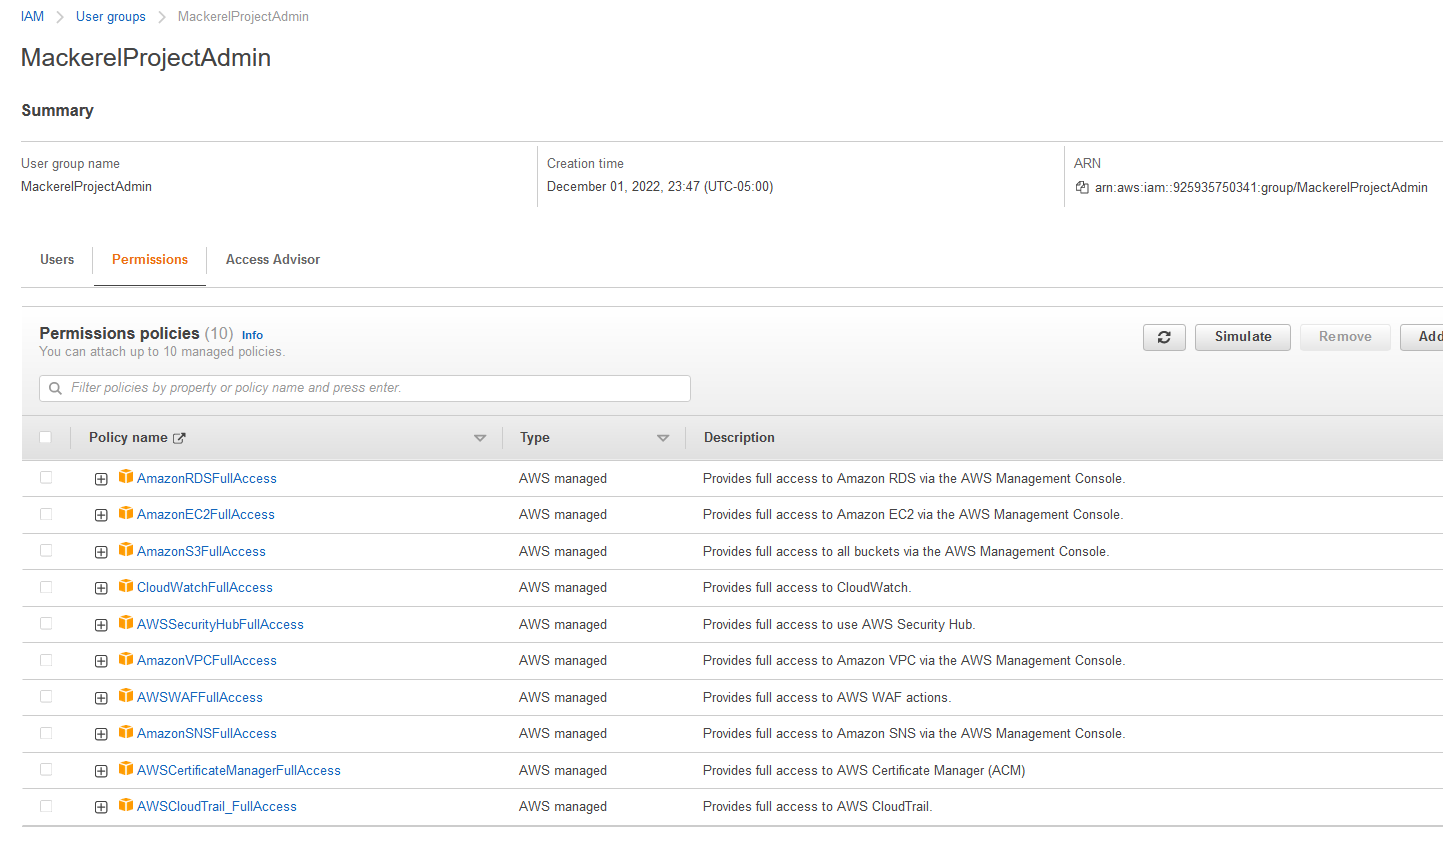
MackerelProjectAdmin#
Now that the read-only group has been configured, I can create the admin group with the following permissions. These users will have full access to the systems reserved for only a few select users.
AmazonRDSFullAccess
AmazonEC2FullAccess
AmazonS3FullAccess
CloudWatchFullAccess
AWSSecurityHubFullAccess
AmazonVPCFullAccess
AWSWAFFullAccess
AmazonSNSFullAccess
AWSCertificateManagerFullAccess
AWSCloudTrail_FullAccess
Admins#
I will add myself to the admin group
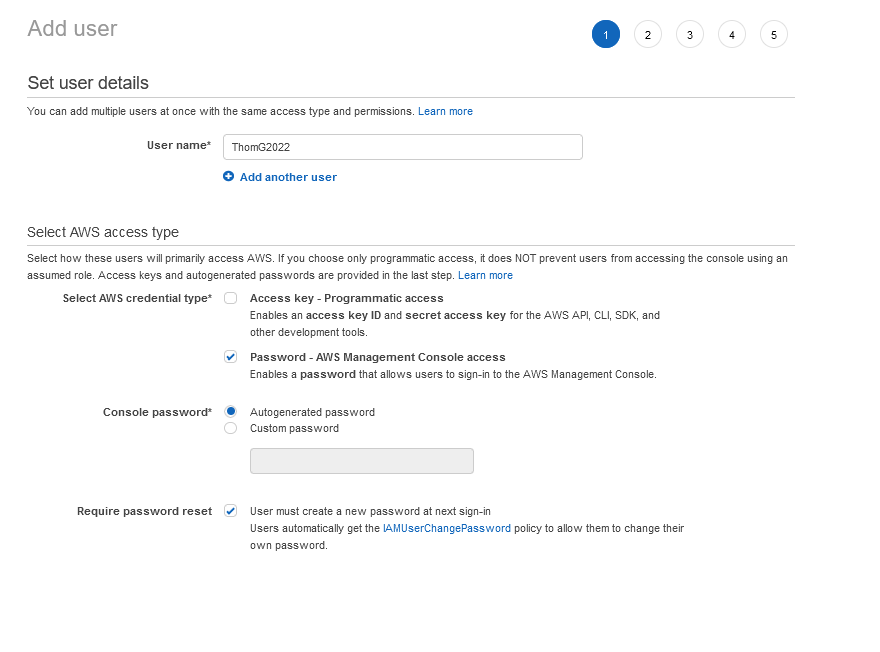
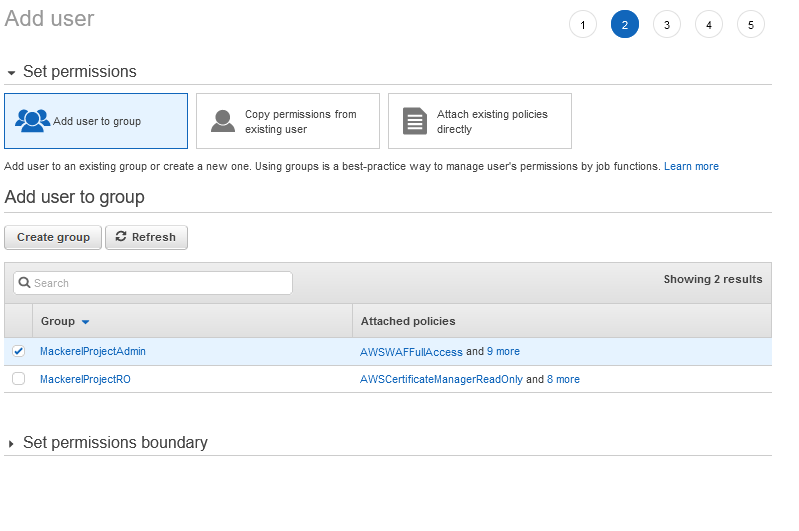
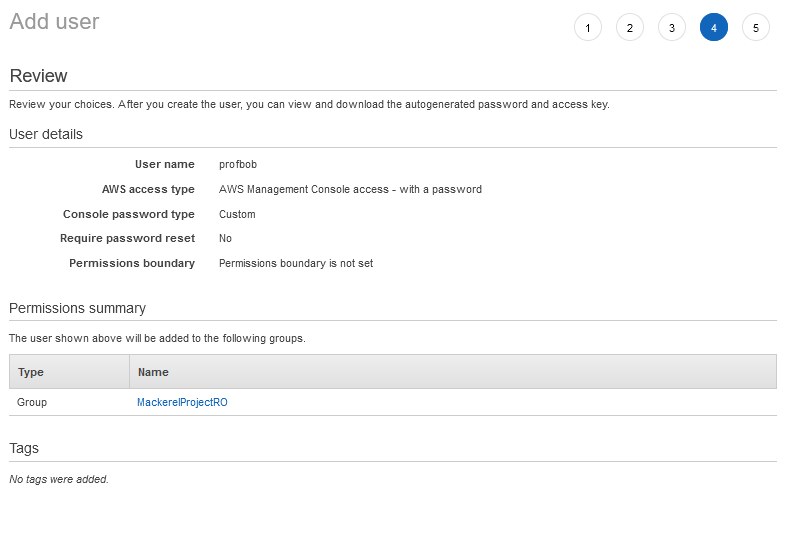
And then add the user to the selected group
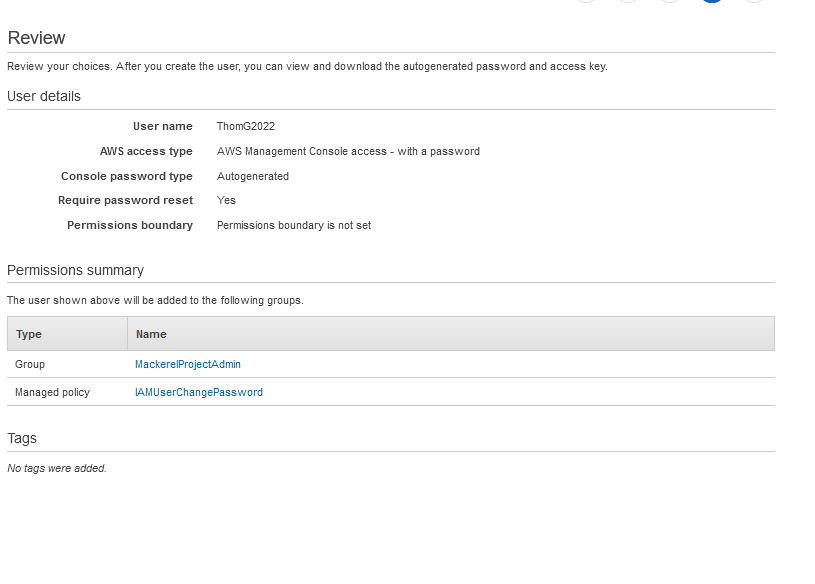
And then I can see the review of the user to be created, and I can finish adding this user
Not that the Admin User has been created; I will move to the read-only user
Read-Only#
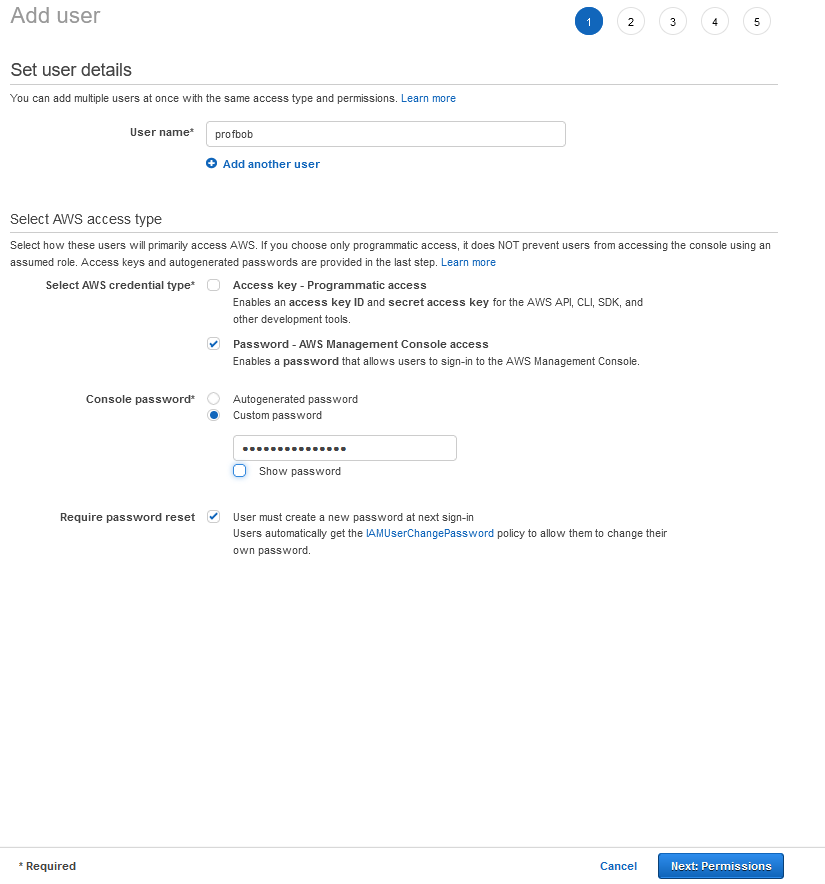
I will go back to the IAM dashboard and click create a new user
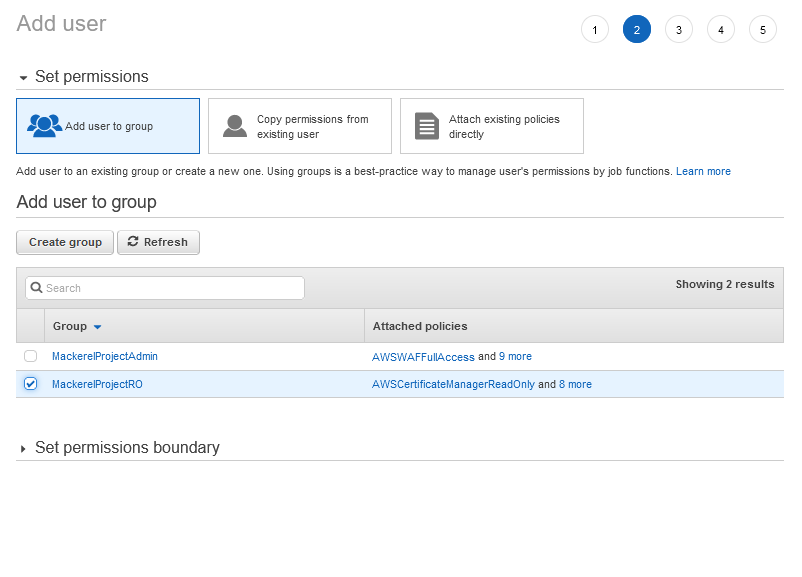
And then, I can add the permissions
And Review the new user is created
And now I can hit create.
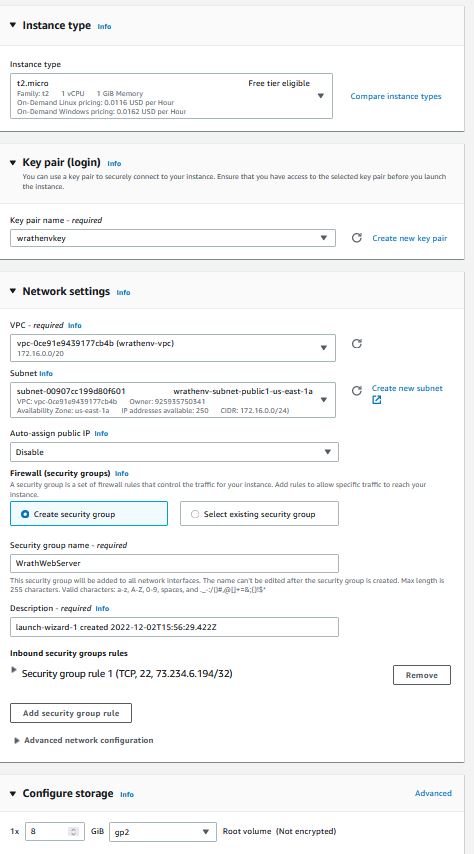
VPC#
The VPC for this environment relies on two distinct boundaries to provide network segmentation. I will be using a private subnet in this project and a public that will contain the database, and the public will serve as the front-facing portion of the network holding the application and the web server.
I will start by running the following commands to build a VPC for this deployment. For the rest of the project, I will use the wrathenv tag throughout to keep all the environment resources grouped.
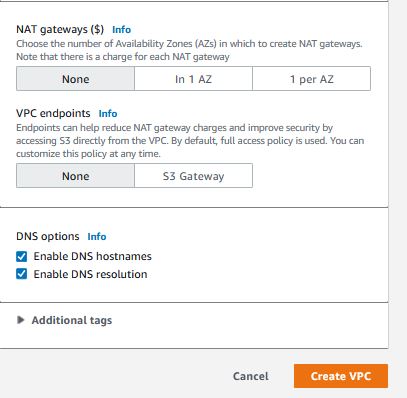
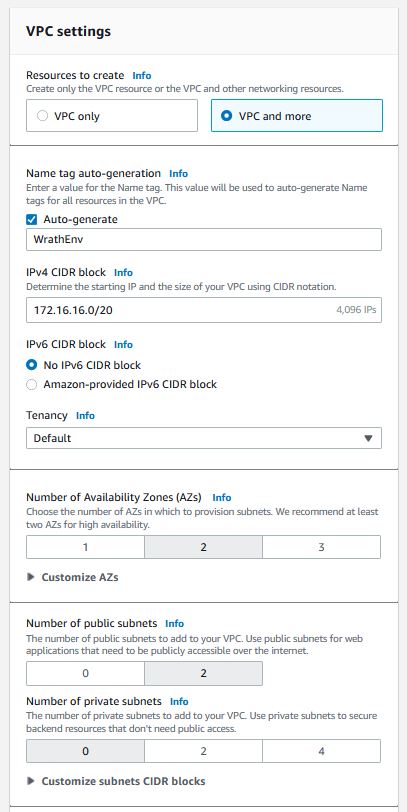
I will create a VPC and more in the AWS web interface with the following configurations.
One excellent piece of the "VPC and More" is this preview which is nice to see how this all fits together
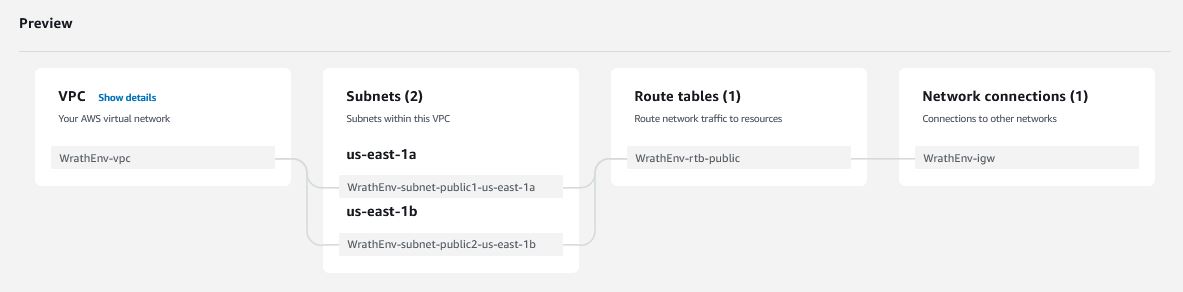
And now we can see the VPC is being built
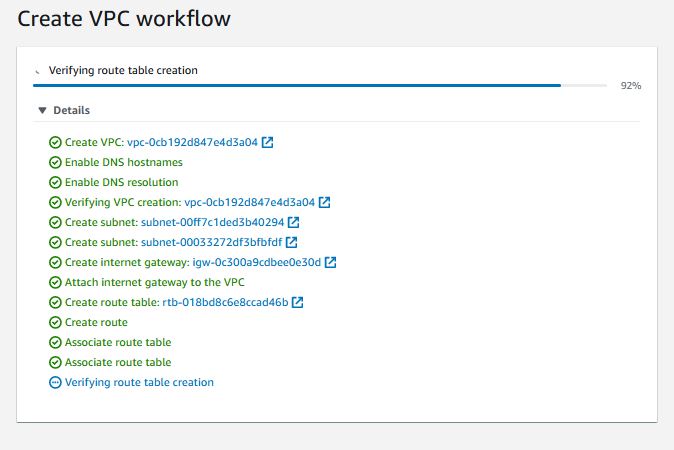
Now that the VPC has been created, I can start configuring the access between the subnets
Security Groups#
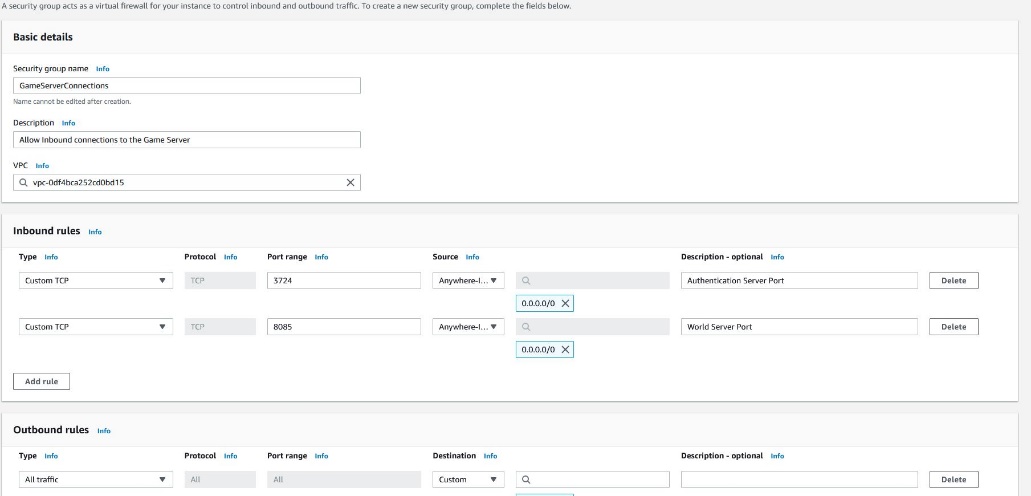
For this project, I will Need three separate security groups this will control access to the servers
The First is the GameServerConnections group, which allows End users to Connect to TCP/8085, the World port, and TCP/3724, the Authentication port.
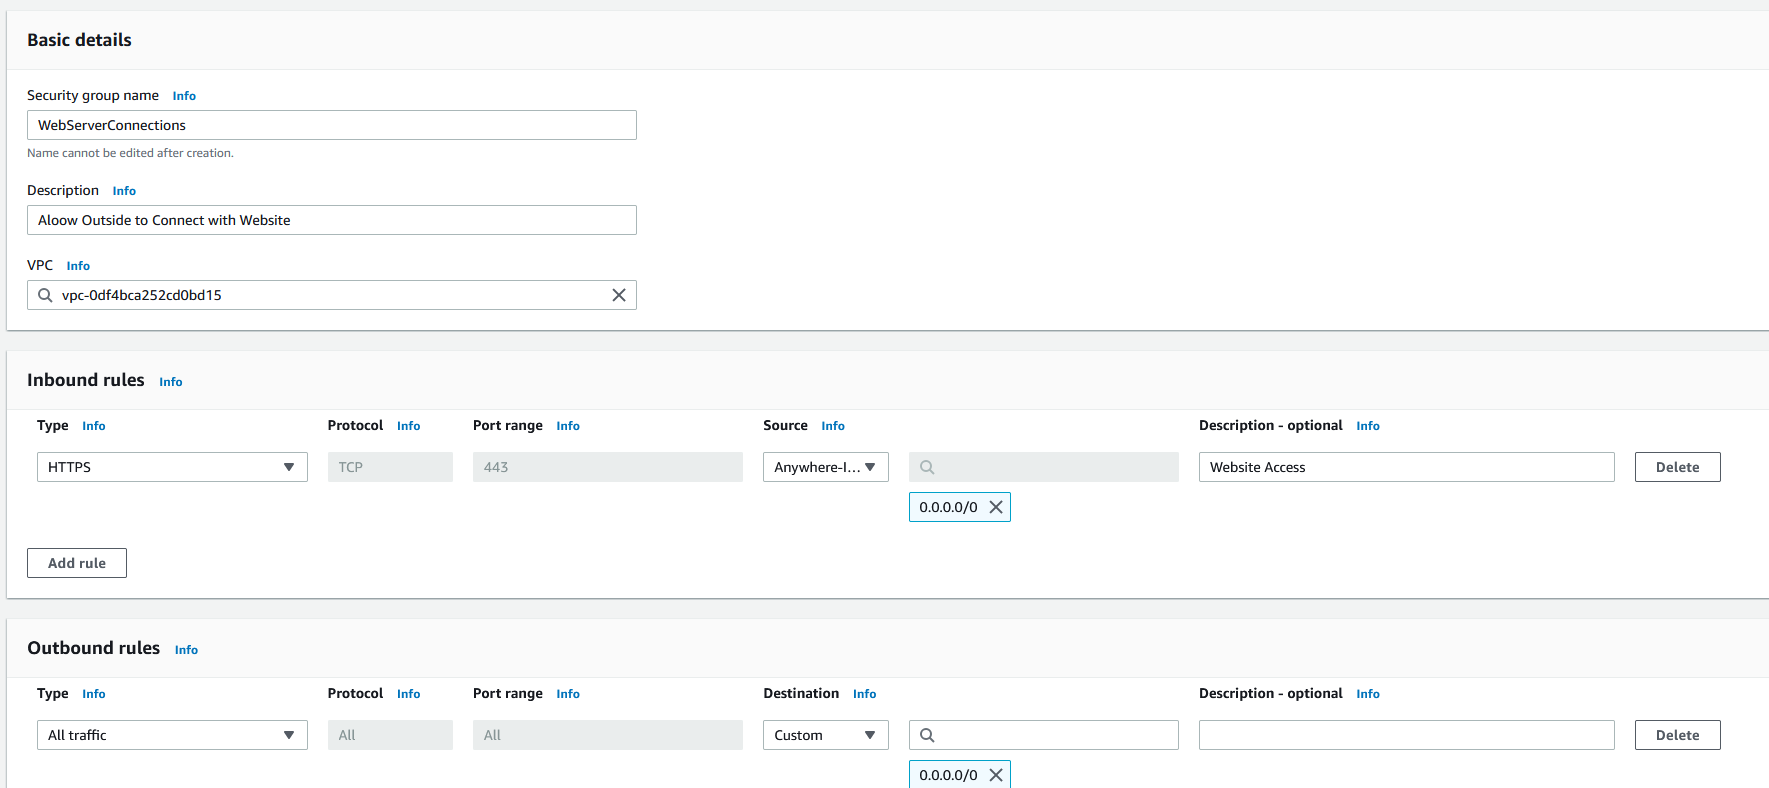
The Next group will be WebServerConnections to allow end users to connect to the website using HTTPS
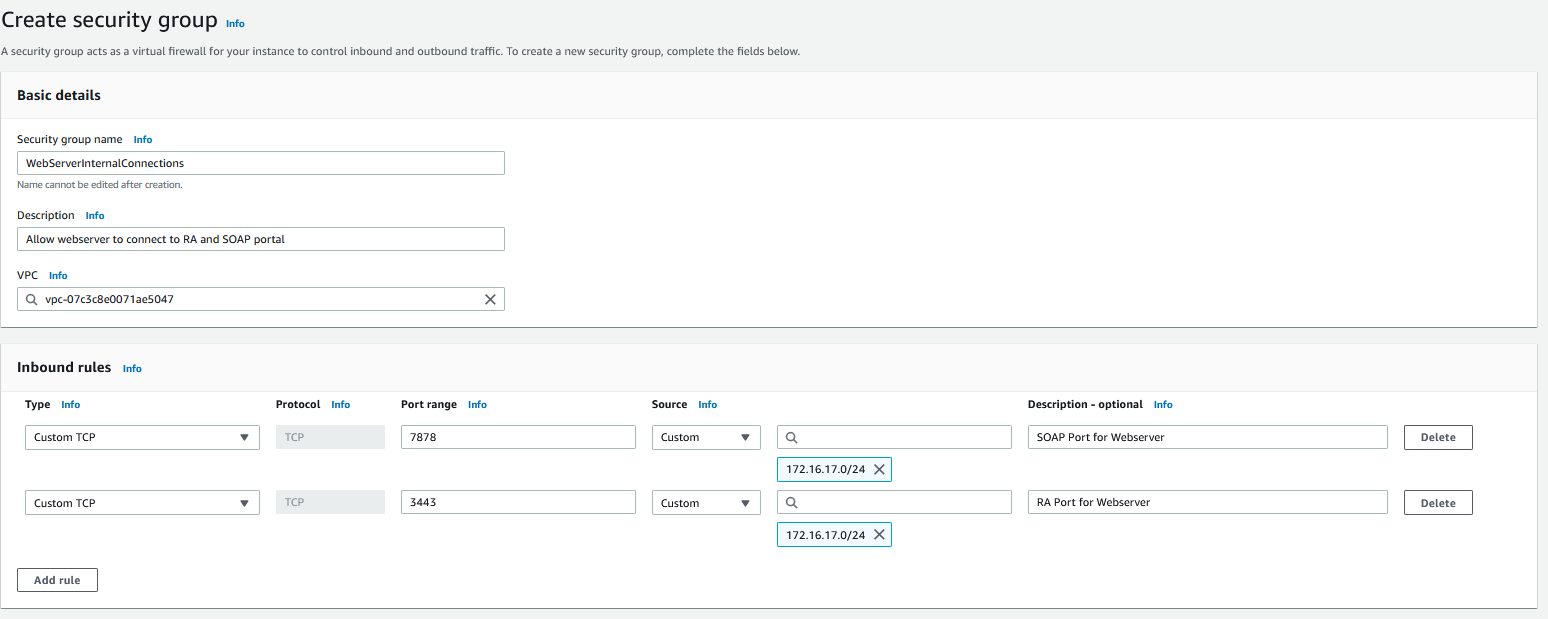
Now for the internal groups, I need to add a security group called WebServerInternalConnections for the Web Server to talk to the Database and the Authentication Server.
And the last rule I will need is for the Application and Web Server to talk to the database; this will be entered into the database security group.
And now, both resources will be able to connect to the DB
EC2#
Now that the VPC has been built, I can begin building the application server and the web server in their respective subnets.
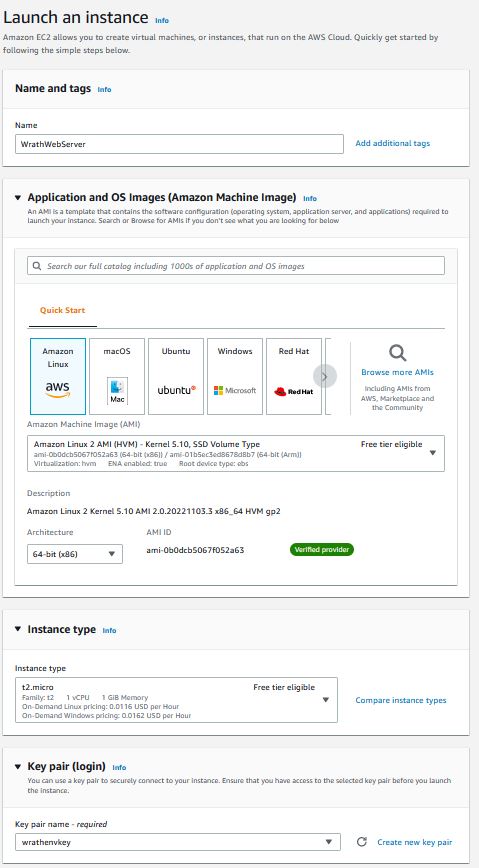
Game Server Instance#

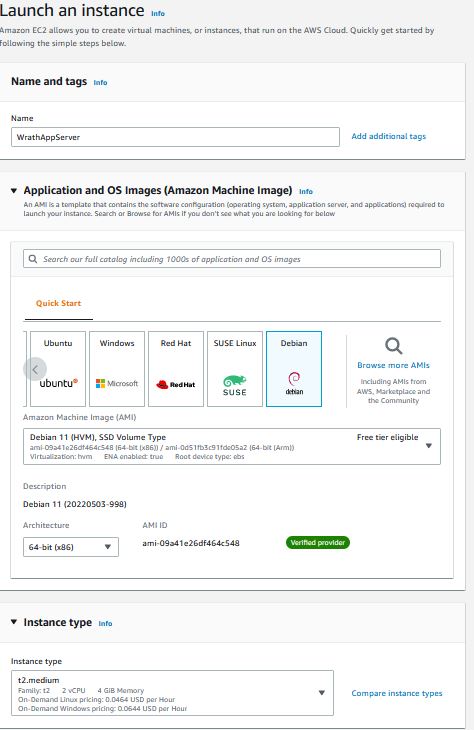 I have elected to use TrinityCore as the
Game Engine for this project. This can be built on different OSes, but
it is recommended for Debian 10+. So for this, I will use a Debian 11
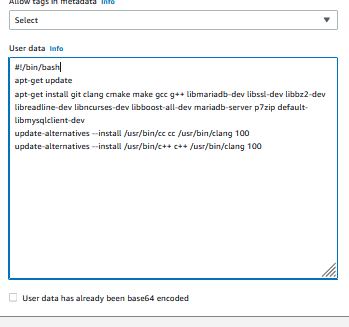
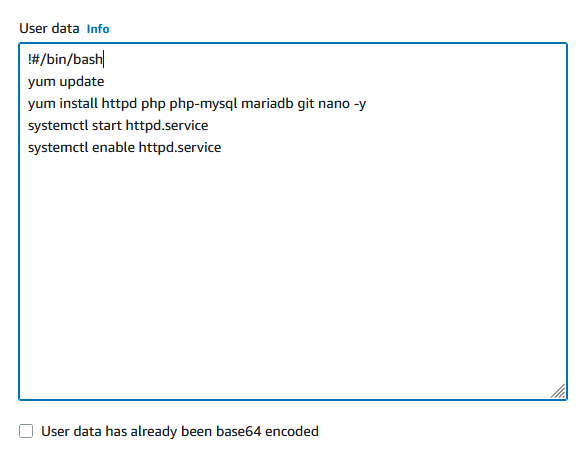
machine. I will specify user data to install some dependencies as the
EC2 instance is being spun up. These are the only dependencies needed
for the Game engine to be built, enabling me to begin building the
server as soon as it is available.
I have elected to use TrinityCore as the
Game Engine for this project. This can be built on different OSes, but
it is recommended for Debian 10+. So for this, I will use a Debian 11
machine. I will specify user data to install some dependencies as the
EC2 instance is being spun up. These are the only dependencies needed
for the Game engine to be built, enabling me to begin building the
server as soon as it is available.
Now I can launch the instance.
Web Server Instance#
Now that the app server is running, I will start building the web server, This is a simple Apache page, and I will use a Debian Image to run it on a t2.micro this should be more than enough to host the web page.
RDS#
The DB is a critical component of this project because it will support the Application server and the website. Though it is a critical piece, the DB is relatively small.
For this, I need a MariaDB 10.6.10, and I will use the free tier; I don't intend to max out this database, so a t3.micro should be sufficient.
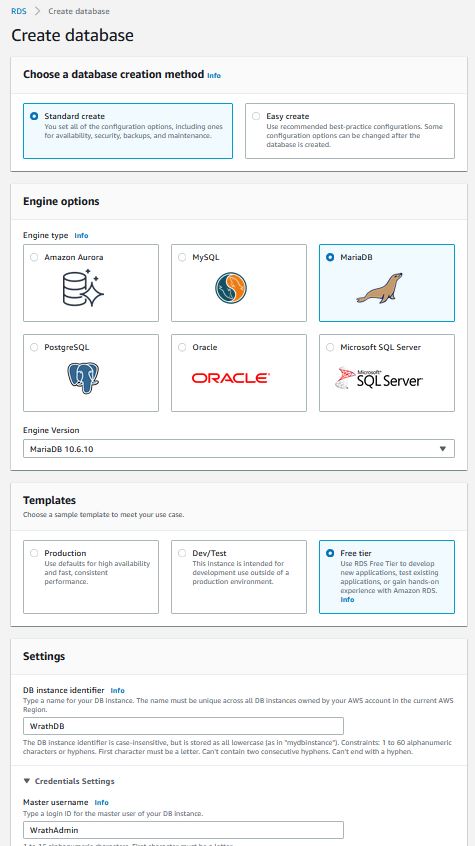
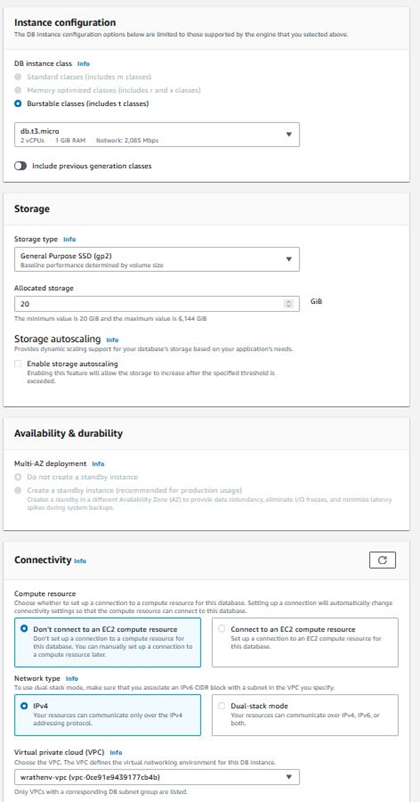
I am opting to use a 20GB database because the previous testing with this game server generally only needs about 5GB when fully deployed. I will let the RDS wizard create a subnet for the DB. I am not going to set up too much on the security group end because I want to come back to this and do all of the configurations for the security group at one time


Now that the database is built, I need to add 4 separate databases to the RDS instance. Fusion, world, character, and auth.
App Database and Permissions#
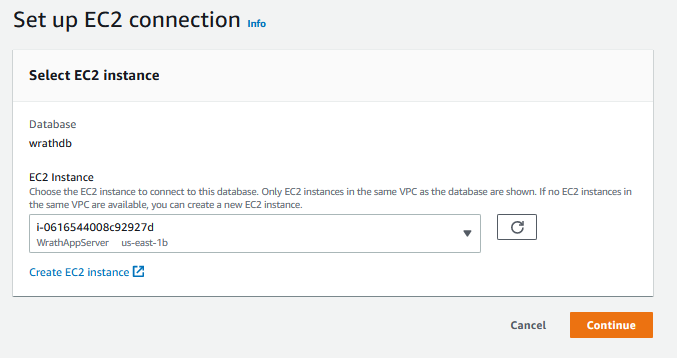
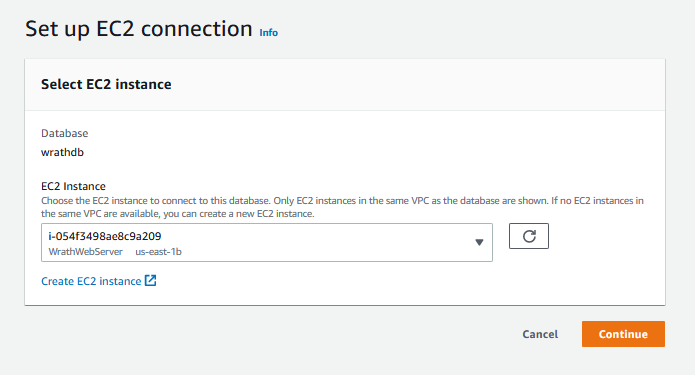
I will connect to the database and start building these tables; the permissions need to connect everything together. I will log into the Web server to start the configuration.
And then, I can log into the RDS instance
mysql -u wotlkadmin -h wrathdb.canjffbz17dk.us-east-1.rds.amazonaws.com -p
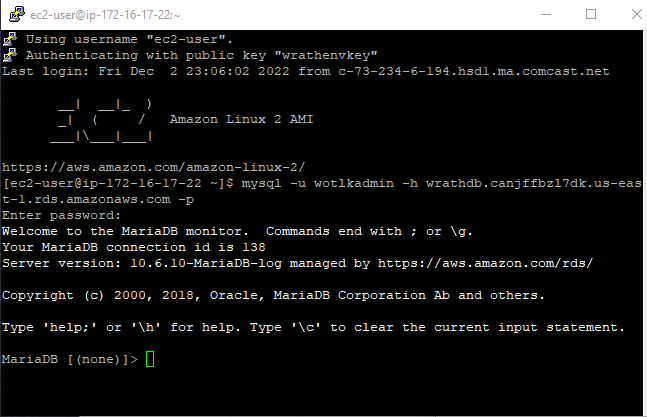
Now that I can connect to the database, I can start building new service accounts and build the database so that the application server and web server will populate.
Running the following commands will create all the permissions needed to set up the environment
CREATE DATABASE `world` DEFAULT CHARACTER SET utf8 COLLATE utf8_general_ci;

CREATE DATABASE `characters` DEFAULT CHARACTER SET utf8 COLLATE utf8_general_ci;

CREATE DATABASE `auth` DEFAULT CHARACTER SET utf8 COLLATE utf8_general_ci;

CREATE DATABASE `fusion` DEFAULT CHARACTER SET utf8 COLLATE utf8_general_ci;

CREATE USER 'MackerelWebSA'@'%' IDENTIFIED BY 'aUw4wgNLYhP8xZR' WITH
MAX_QUERIES_PER_HOUR 0 MAX_CONNECTIONS_PER_HOUR 0 MAX_UPDATES_PER_HOUR 0;

CREATE USER 'MackerelAppSA'@'%' IDENTIFIED BY 'aUw4wgNLYhP8xZR' WITH
MAX_QUERIES_PER_HOUR 0 MAX_CONNECTIONS_PER_HOUR 0 MAX_UPDATES_PER_HOUR 0;

GRANT USAGE ON * . * TO 'MackerelWebSA'@'%';

GRANT USAGE ON * . * TO 'MackerelAppSA'@'%';

GRANT ALL PRIVILEGES ON world.* TO 'MackerelAppSA'@'%' WITH GRANT OPTION;

GRANT ALL PRIVILEGES ON characters.* TO 'MackerelAppSA'@'%' WITH GRANT OPTION;

GRANT ALL PRIVILEGES ON auth.* TO 'MackerelAppSA'@'%' WITH GRANT OPTION;

GRANT ALL PRIVILEGES ON fusion.* TO 'MackerelWebSA'@'%' WITH GRANT OPTION;

GRANT ALL PRIVILEGES ON auth.* TO 'MackerelWebSA'@'%' WITH GRANT OPTION;
I will double-check the databases have been created
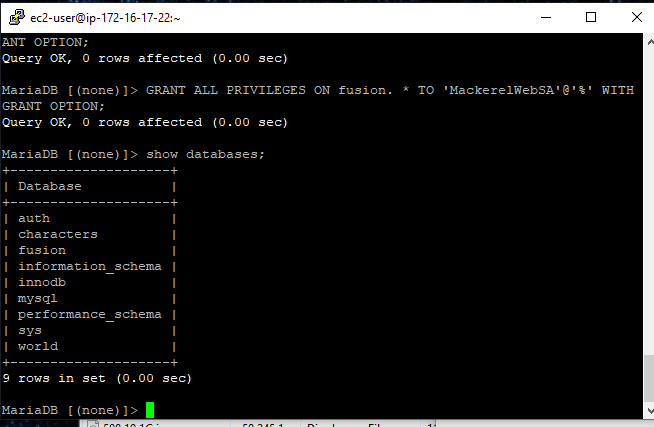
And it looks like we are ready to move on
Route 53#
I currently have a few domains in my AWS account, so I am going to reuse my projectmackerel.com domain to add entries for the webserver SSL cert and the application servers world port
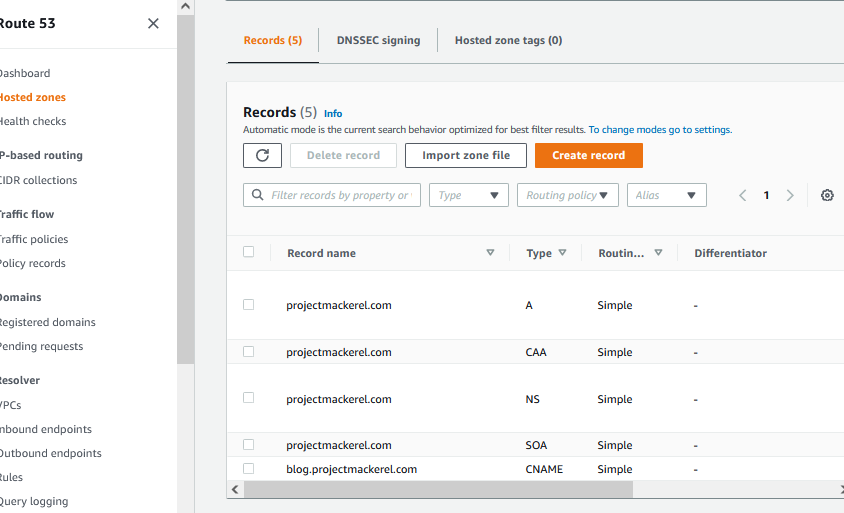
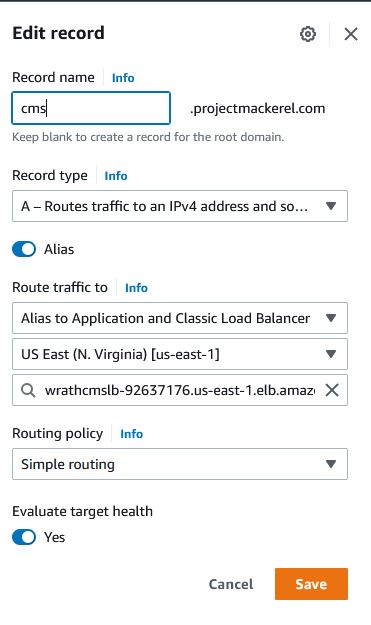
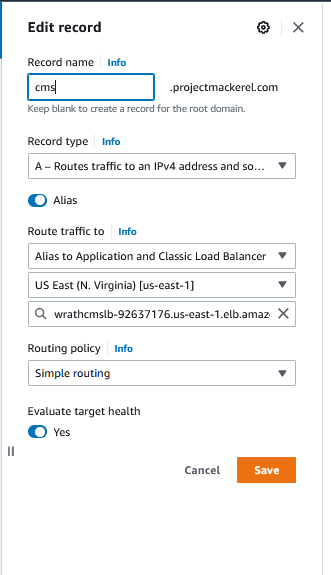
I will Create an A Record for cms.projectmackerel.com that points to the load balancer
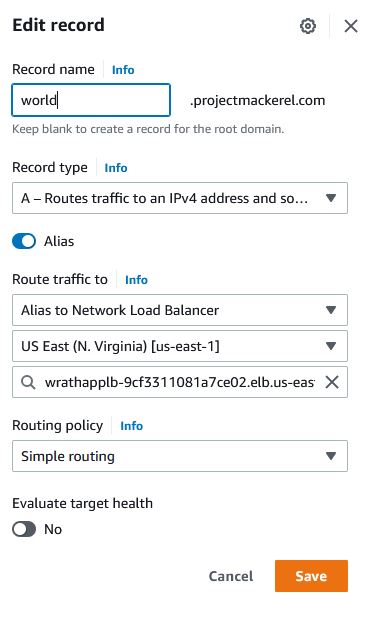
And then I will create an A Record for world.projectmackerel.com pointed to its load balancer
Since the records have been generated, I can move on to creating the actual certificates for the web server.
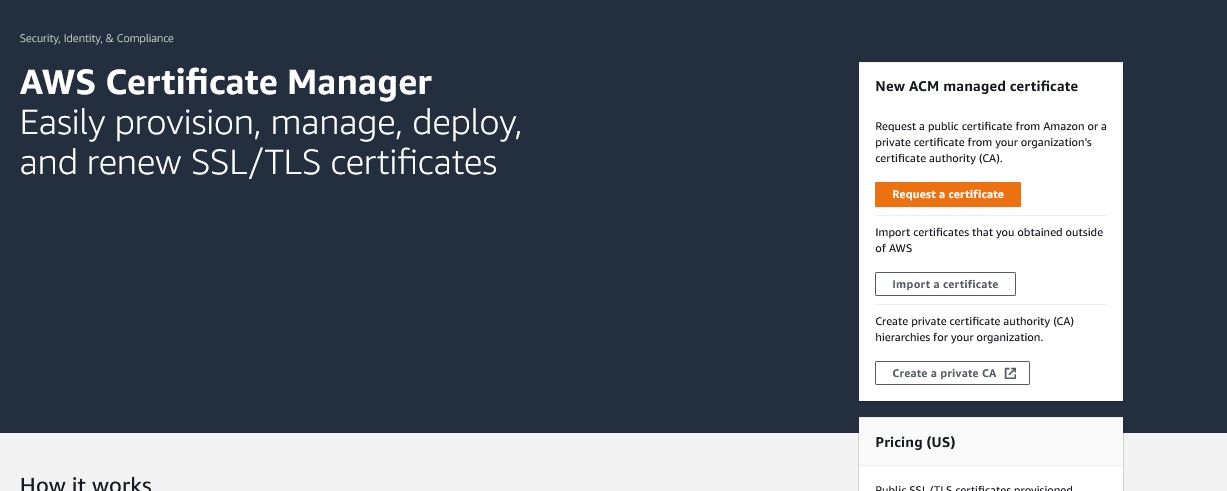
Certificate Manager#
I elected to use a certificate manager in this project because part of the overall deployment is the Customer Management System or CMS, which serves as the front end for the entire platform. The CMS is a critical component of this system. Because this is a public-facing website, I need to leverage Amazon's CA to provide an encrypted platform to facilitate user registration. The other portion of this is managing the private CA, which will handle the encryption of the AWS resources.
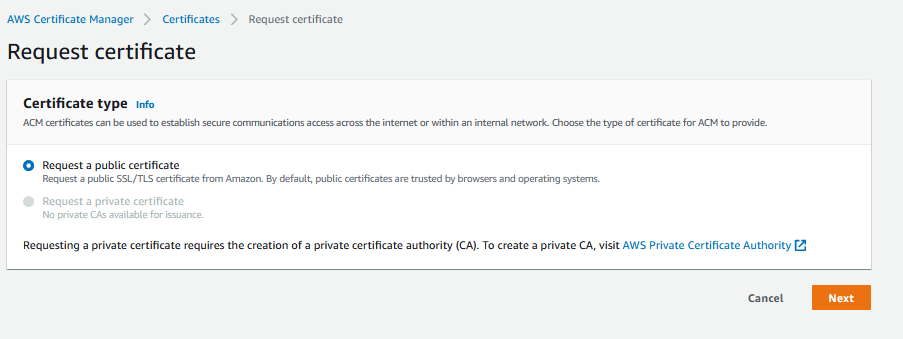
Public CA#
For the Webserver, I will need a certificate to ensure that the webserver traffic is encrypted. I will go to the Certificate manager page and request a public certificate.
Then select the public type
I will use the cms entry created in the Route 53 section.
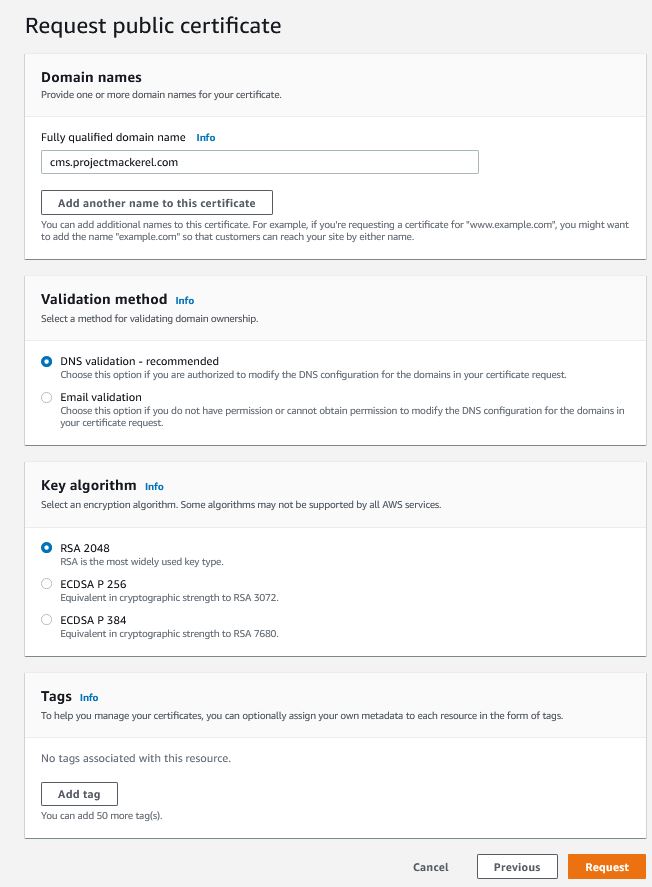
And now we can see that the newly requested certificate is now pending

Now that I have validated the SSL cert for this, I will use it later on when it comes to the web server.
Build Application Server#
Now that the underlying components have been created, I can start setting up the game server. The installation of the game server is lengthy and complex. I will try to make sure this is to the point. I will connect to the EC2 instance. I will be using the guide from trinity core that can be found here https://trinitycore.info/en/install/Core-Installation/linux-core-installation

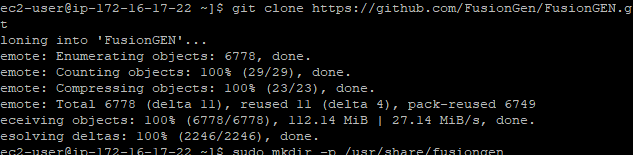
And then clone the GitHub repository
cd ~/h*
git clone https://github.com/TrinityCore/TrinityCore.git 3.3.5

And now we can make our directory
cd TrinityCore
mkdir build
cd build
And we can start building the actual game engine
cmake ../ -DCMAKE_INSTALL_PREFIX=/home/$USER/server -DTOOLS=1 -DWITH_WARNINGS=1

And then, the engine will begin building with
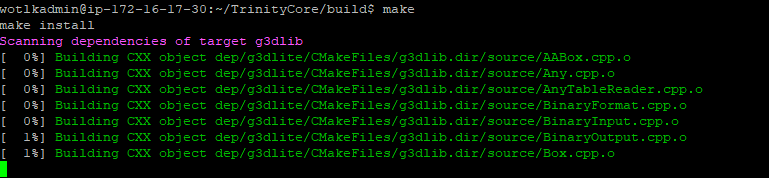
This will take a while to run
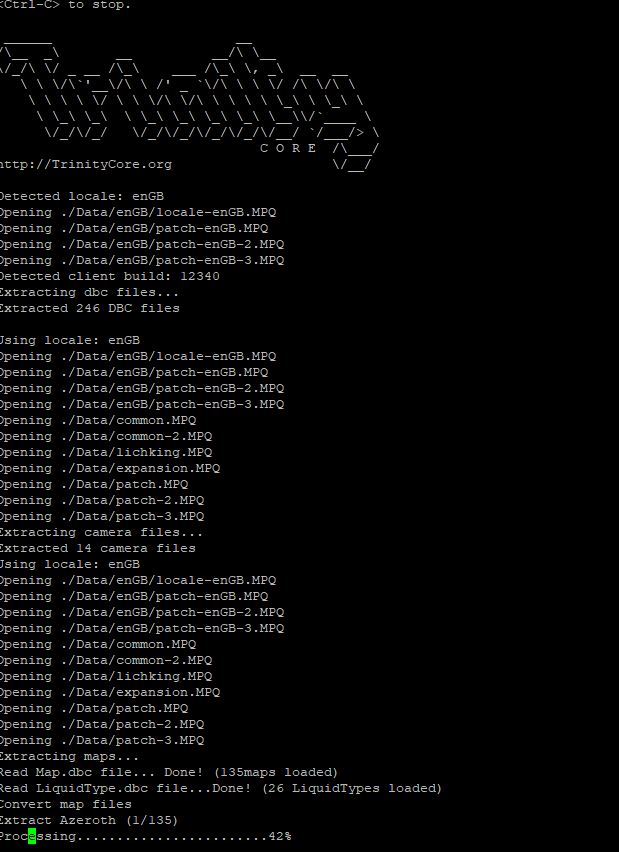
Now that it has finished, we can start the extractors. I uploaded a copy of the map files via SCP

Now I can set up the extractor to the Server Engine folder and the Client files and start the extractor

Now that the extractor is running, it is time to wait once again
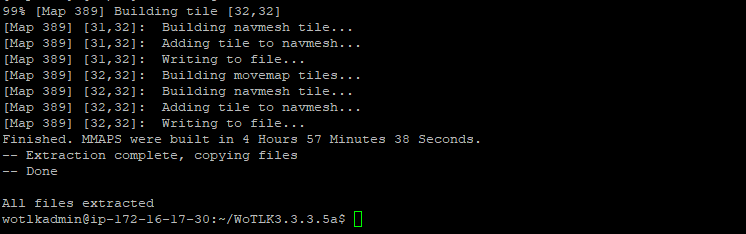
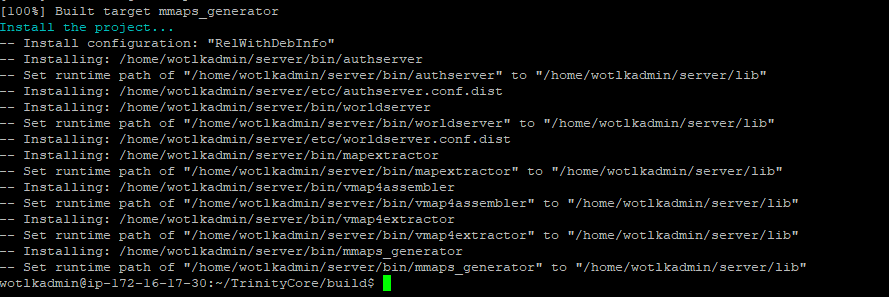
Now that the Extractors have finished, I can move the generated files to their directory and set up the configuration files
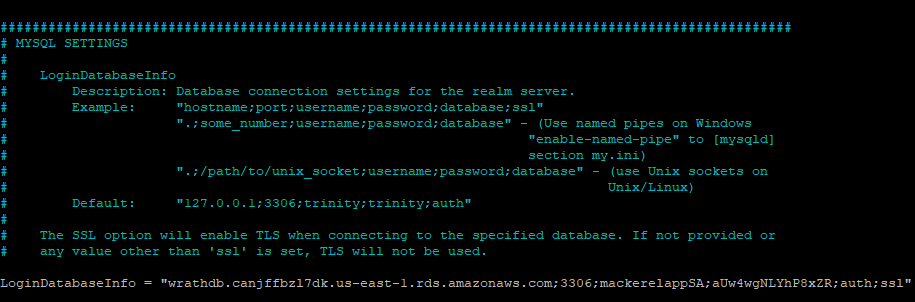
The most critical piece of this config file is linking the server to the database TrinityCore uses this format
LoginDatabaseInfo = "127.0.0.1;3306;trinity;trinity;auth"
So my connection string will be
wrathdb.canjffbzl7dk.us-east-oc-1.rds.amazonaws.com;3306;mackerelappSA;password;auth
And then, I will make the same changes in the world config file
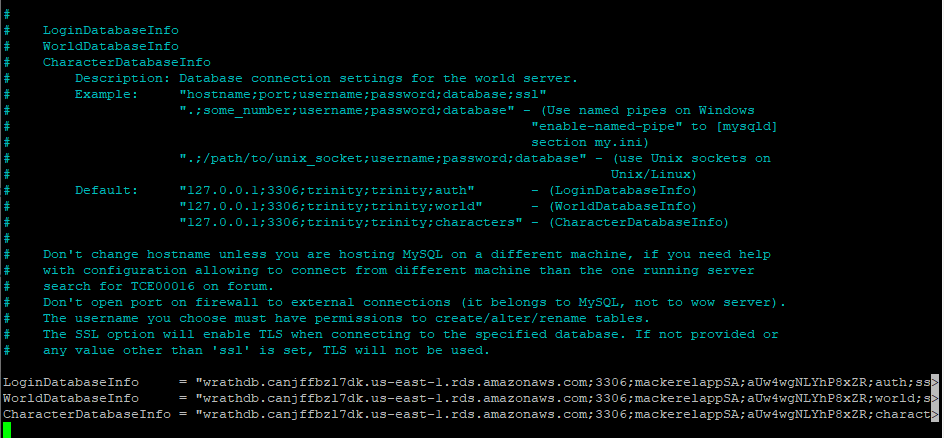
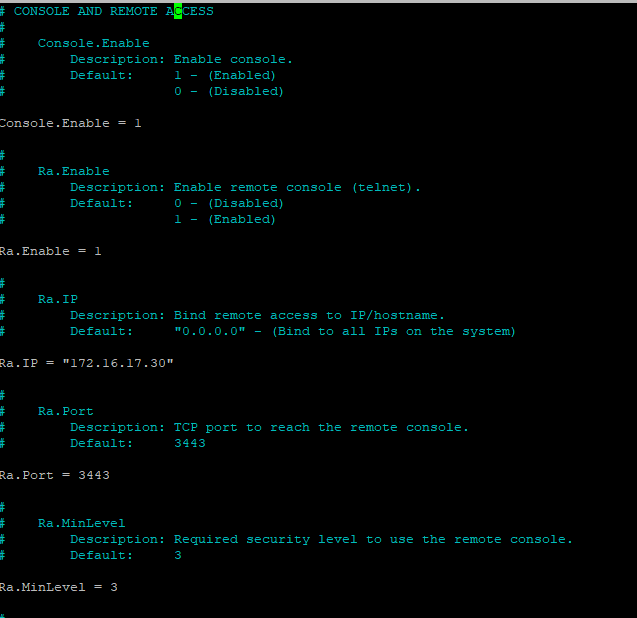
For the Webserver to create users in the database, it will need access to the RA port, and the default bind is 0.0.0.0, which means any interface on the server. I want to change this to reflect the internal IP only because this should not be open to the internet, so that I will change this to 172.16.17.30.
Now that the configuration is all set, I can run the World Service; this will populate the database.
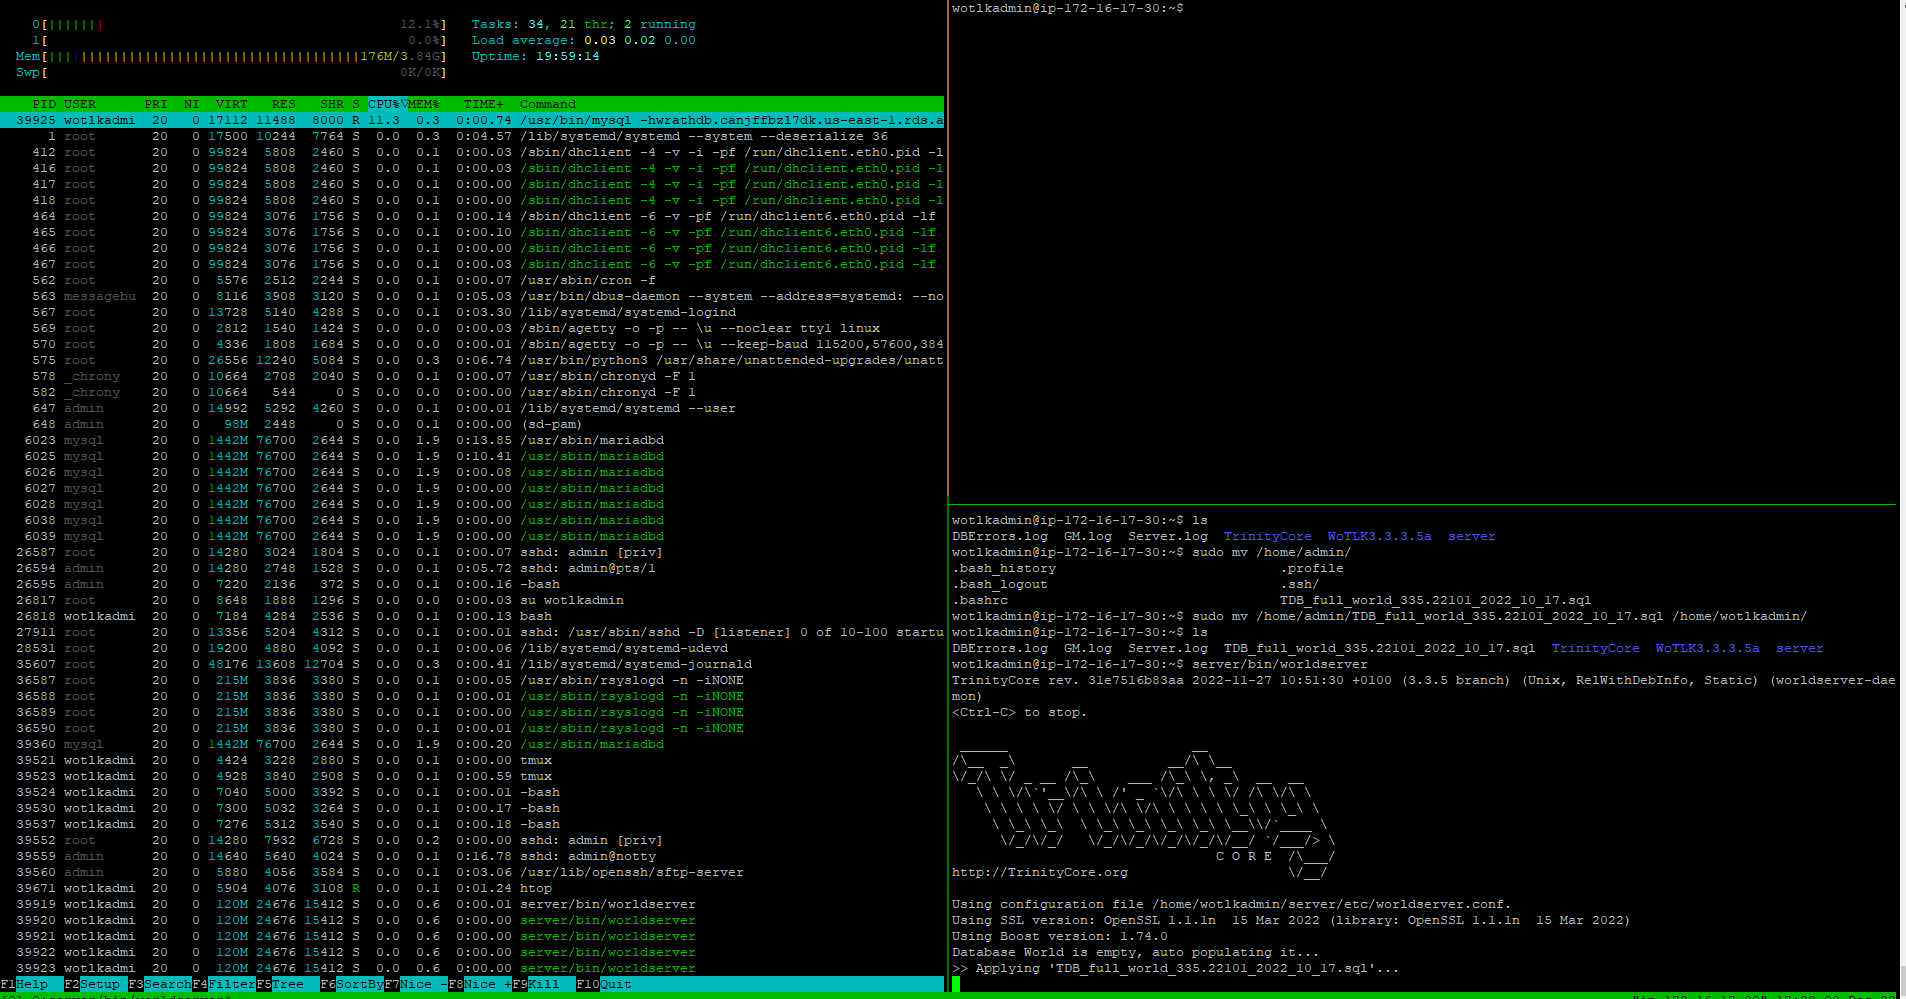
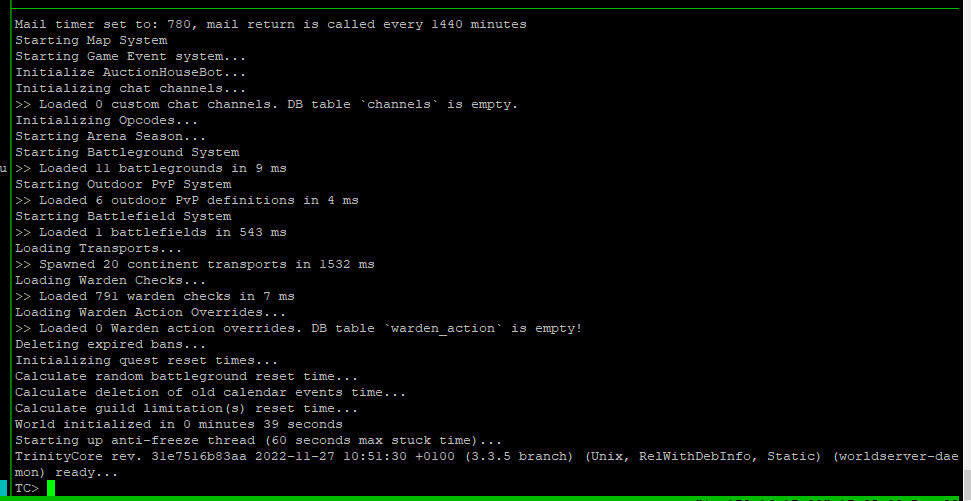
Now that the database has been populated and the world server is running. I will need to set up a service account on the world server that the webpage will utilize to make accounts.
Running the following commands will create an administrator-level user with complete control of all worlds in the database
account create MackerelWebSA [PASSWORD]
account set gmlevel MackerelWebSA 3
Now that this account has been created, I have everything I need to configure the webpage.
Building Web Server#
I can start building on the web server now that the application server has been configured. I am using FusionGEN as a CMS for this server. It will help support user account creation, and password resets and offers an information center for Users.
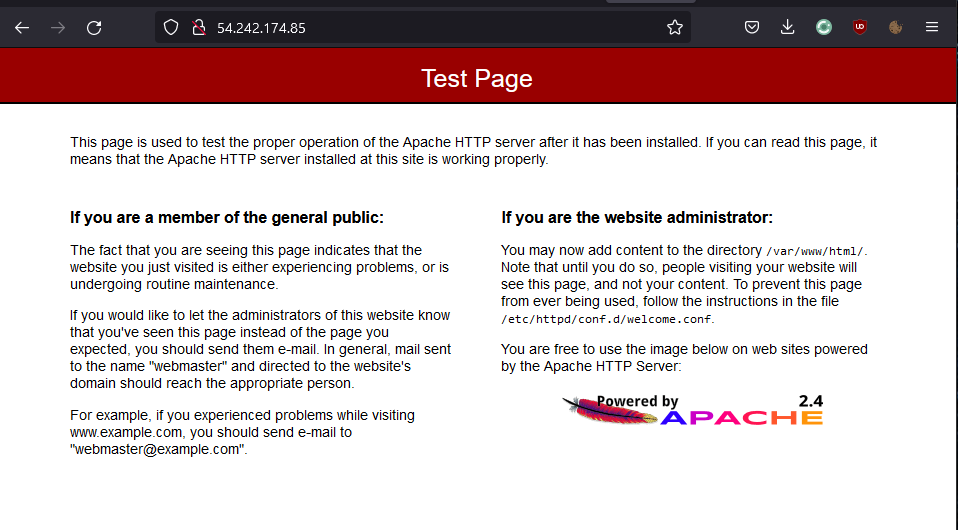
I ran user data to get the dependencies installed when the instance was built, and I can confirm it worked by opening the Apache test page
I will log into my EC2 instance and begin setting up the CMS, and Now I can clone the GitHub Repo
And then, I can begin to configure the permissions for the new Apache-based website
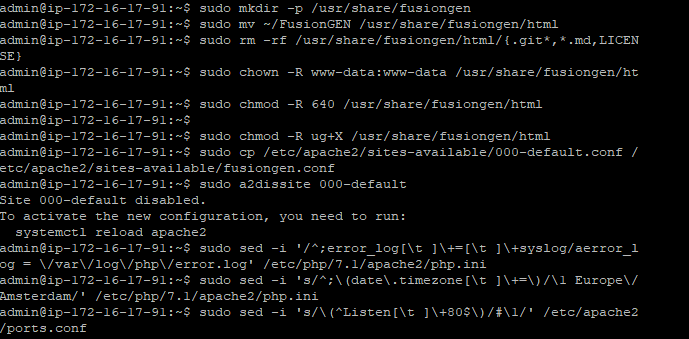
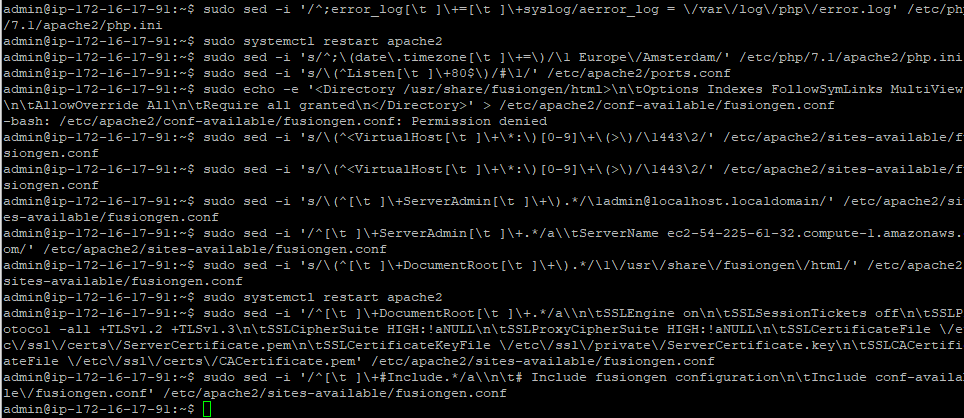
And now the FusionGEN CMS can be configured
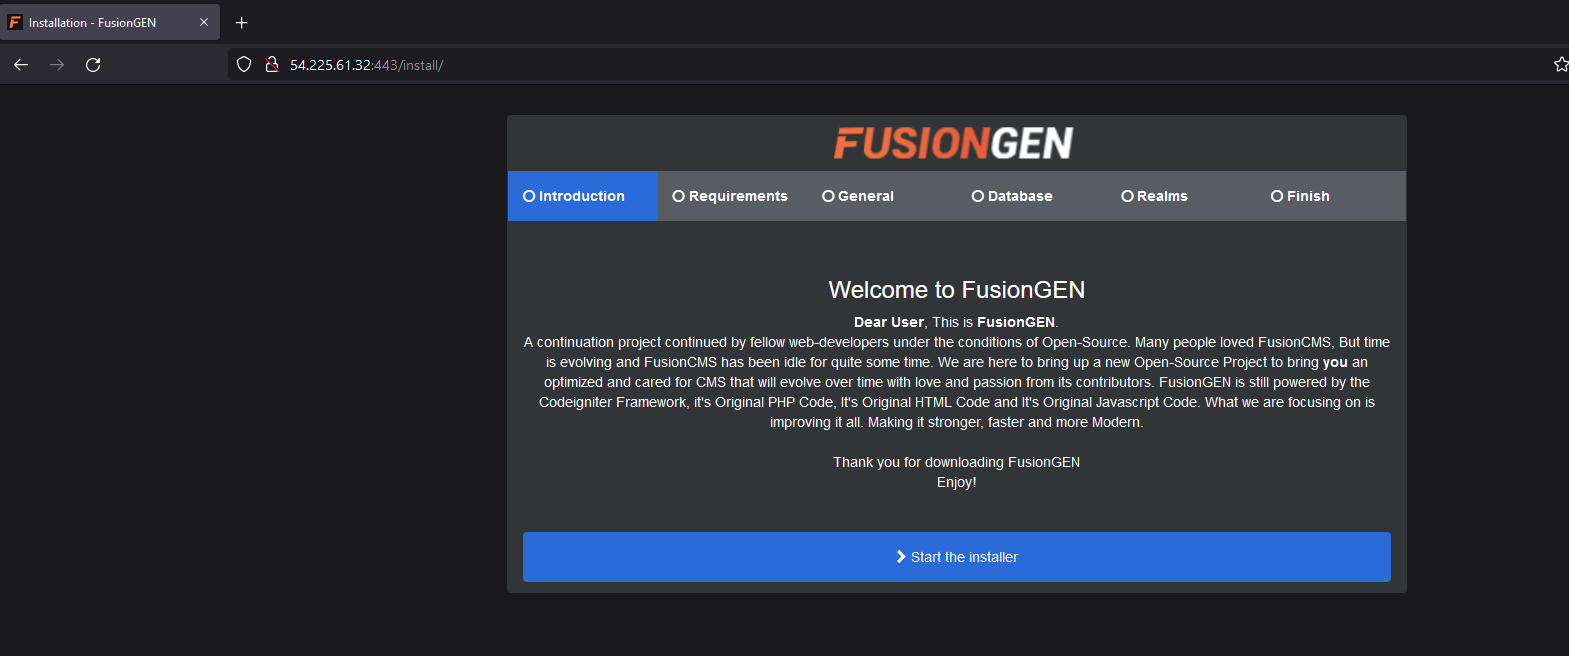
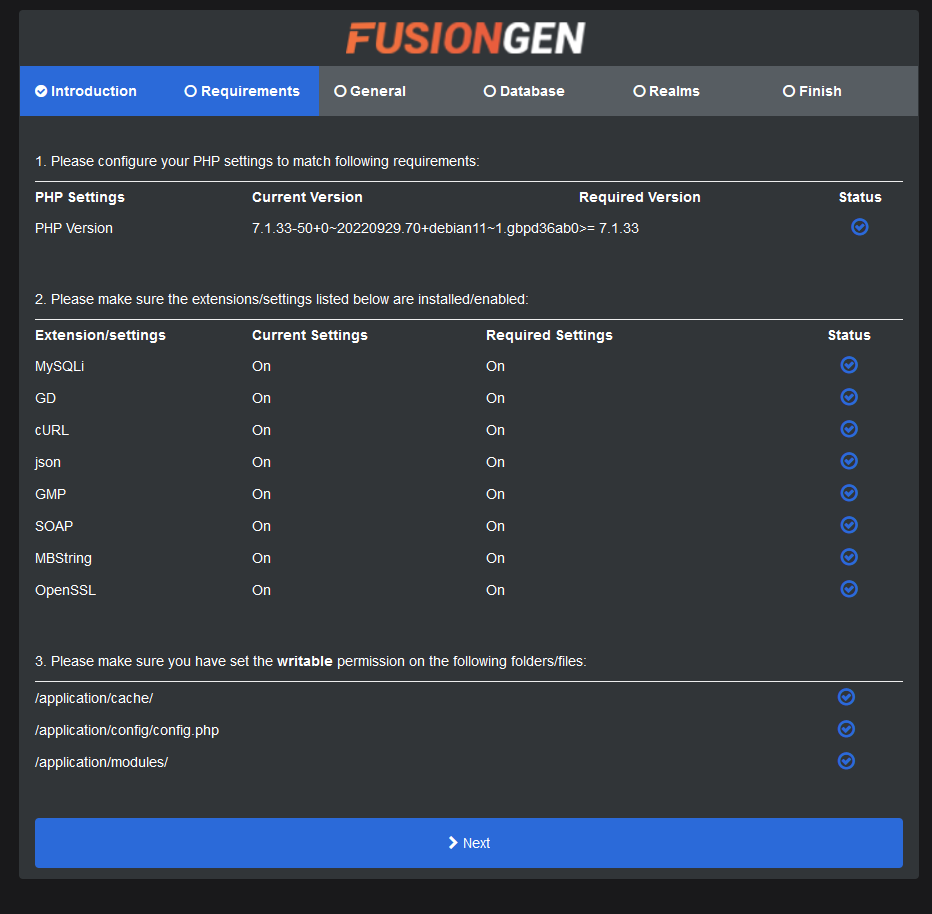
Now we can test the requirements to make sure the webpage has permissions and connectivity to all resources
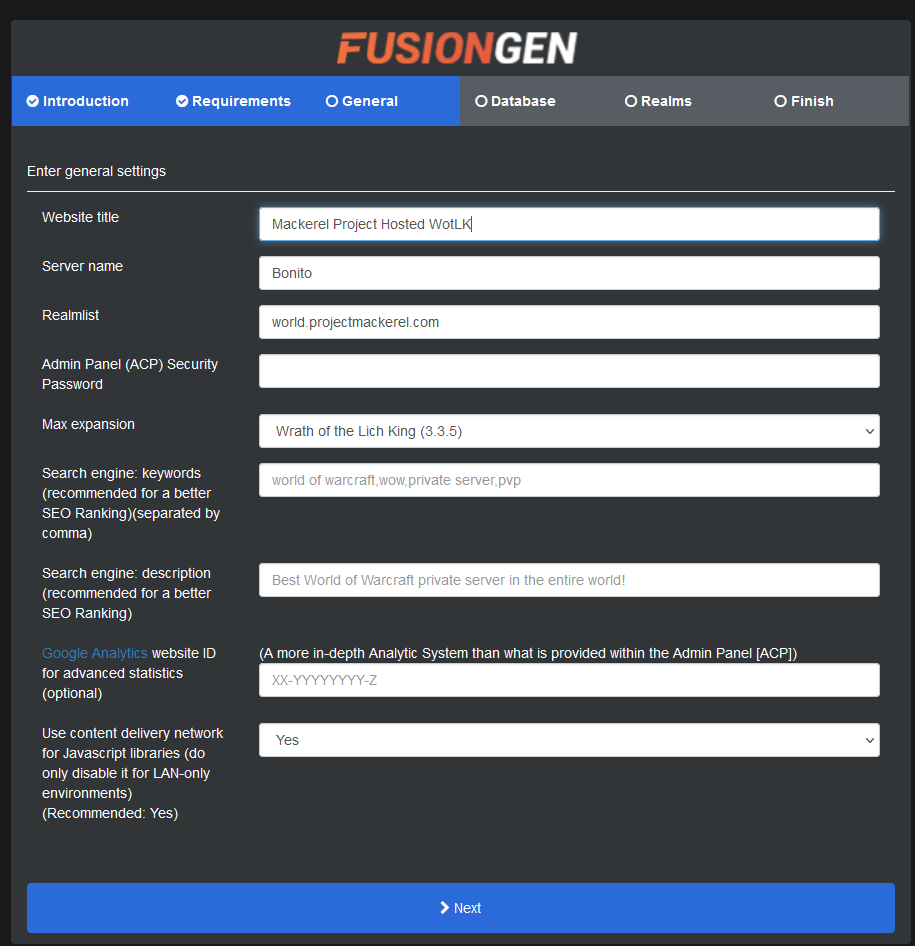
Now I can set the Webpages title to add the server name and create an admin account for the CMS page
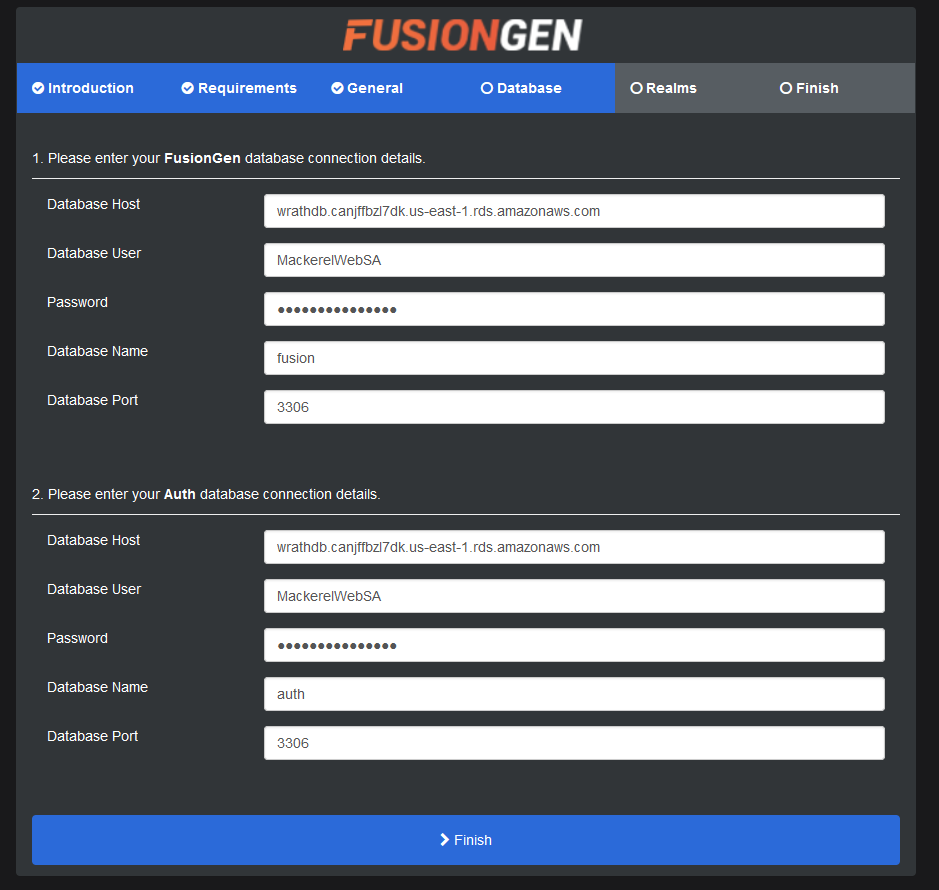
On this next screen, I can add the database information created earlier
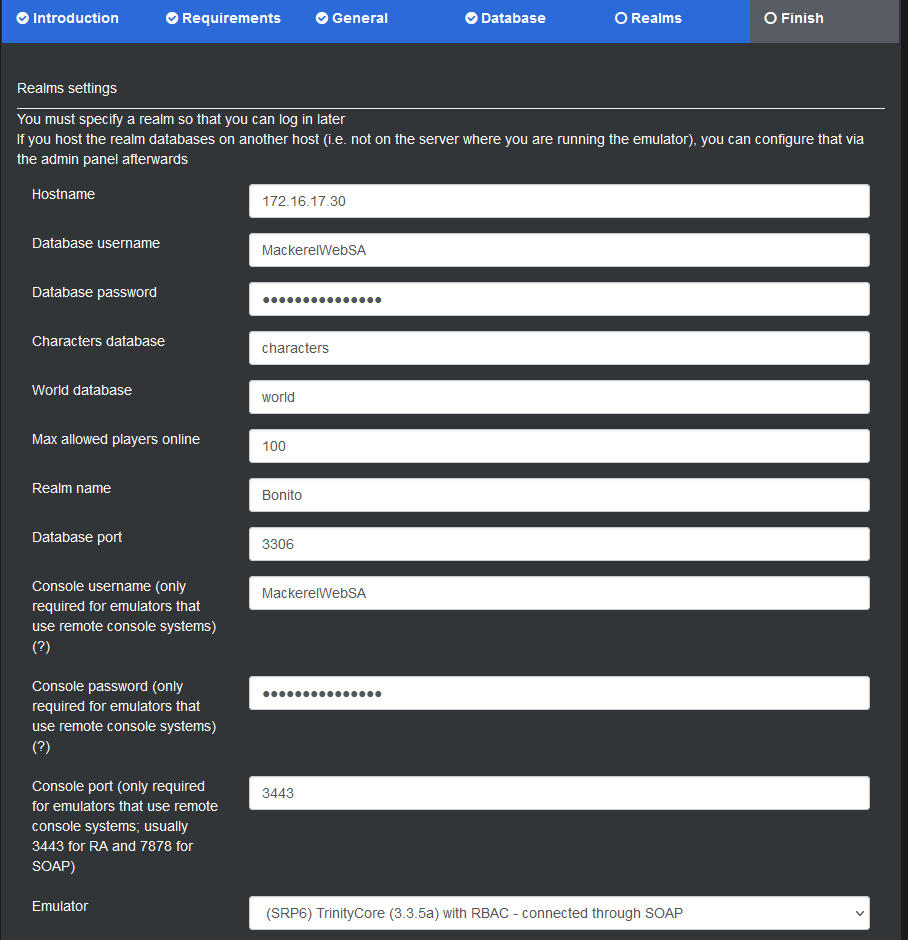
Now I can use the user account created earlier to connect to the realm, and this information allows the CMS to create user accounts
With the site able to connect to the realm, I can make a website admin account

And now the web portal can be accessed
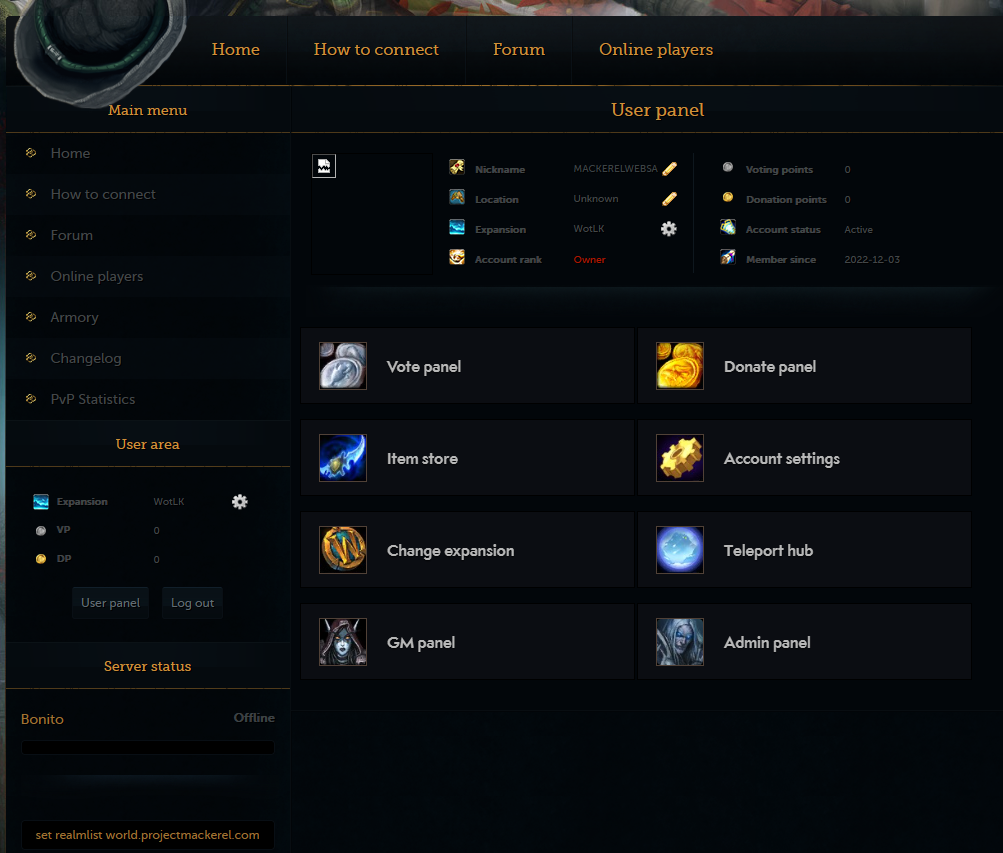
Now I will see if I can register an account to make sure the setup is working
I will enter some information for testing purposes
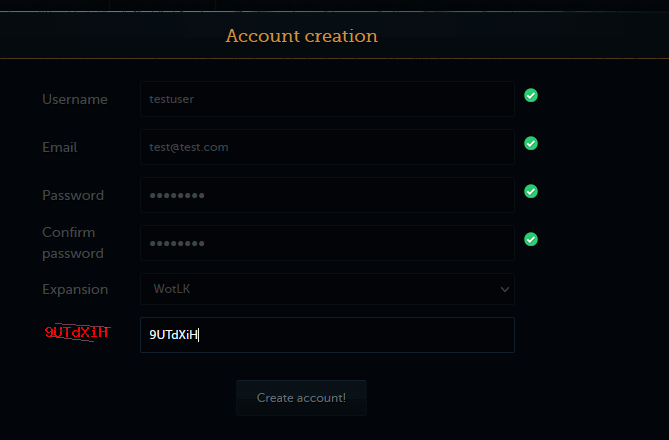
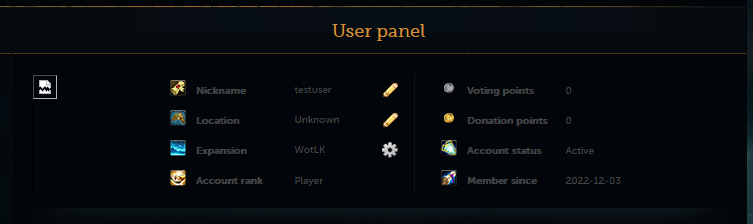
And I will click create an account, and we can now see the user panel as "testuser."
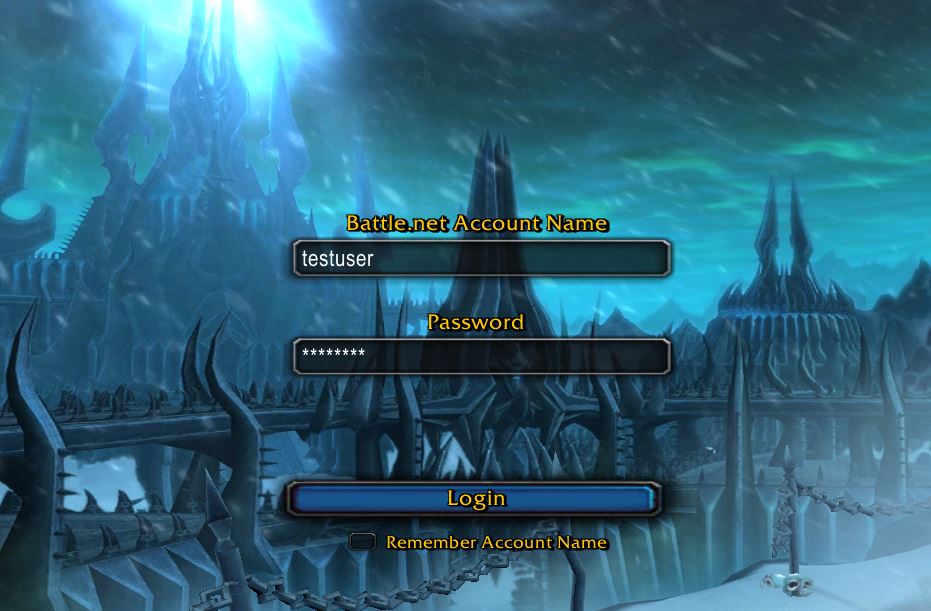
And now, I can verify that I can log in

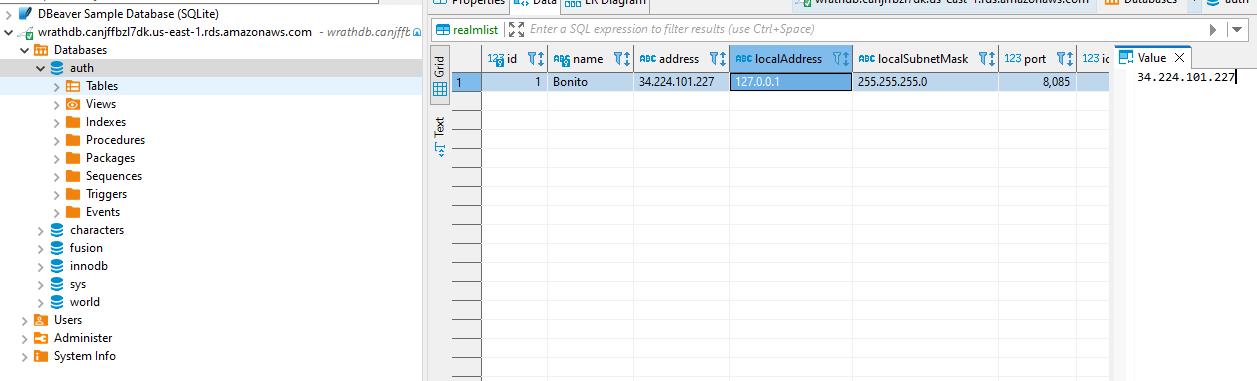
One last element I want to change in this configuration is renaming the default world and assigning the correct IP, and I will use DBeaver to open an SSH tunnel to the Webserver and then connect to the DB
Now that everything has been set up for the server and webpage, Users can register an account and start logging in.
Load Balancer#
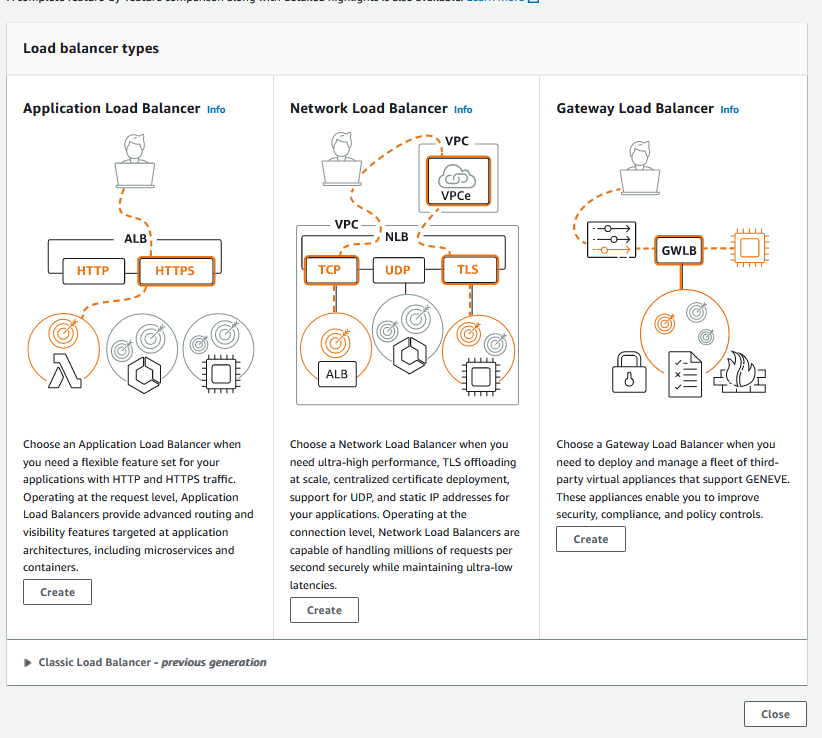
I wanted to add a load balancer to facilitate the SSL connections and the WAF deployment. Cloudfront can be used for this typically, but it didn't quite fit the needs of this project. So I will open the ec2 dashboard and go to load balancing.

I will Create an Application Load Balancer
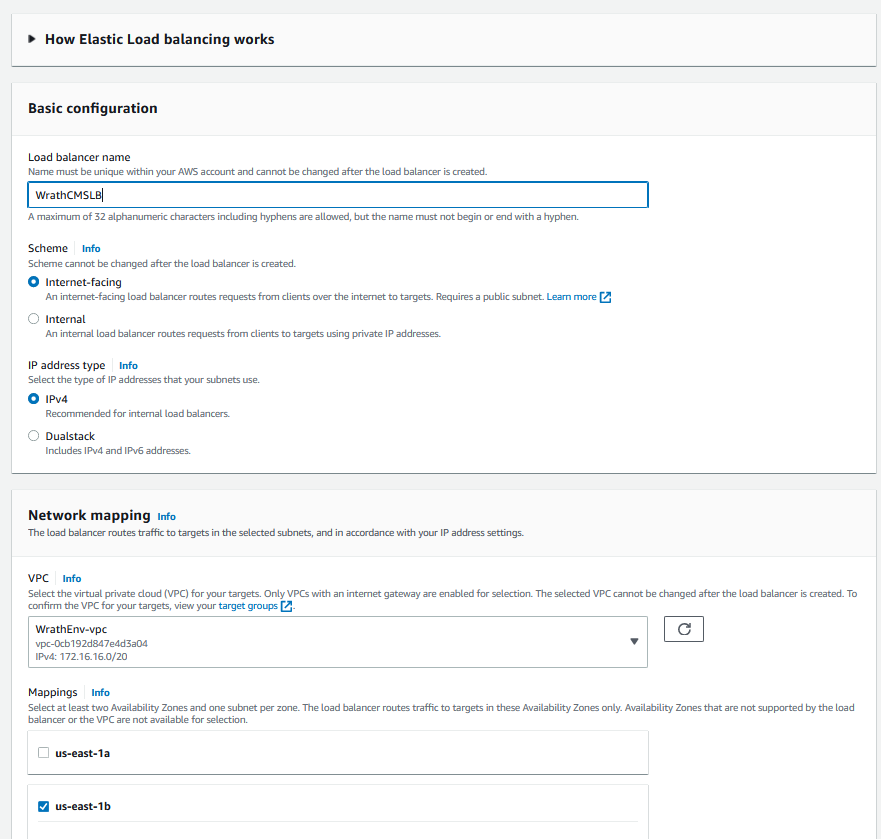
I am going to call this WrathCMSLB and connect it to the wrathenv vpc
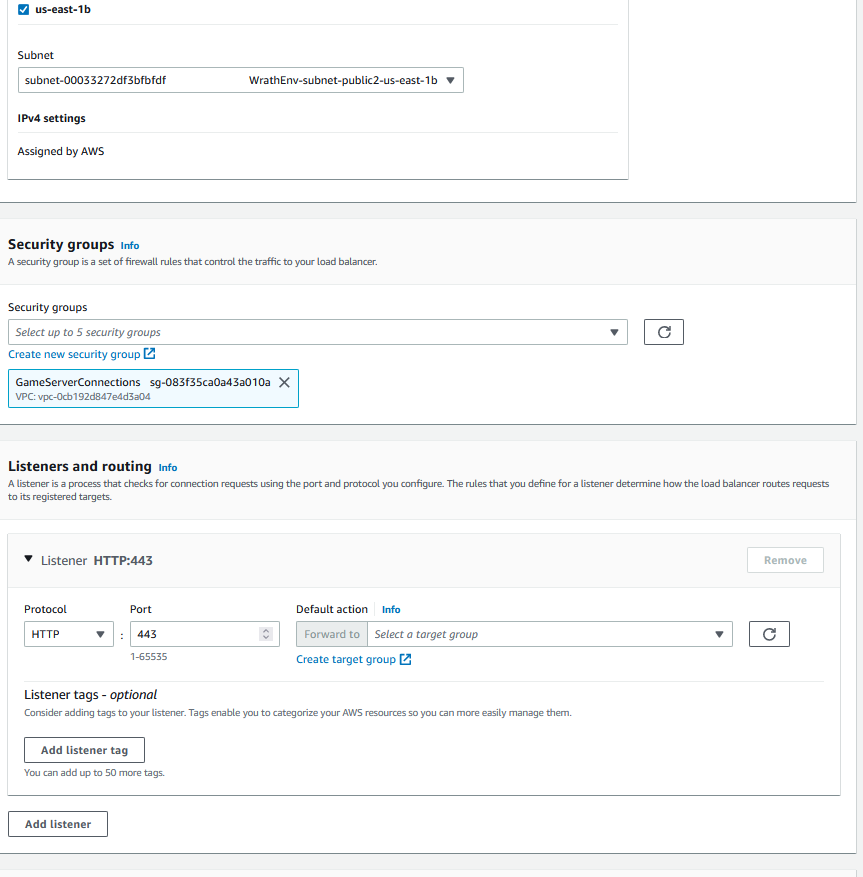
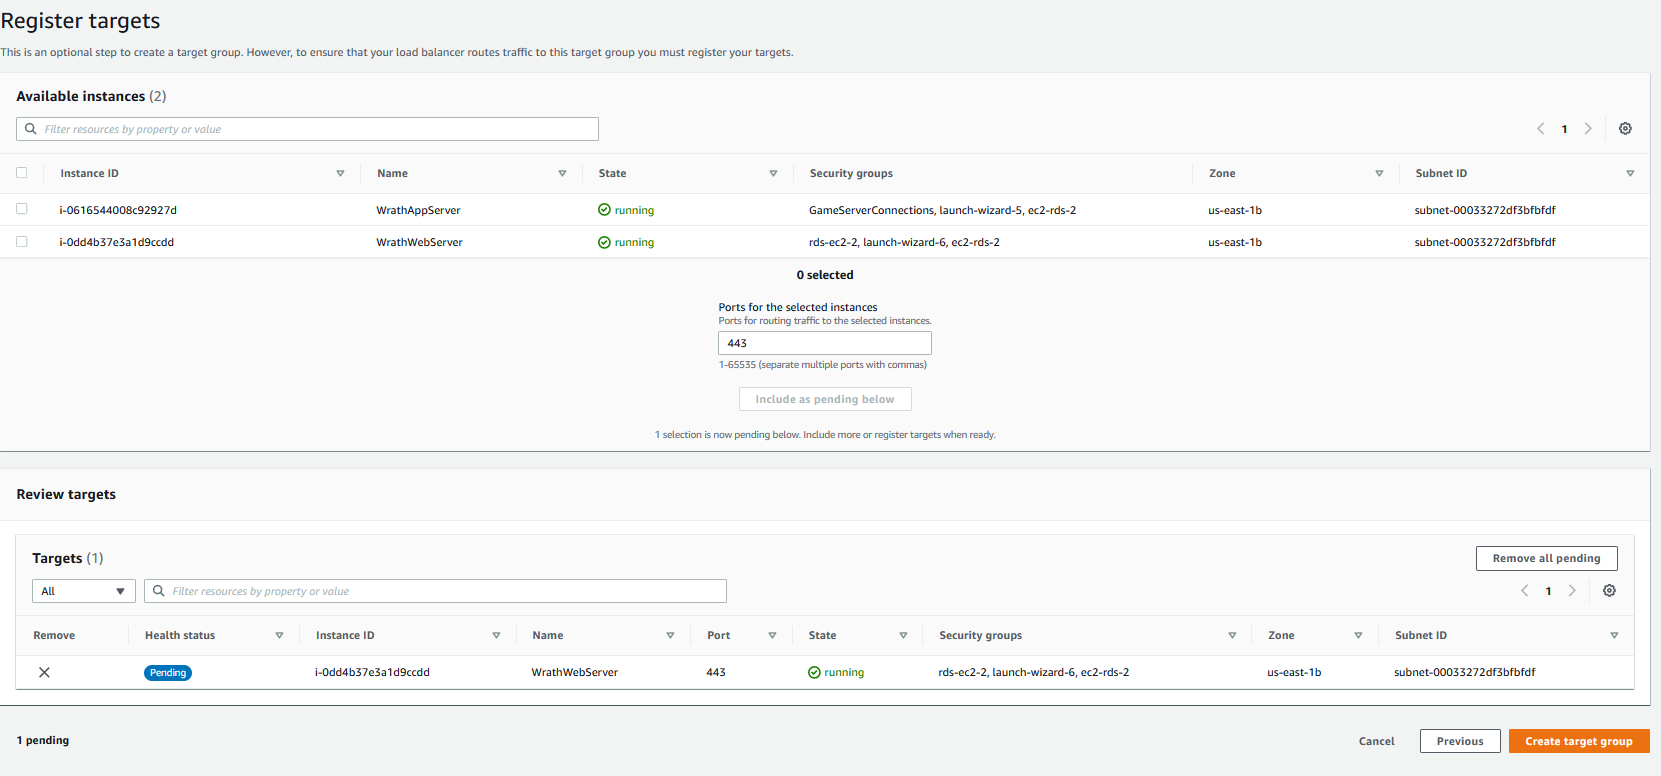
And then, I need to create a target group containing the web server
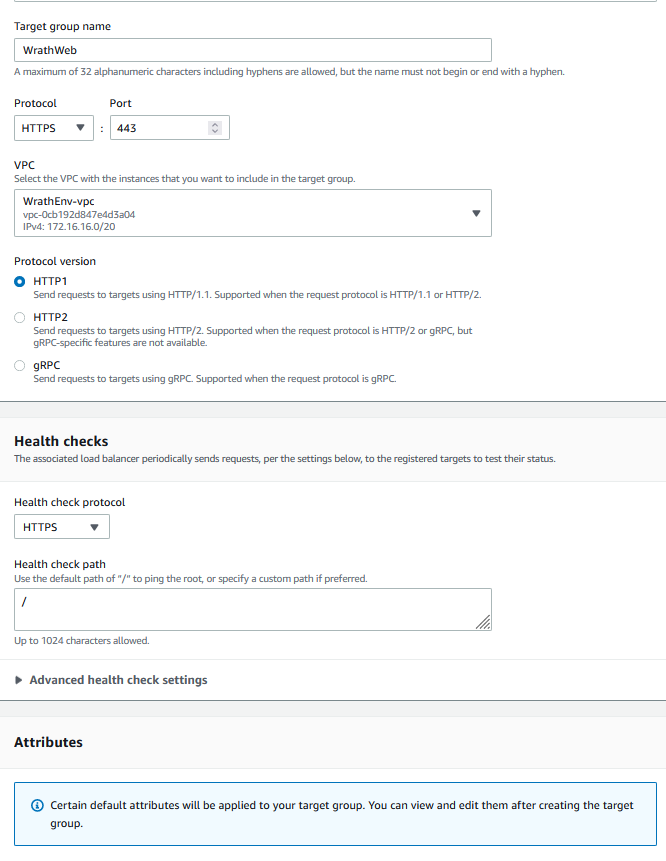
I can now add the web server to the load balancer
And now, going back to the load balancer, I can add the target group to it
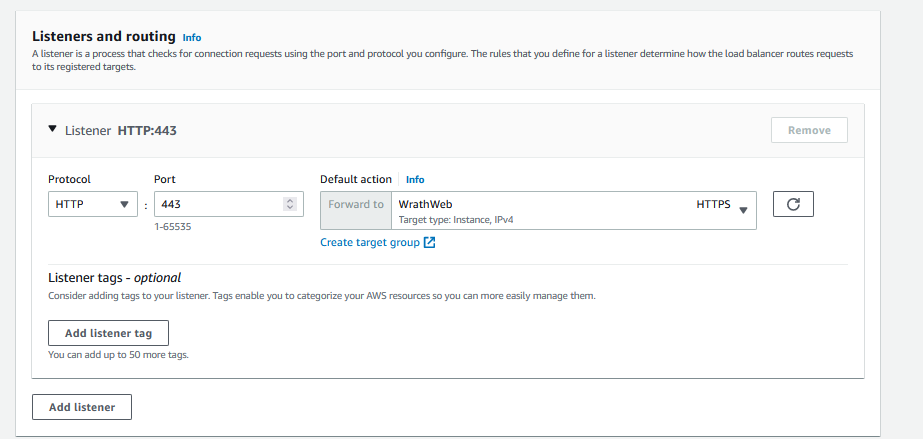
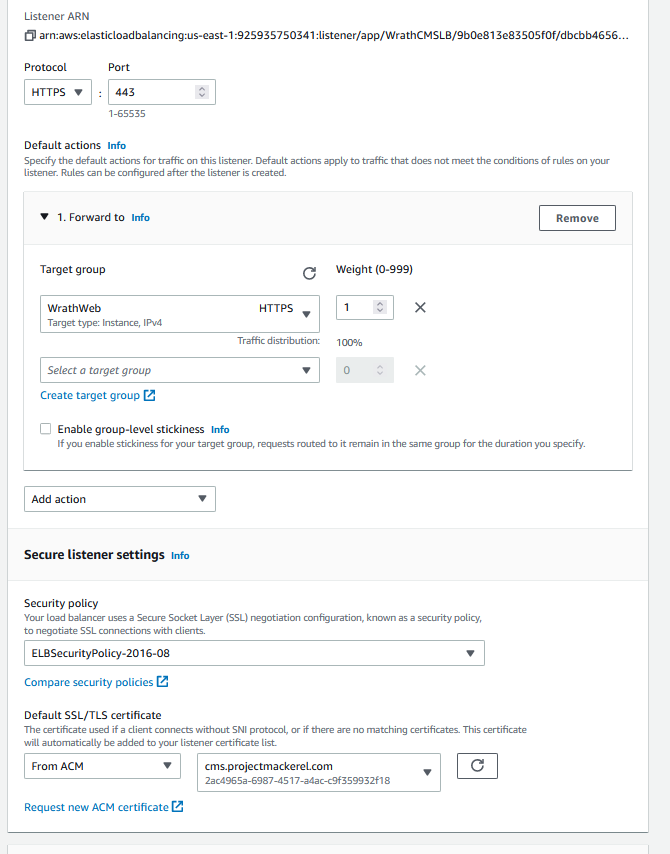
Once the load balancer has been created, I can edit the listener and add the SSL certificate
Now I will update the DNS record in Route53 to reflect the changes
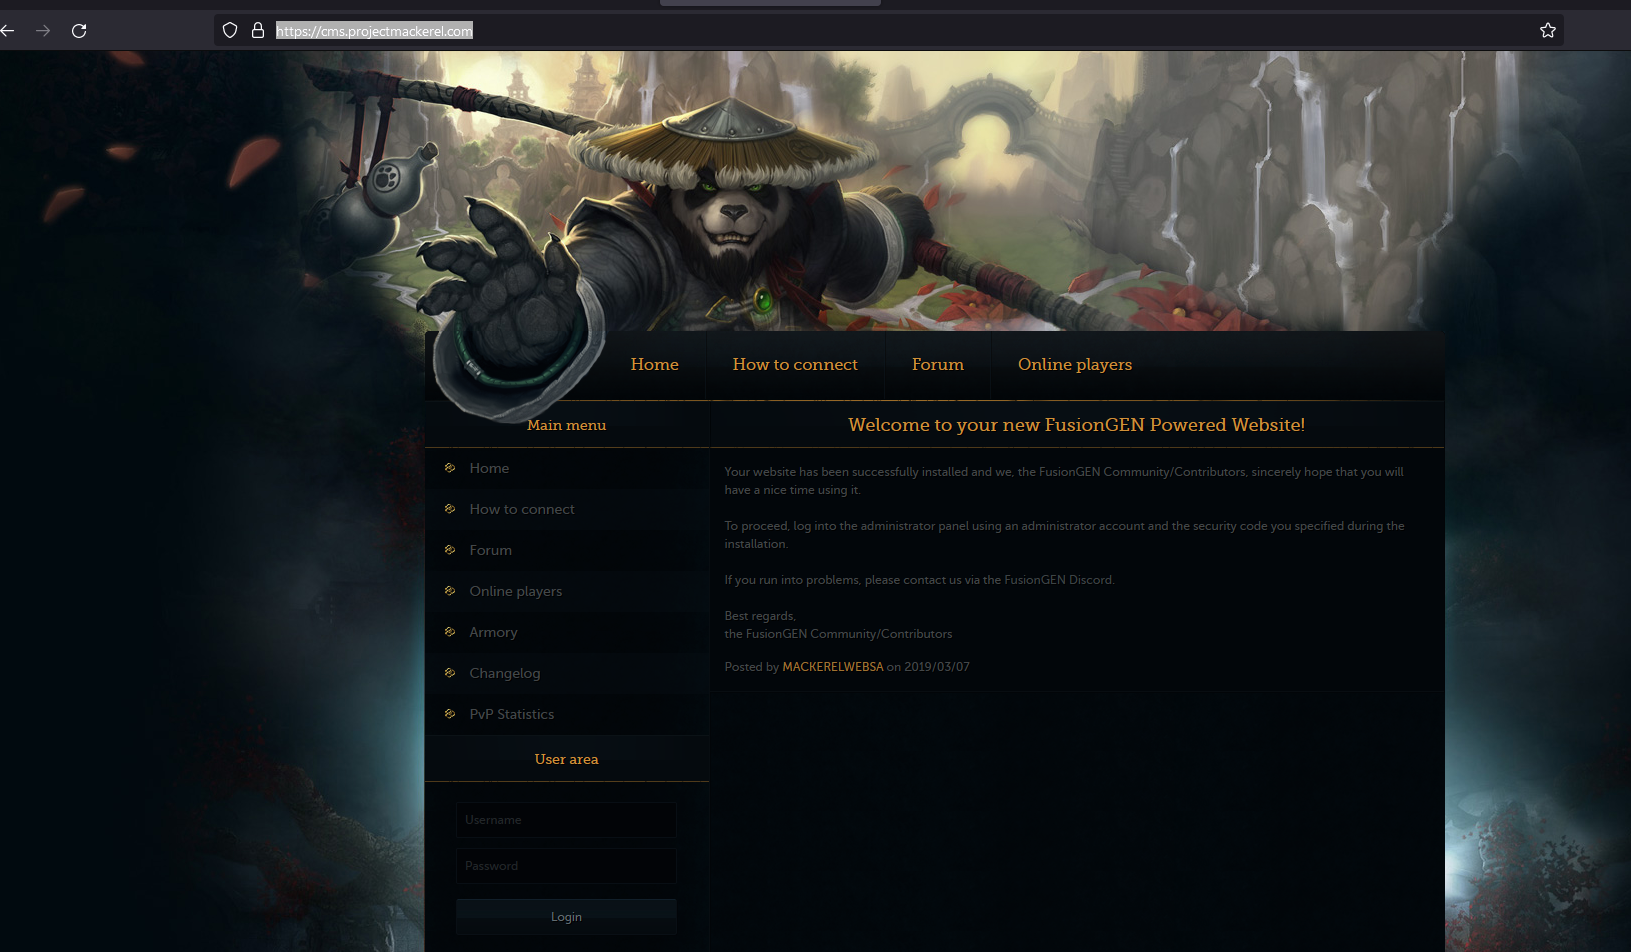
And now, if we go to https://cms.projectmackerel.com/
We can see the CMS page
S3#
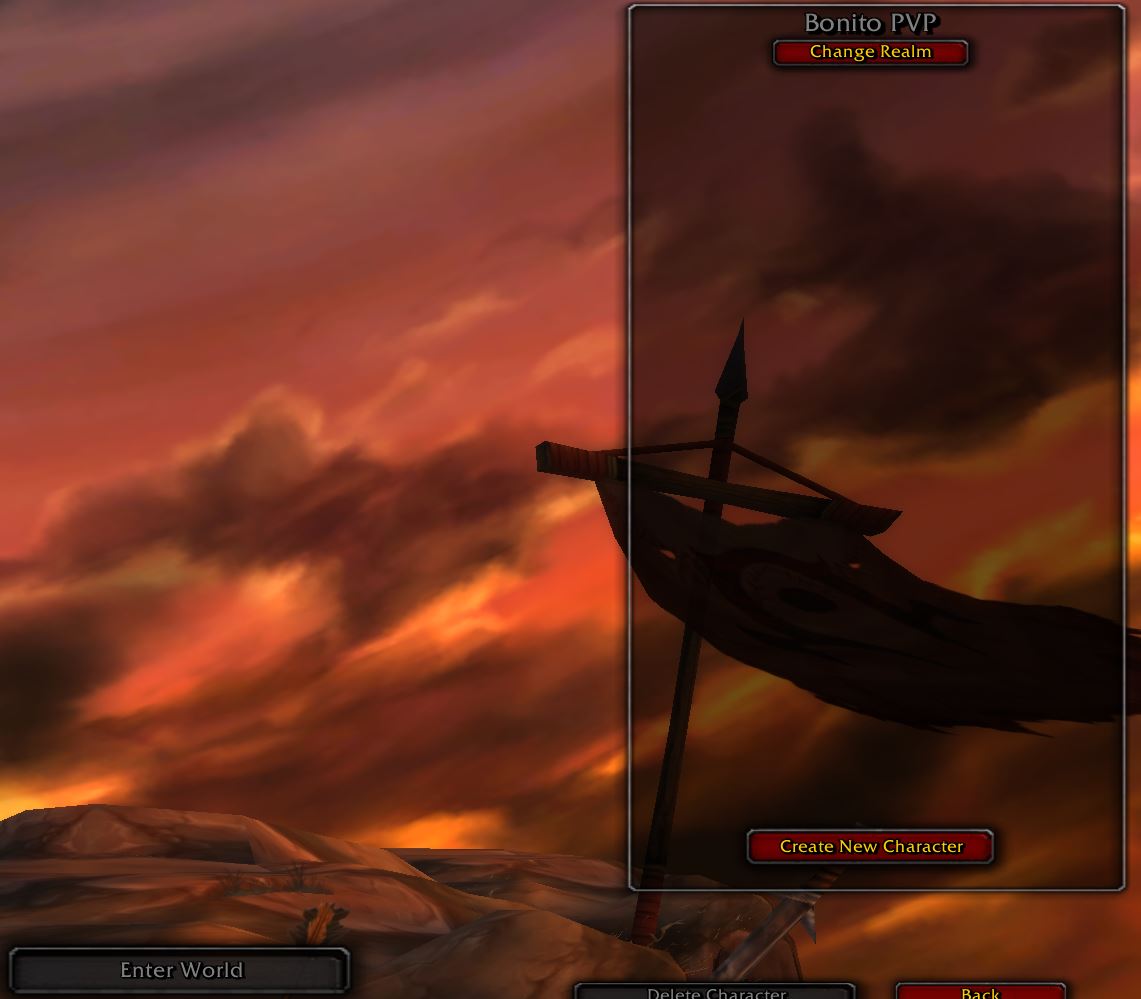
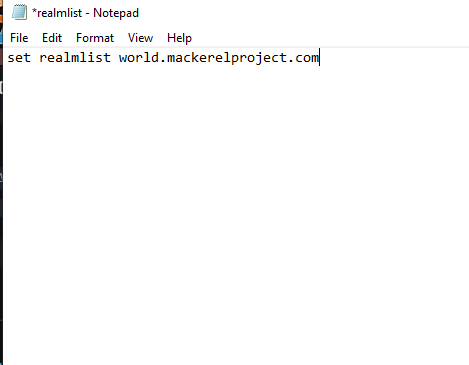
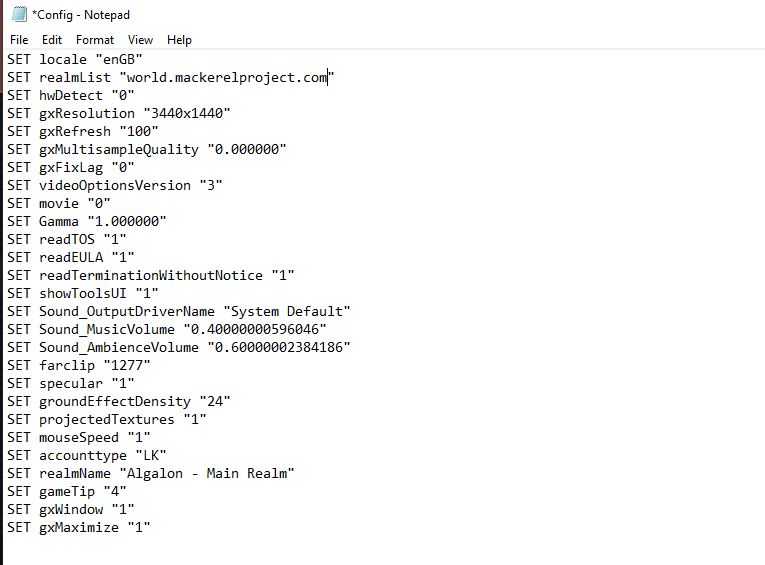
I wanted to host a version of the client that is specific to this Game server. I wanted to update the realmlist, which points the user to the correct server, and then add some valuable tools for the game. I will open the client and change the config list to world.mackerelproject.com, and then I will open the realmlist configuration file to reflect the same server name
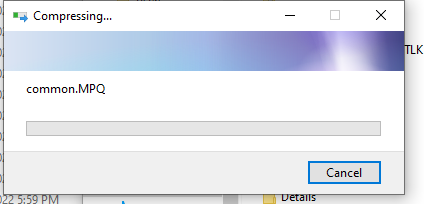
I will zip the file because it is large
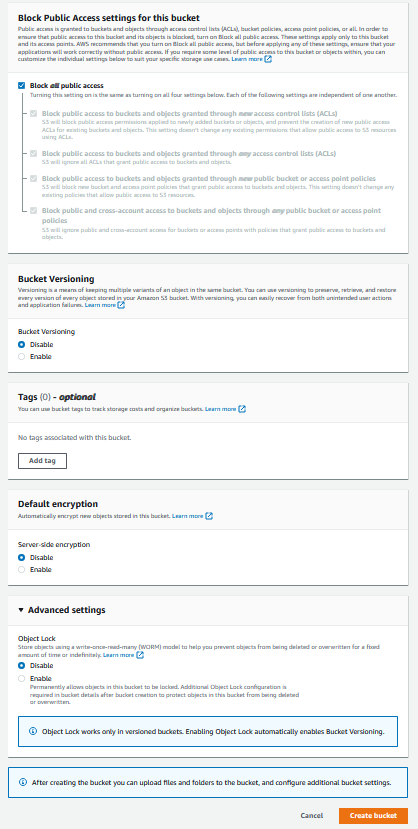
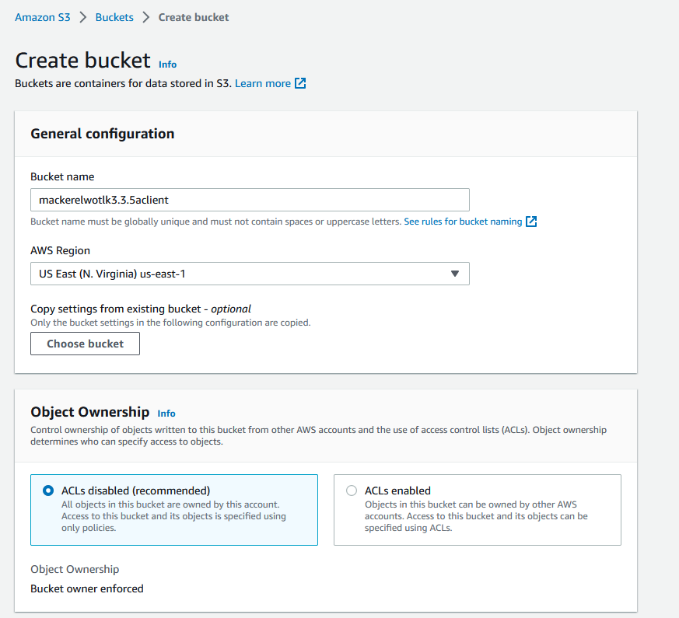
And now that it is zipped, I can build an S3 Bucket to store it in. I will go to the S3 dashboard and create a bucket
Now that the bucket is active, I will upload the client

And then I will add the zip file to be uploaded
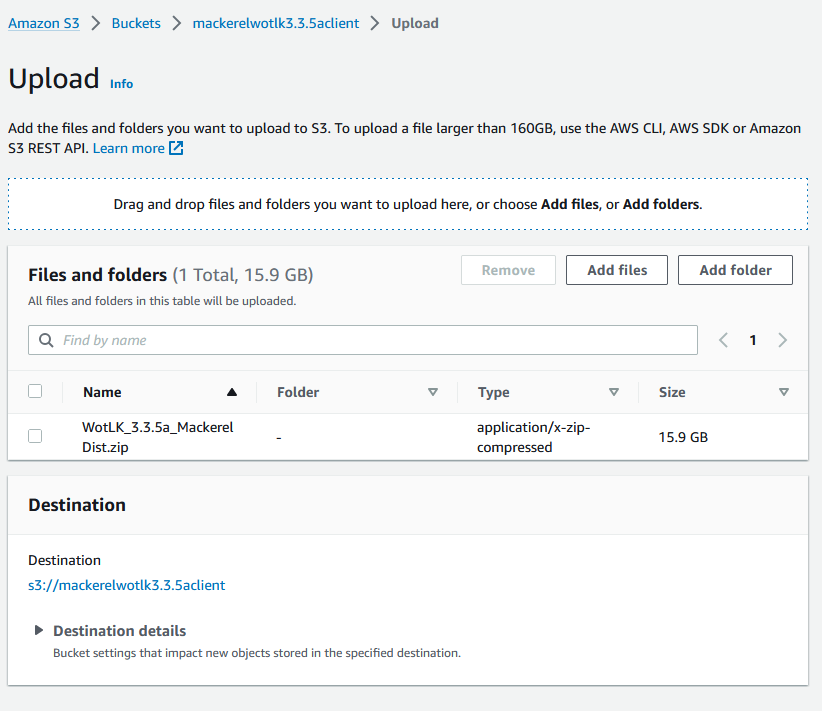
And now I will wait as the file is uploaded to S3
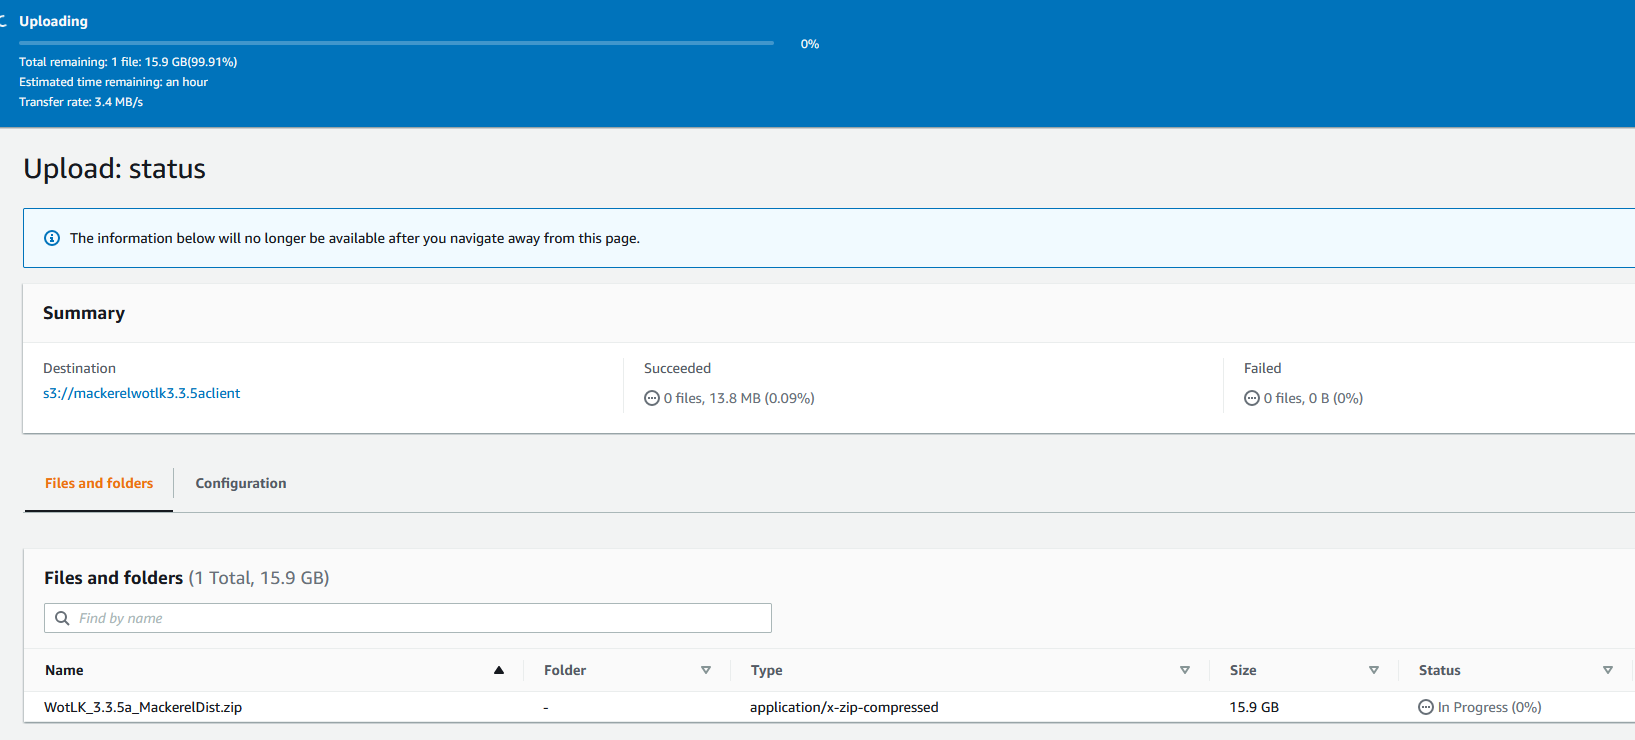
Now that the file has been uploaded, I will make it public
And now this link can be posted onto the server discord so only approved users can download the client.

Phase 2#
The goal of the second phase of this project is to build visibility into the environment, and The idea is to add different resources for the environment to benefit the End users through the use of SNS and Chatbot to send messages to the user base to keep them informed on what is happening with the game server. The second part of this is building a system that can Detect and alert the admin groups on what is happening in the environment, whether this is a security issue or a performance issue.
CloudWatch#
For CloudWatch, I want to create a few different alerts, I am going to make a DB alert, an EC2 CPU and RAM Alert, and then I want to add Alerts to send to the Userbase. This will be for Outages. The User Alerts will be pushed to the project's discord server. I will break these down by Admin and User.
Admin#
DB Alert#
I will open the Cloudwatch dashboard and create an alarm

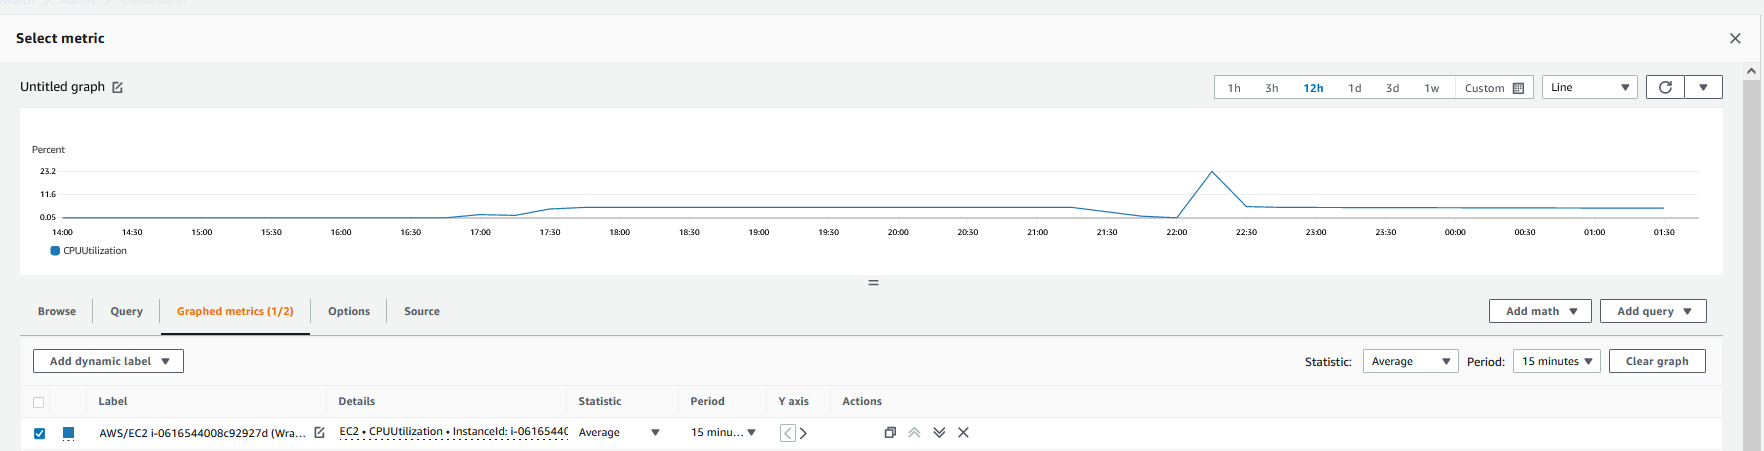
Then I will open the select metric window
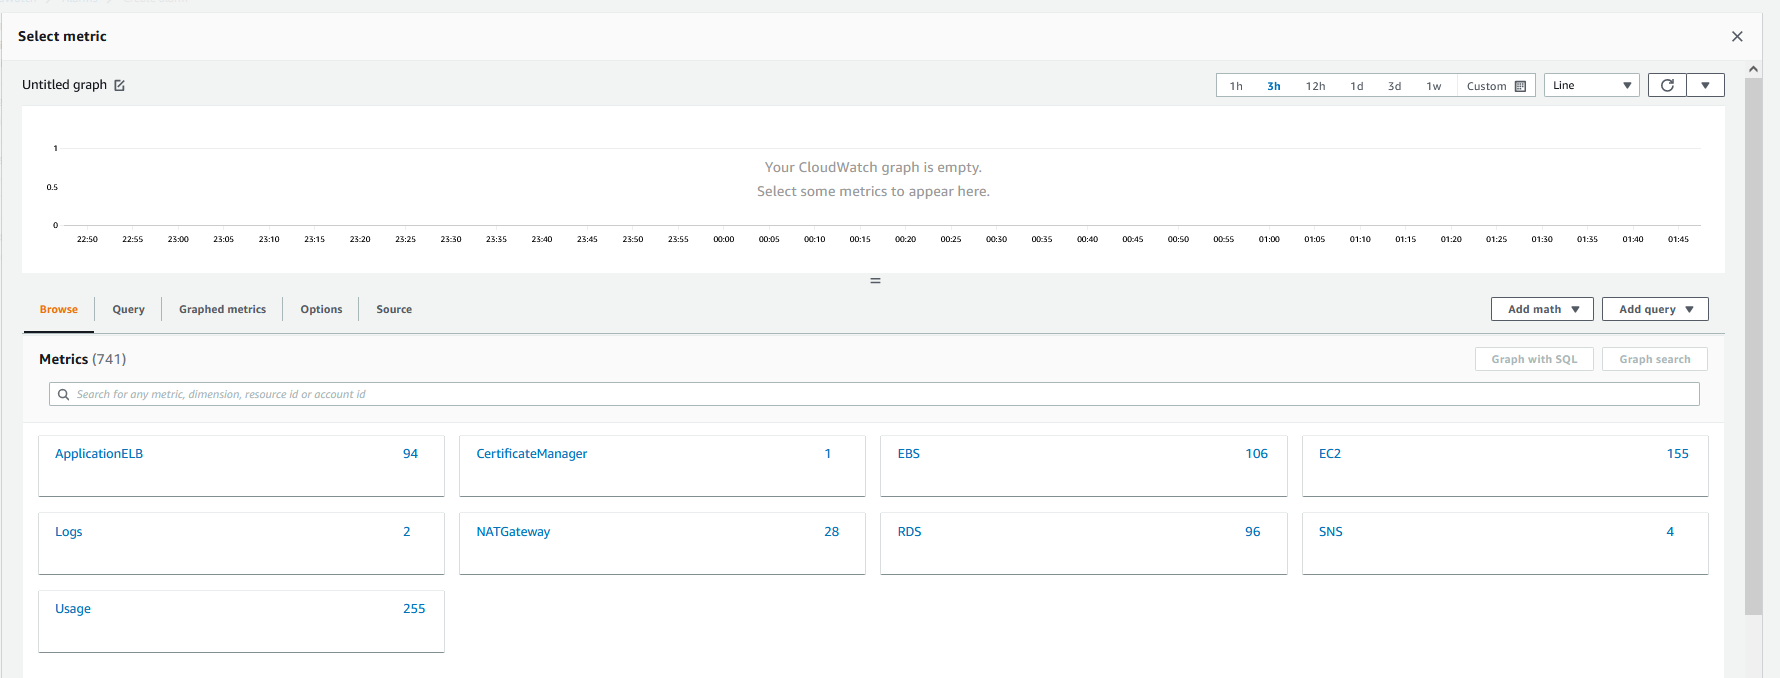
This will be for the DB, so I will click RDS and track the CPU utilization Metric. The highest utilization is 5%, so I will set the alarm for anything over 15%
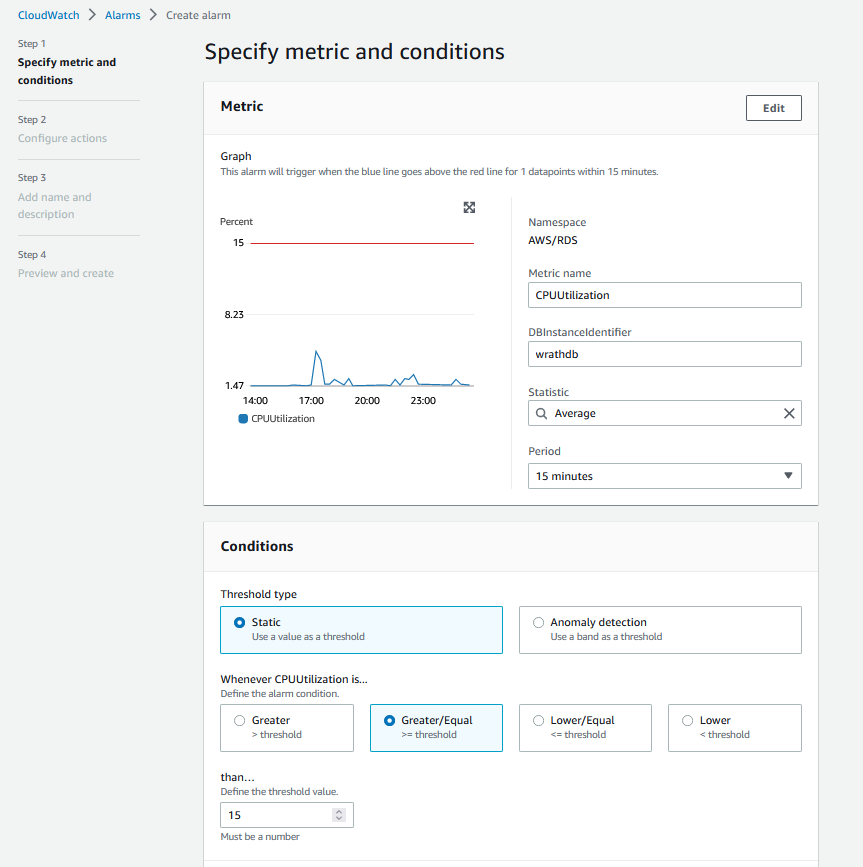
And then, I will create a notification to my email alerting me to this issue
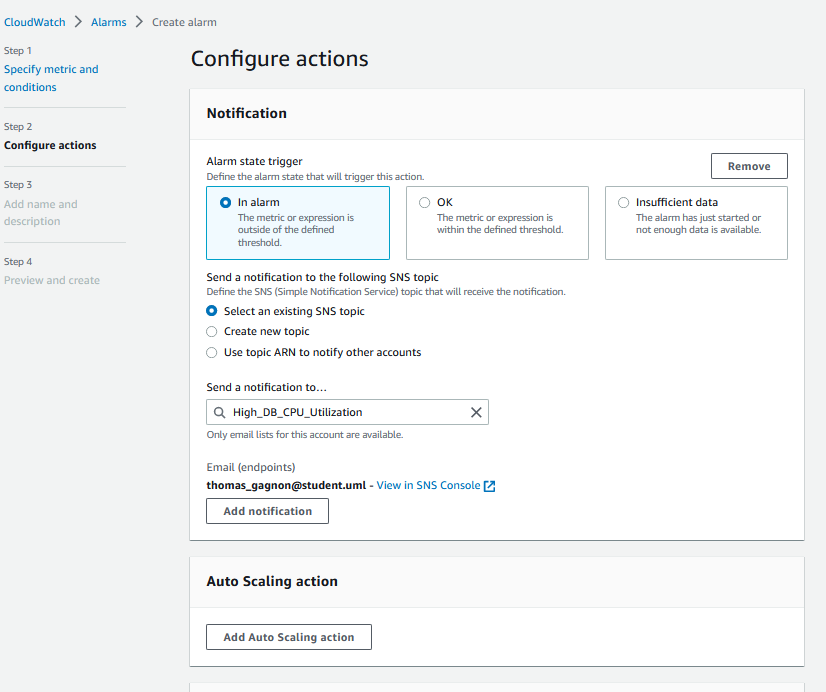
And then, I will name the alert
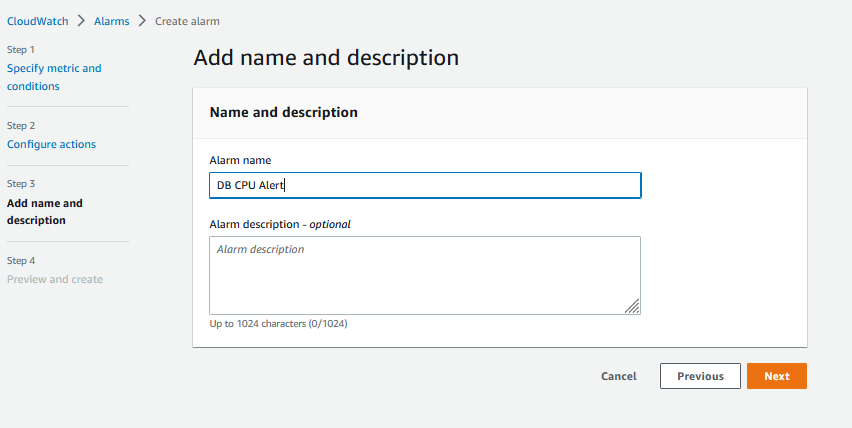
And then, I will review and create the alarm
EC2 Alerts#
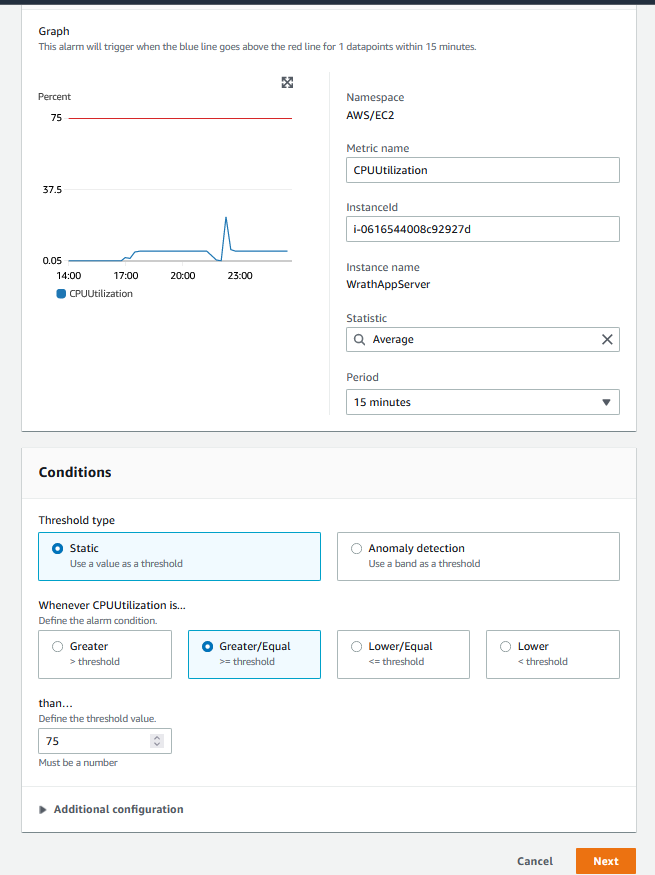
I want to make two EC2 Alerts, one for CPU utilization that is above 75%, and the second alert will be for RAM Utilization. I've found in the past that any utilization over these points tends to start causing noticeable issues with the game server and will crash if it remains at this level for too long.
I will do the same process as before, but I will select EC2\Per-Instance Metrics\CPU Utilization
And then, I will add the threshold
I will create a new topic for this called WrathApp_High_CPU_Usage
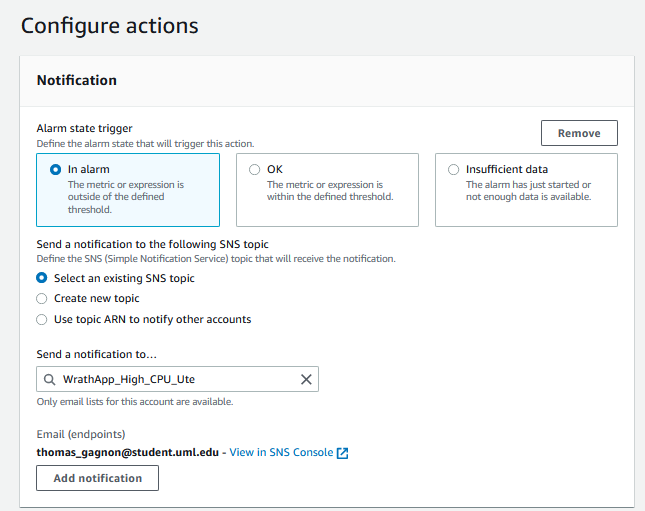
Now that this alert has been set up, I want to make an alert for the Userbase.
User#
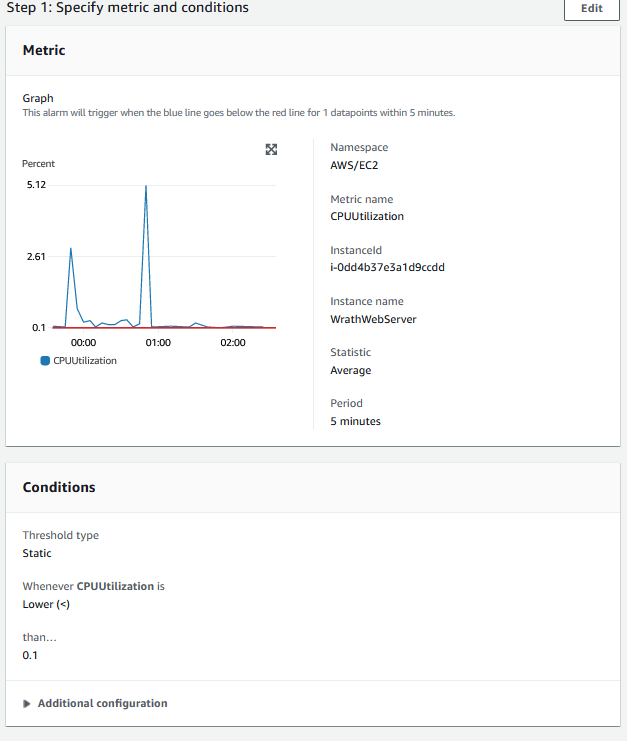
I want to make an Alert that will send a message to a discord server if the Application server stops running, and I want a follow-up alarm that will send a message that access to the server has been restored.
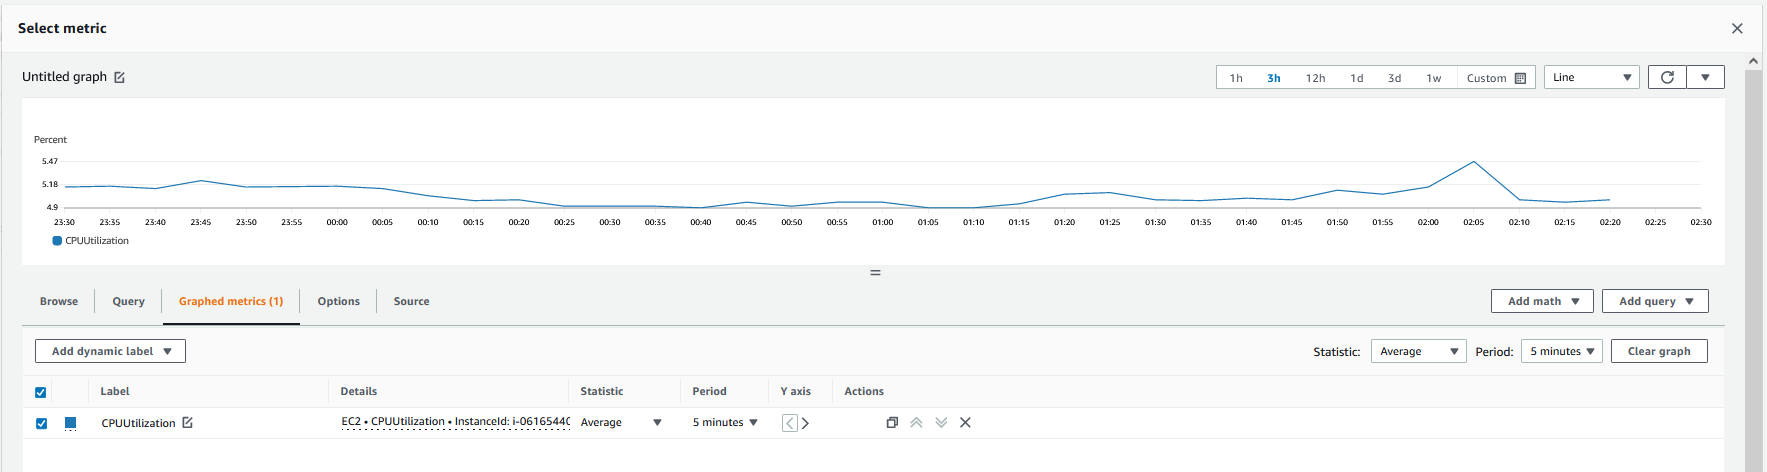
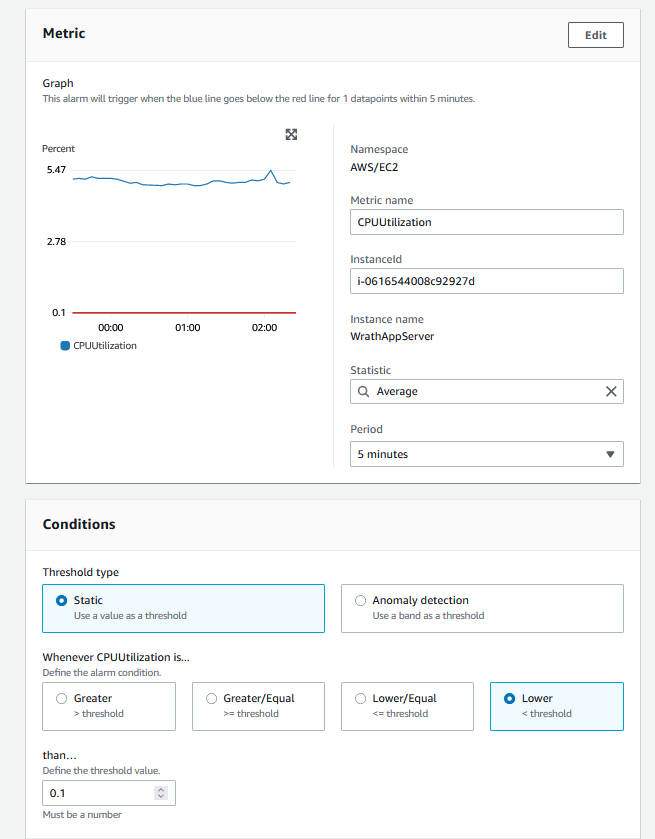
I will create an Alarm and select metrics to find the CPU utilization. Cloudwatch does not have explicit server unavailable or offline metrics, but if the server CPU Utilization is zero, it is a safe assumption that the server is down.
I will set the threshold to lower than 0.1
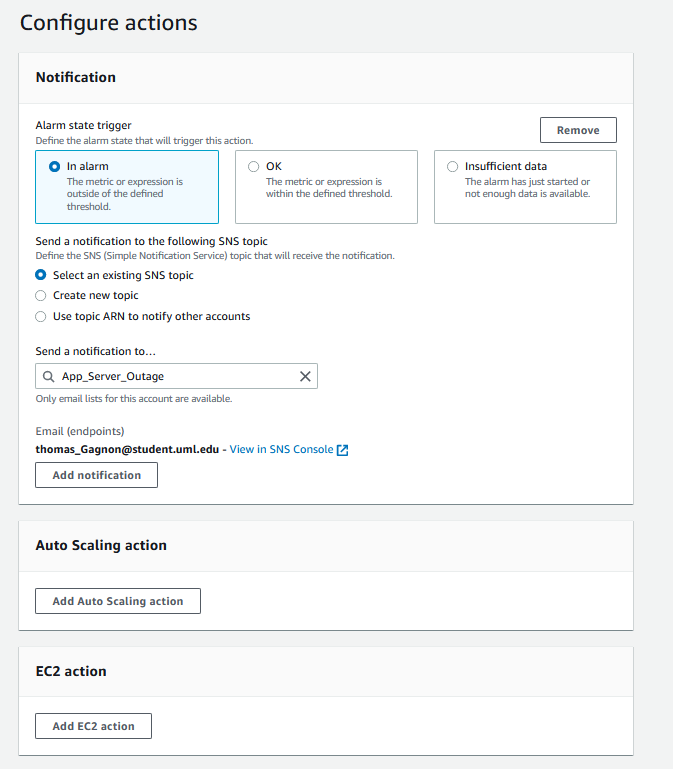
I will call this App_Server_outage and set this to send alerts to the admin
Now that the App metric is created, I will make the same alert for the webpage
And now I can see all of the alarms that have been created

Now to connect these alarms to the Userbase, I am going to open SNS and set up some configurations
Lambda with SNS triggers#
The Outage alerts have been created for both EC2 instances, I want the admin to be notified, but I want the Userbase to know that the server is down and is actively being looked at. I am going to use Discord to send messages to the Userbase, and I will be able to configure this by using SNS, a Lambda function, and a webhook.
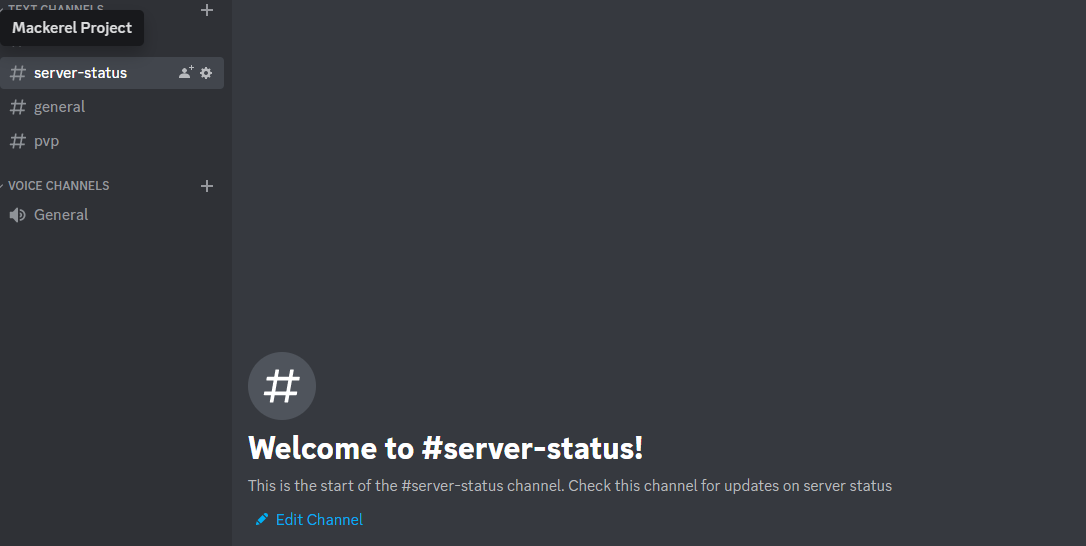
To start, I will need to create the webhook in Discord; I have already set up a discord server for this project
Then I will head to integrations and select create webhook
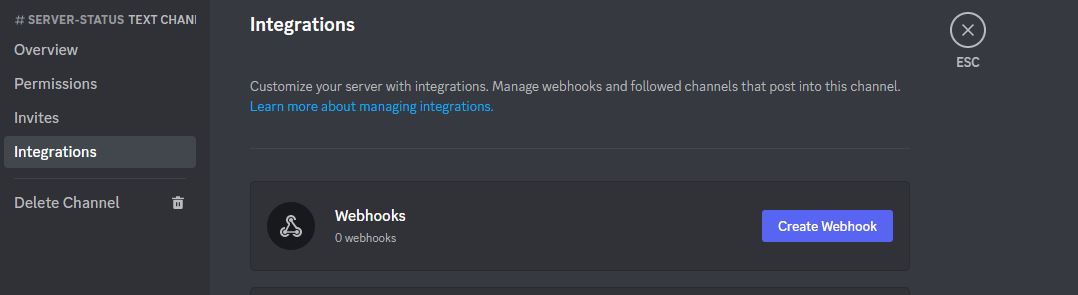
And then, a webhook will be created for me
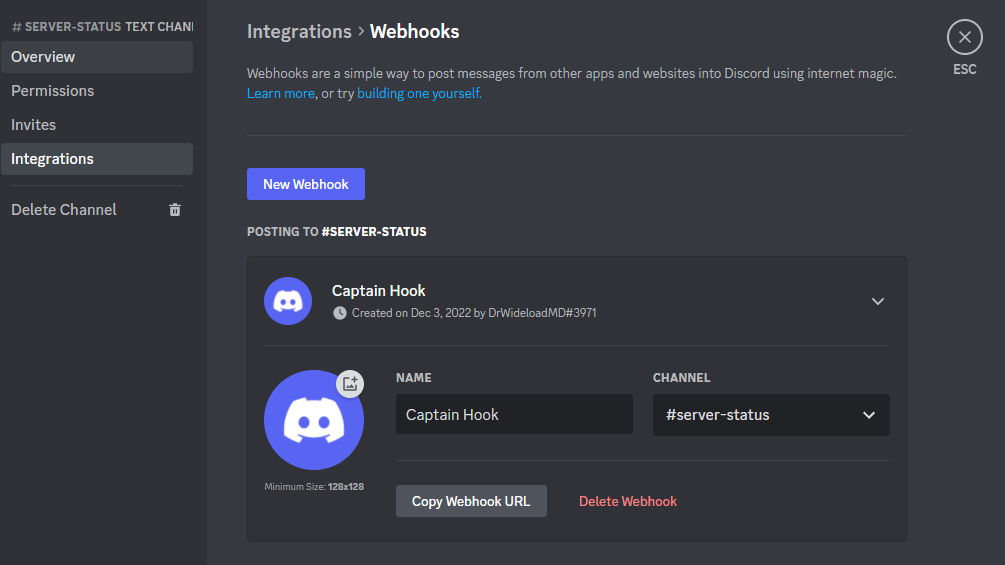
I will name this webhook MackerelBot and copy the webhook URL.
Now that the Webhook has been created, I can build my lambda function. I need to put together my python packages before moving to the lambda functions, so I will create a folder called cloudwatch2discord, and I will run the following inside the folder
pip3 install Cet.discord
webhook
rm -r *dist-info __pycache__
I will then take this folder and zip it, and now I can go to lambda
layers

And now, I can select the following options to build the layer and click create.
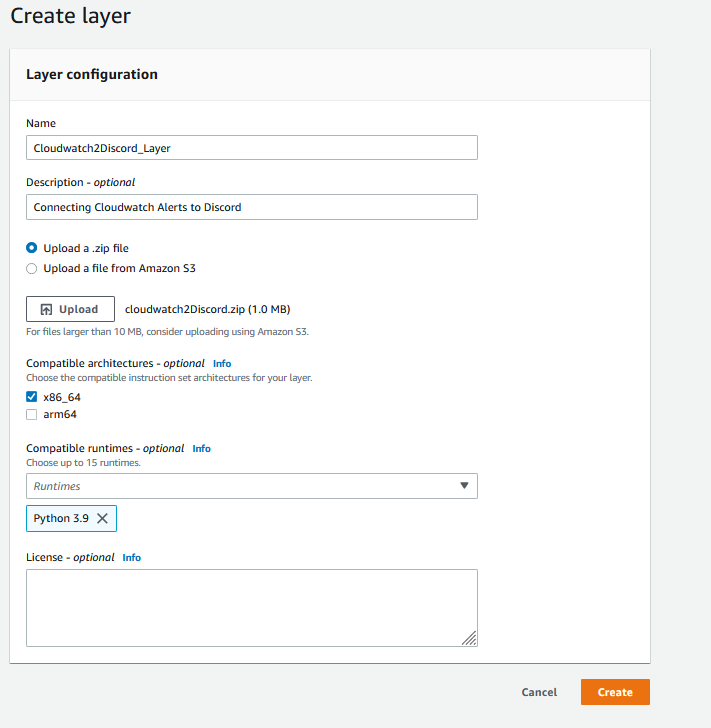
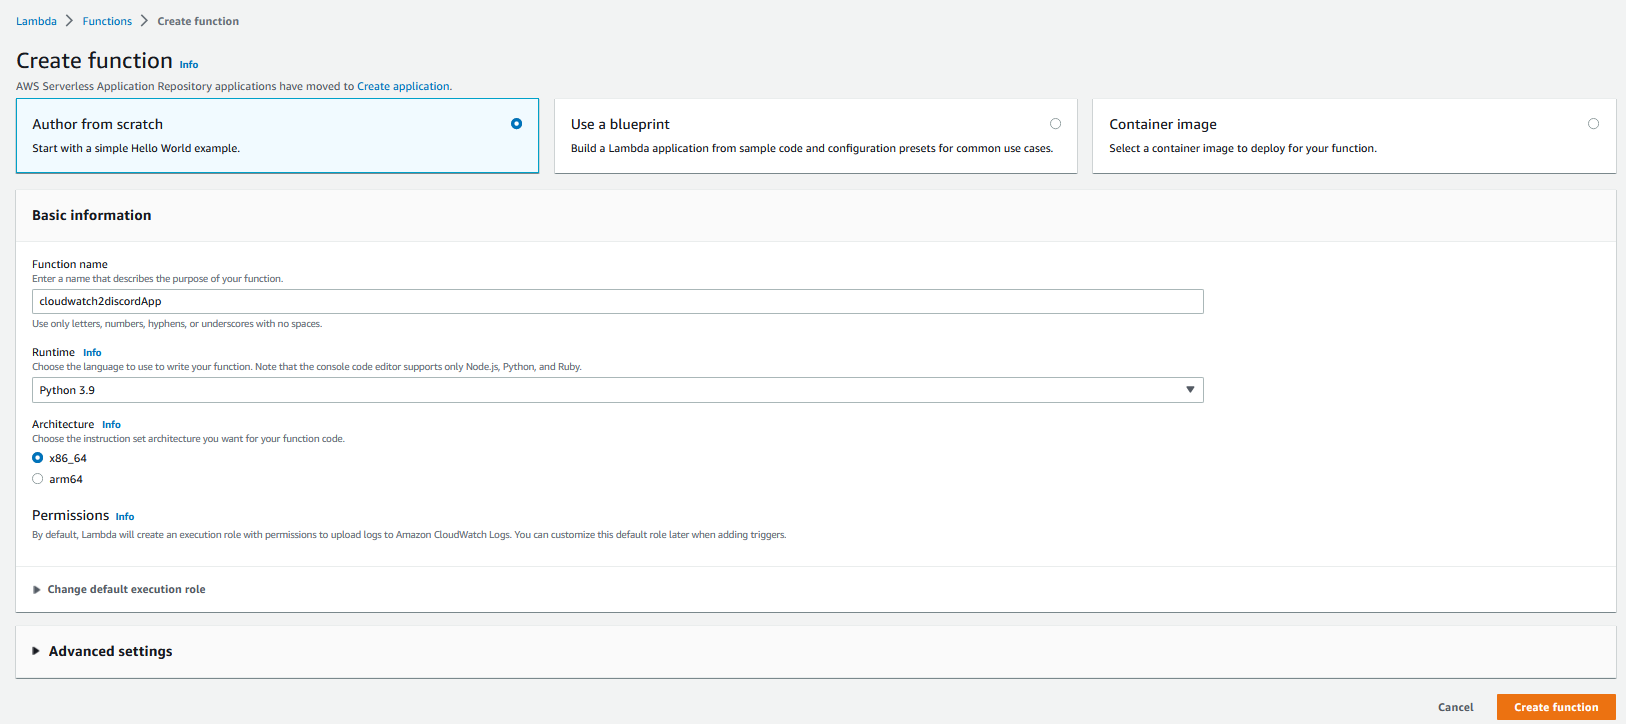
Now that the lambda layer has been created, I can work on the function

I will set the Name, Runtime to Python, and the architecture to x86_64 and then create
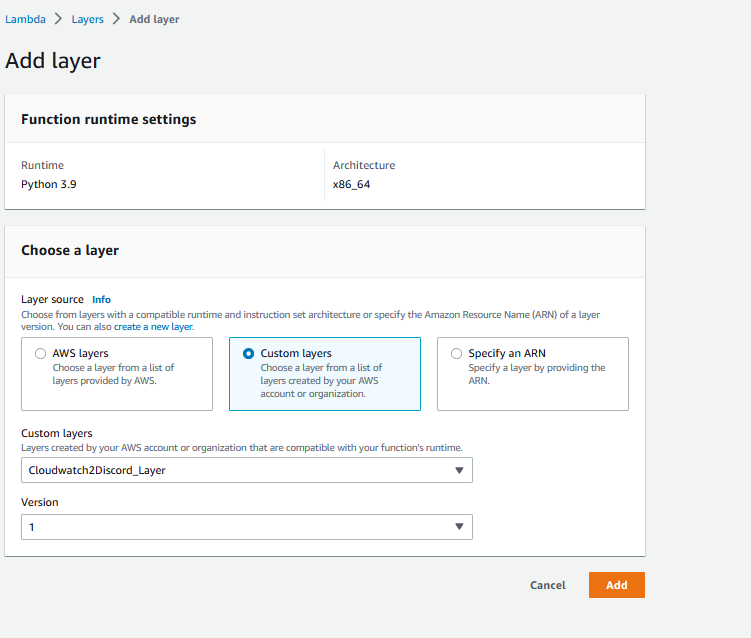
Now that the function is created, I will open it and then add the layer previously created
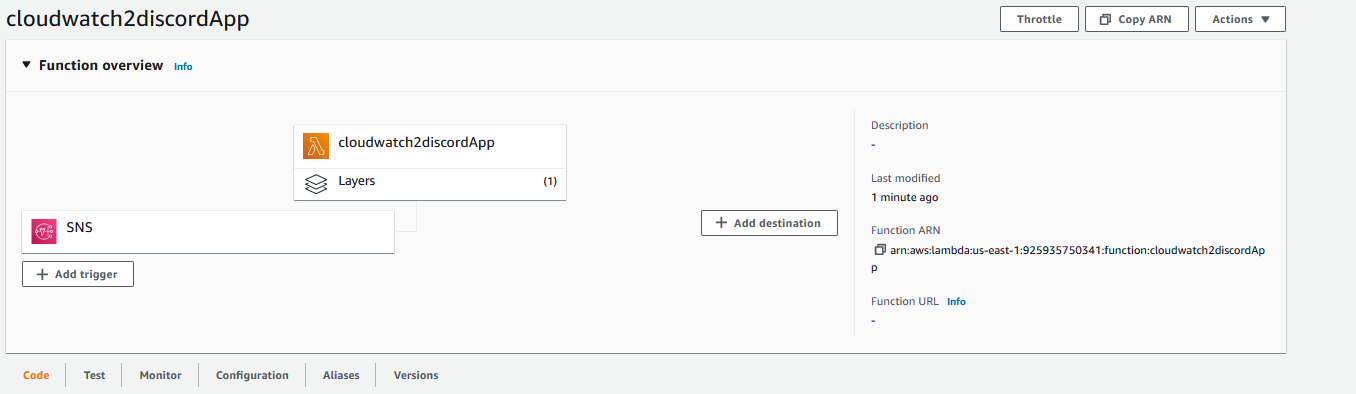
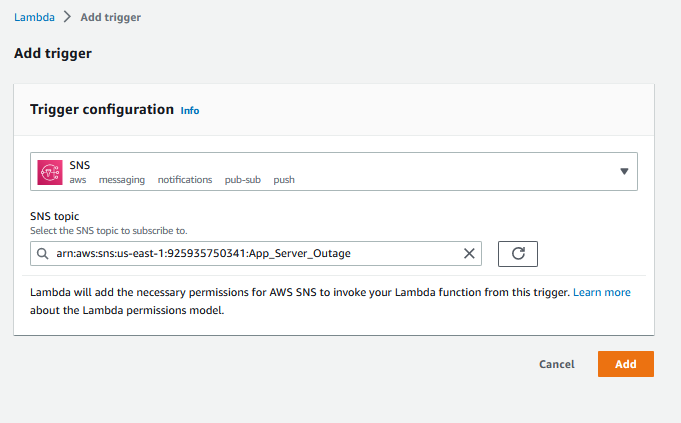
And we can see this in the overview, And I will add a trigger from the SNS Alert for the App Server Outages
Now I can paste my code into the lambda function
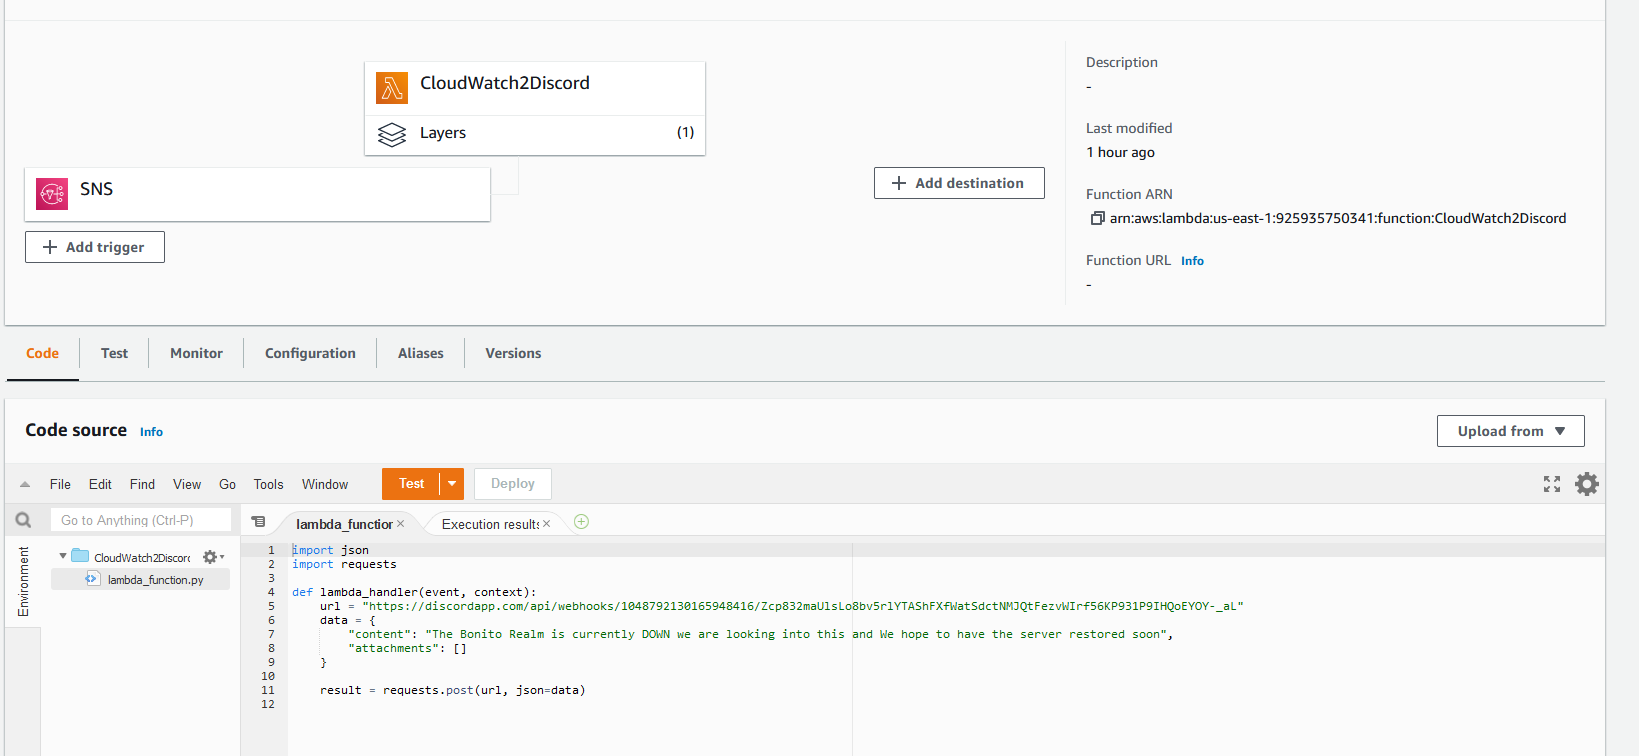
And click Deploy.
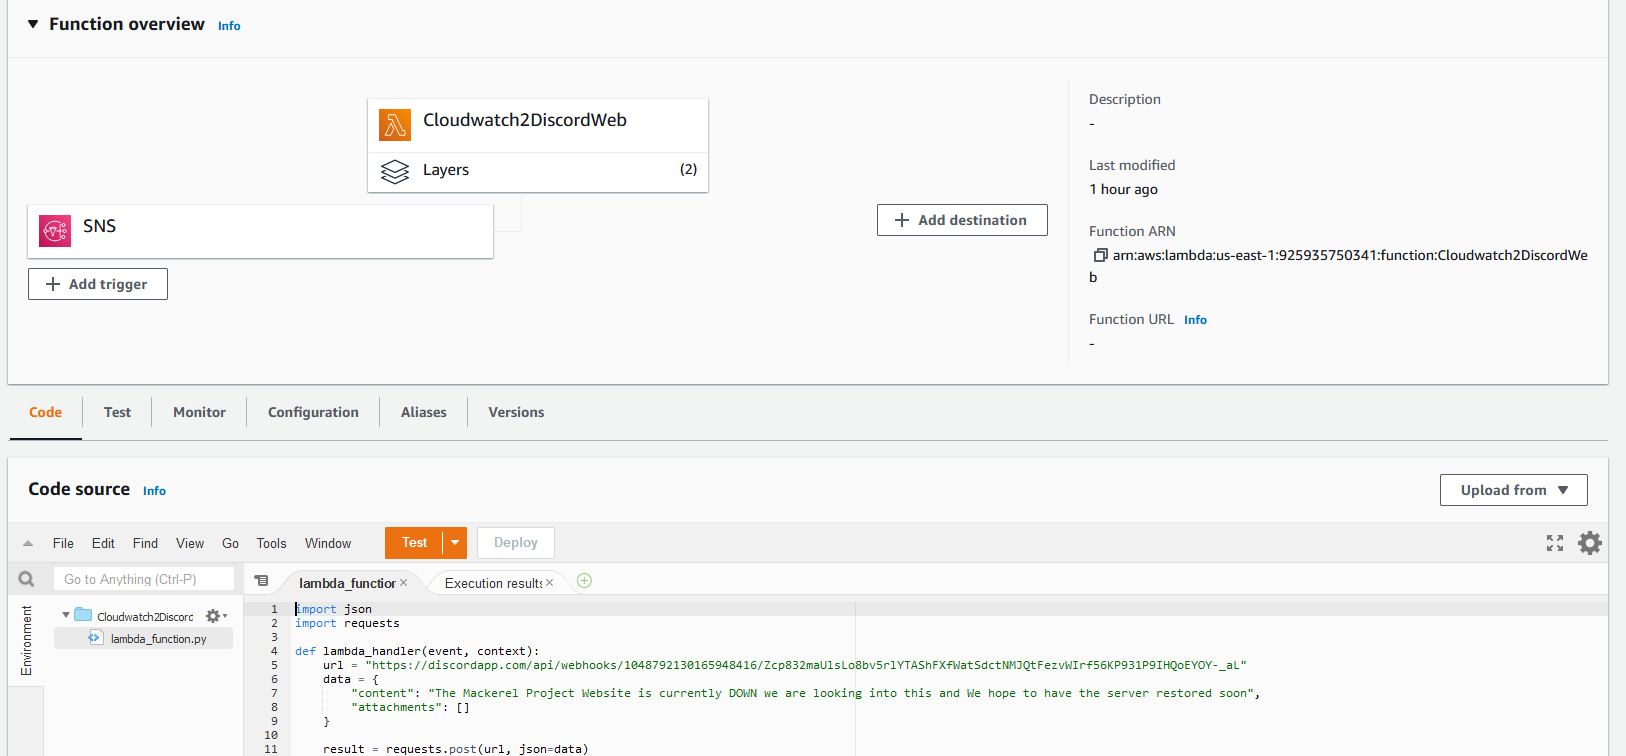
This will now send messages to the discord server when there are outages for the App server. I want to do the same for the Web Server; I will create the Cloudwatch2DiscordWeb Lambda function; the process will be the same as before, but the SNS topic to trigger the function will be Website_Outage instead, and the message will be slightly different
Testing#
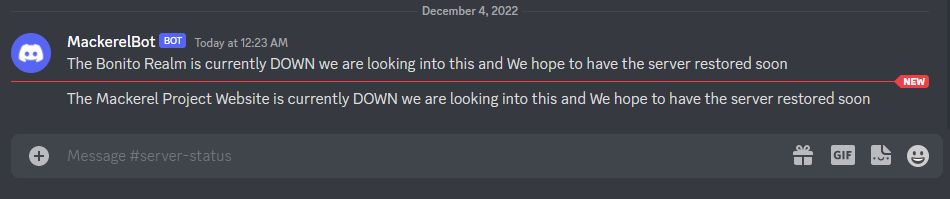
Now that the Alarms and their Accompanying Alerts have been created, I will stop the Servers

And now, if we look at the Discord channel, we will see MackerelBot has sent a message saying the Website and App Server are both down.
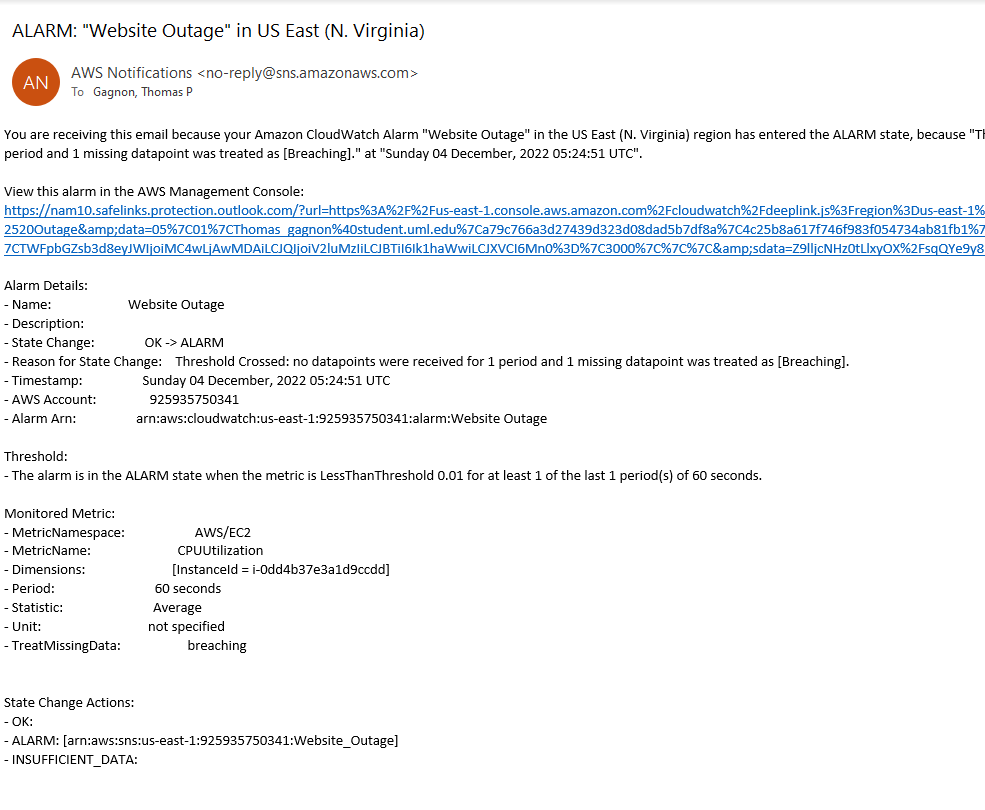
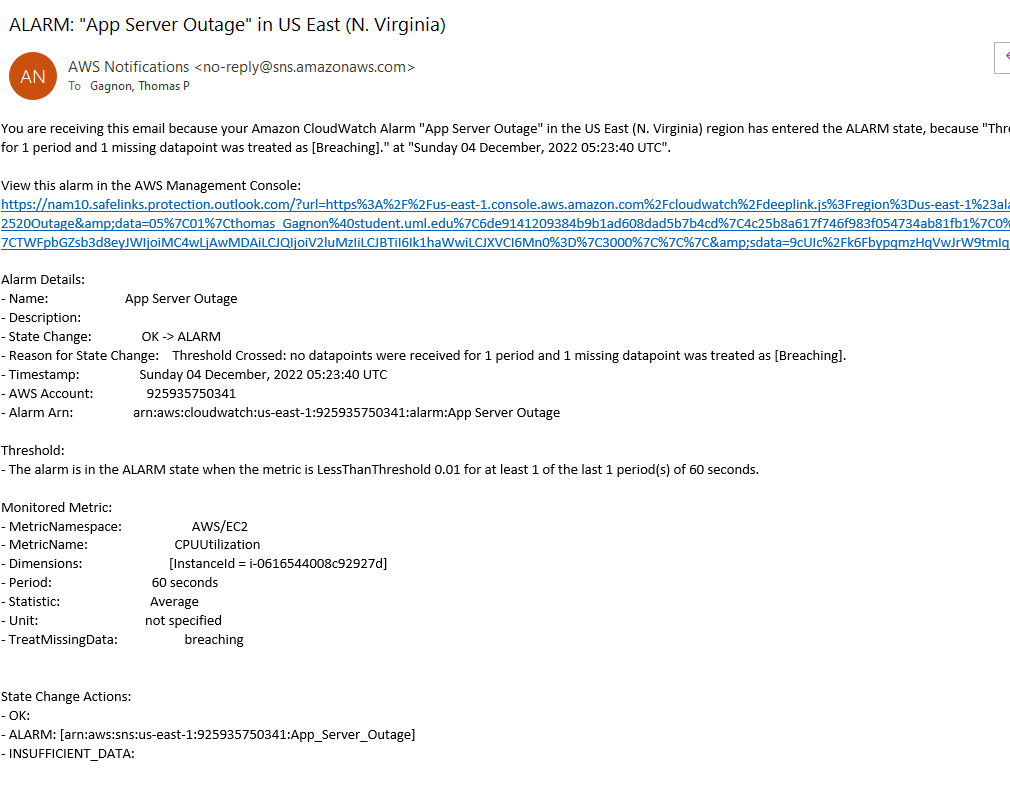
And if we open the admin email, we will see notifications that the Website and App Servers are both down.
WAF#
I wanted to include a WAF in my setup because this project's CMS is old and a fairly vulnerable platform. The web server was configured with a load balancer; the load balancer for this project does not function as a proper load balancer because there is only one server handling the request. To enable the WAF, I will go to the load balancer dashboard and integrations.
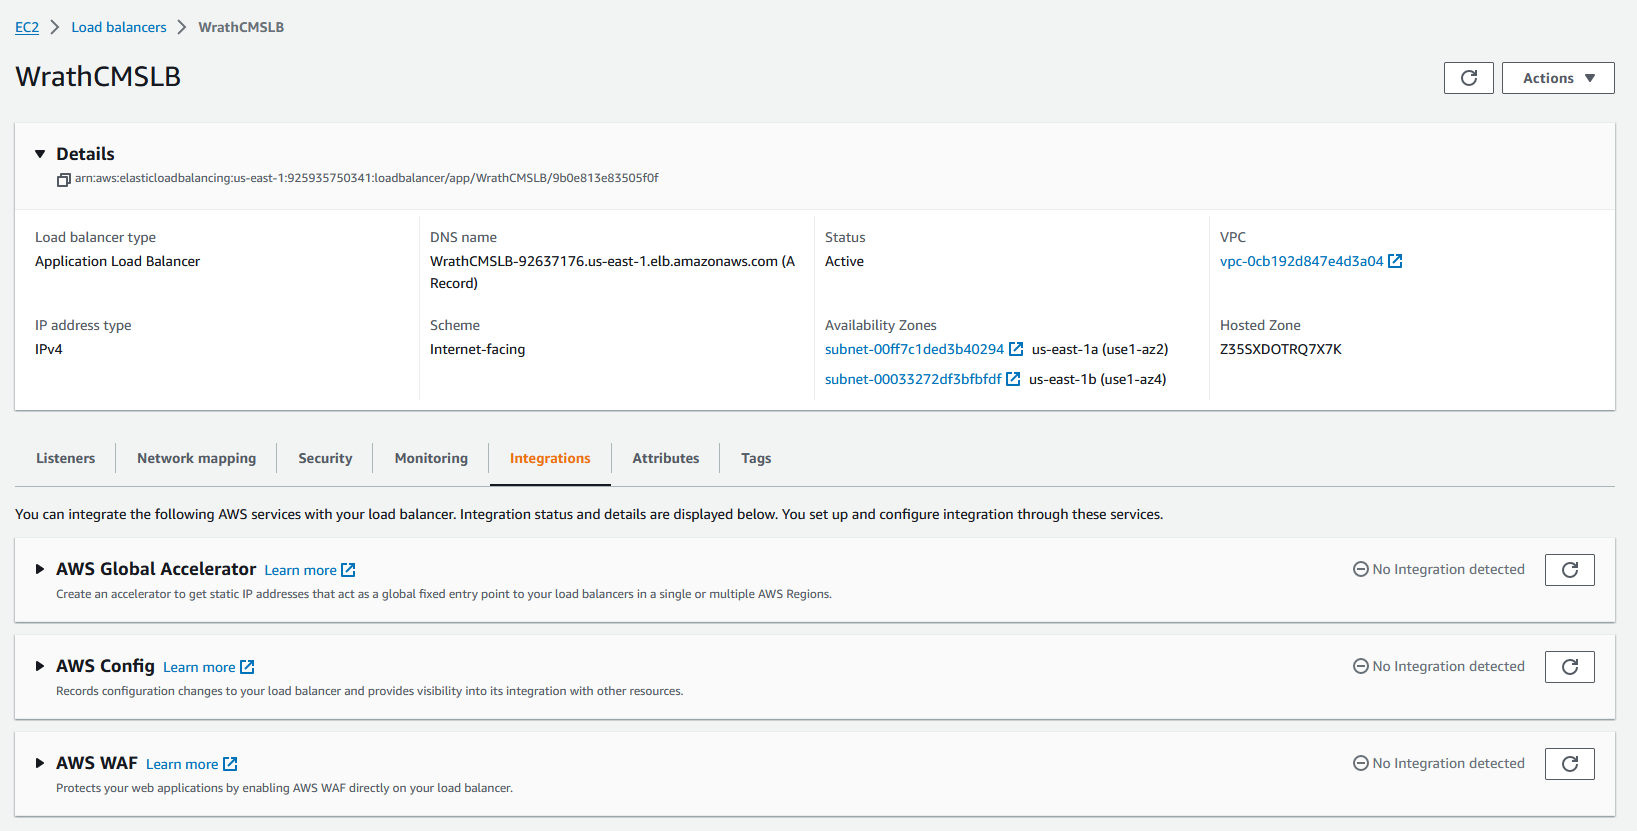
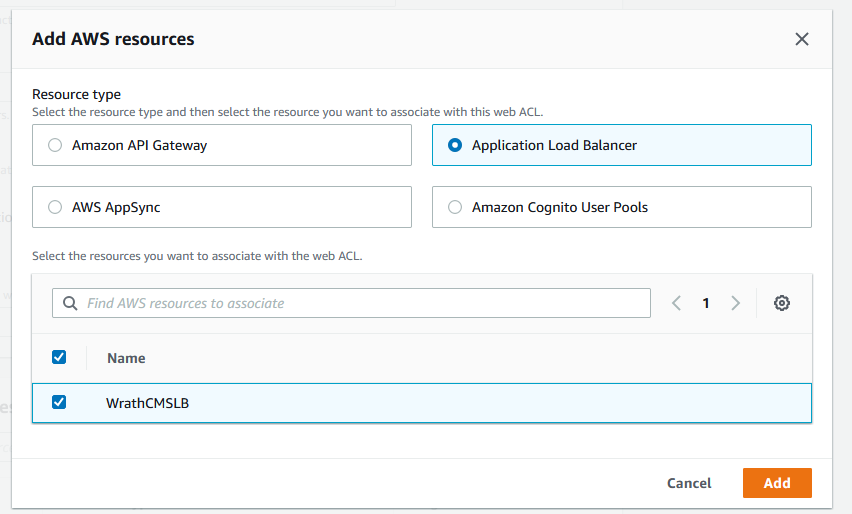
From here, I can enable the WAF by clicking the create web ACL button

I will call the web ACL wrath_waf
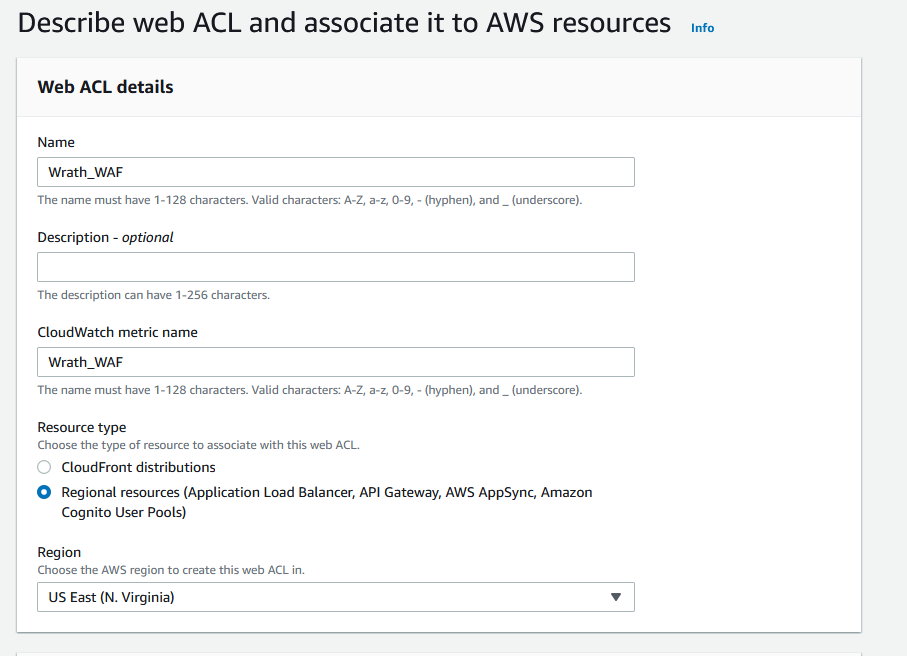
For associated AWS resources, I will add the CMS LB
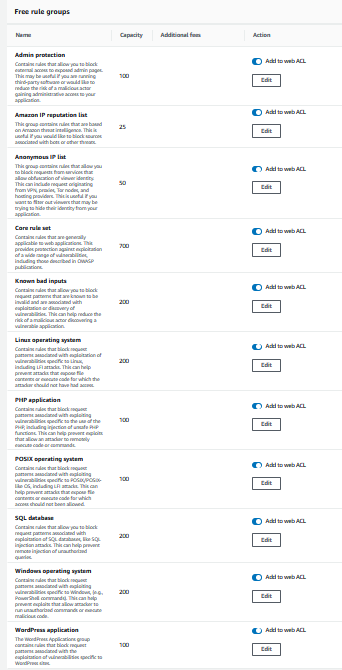
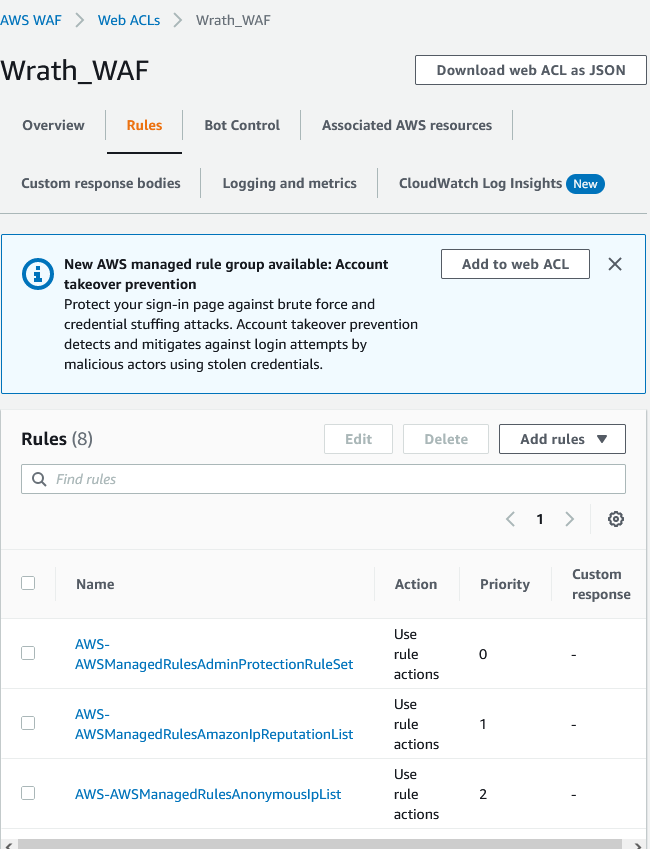
For rules, I will use the AWS Managed rule groups, and I am going to enable all of the free rules
I will keep the rule priority as the default because I want to see how well the free AWS rules function for this environment; the key components of this project are included in the free rule sets, such as Linux, PHP, and SQL. It should be a fair baseline for the environment.
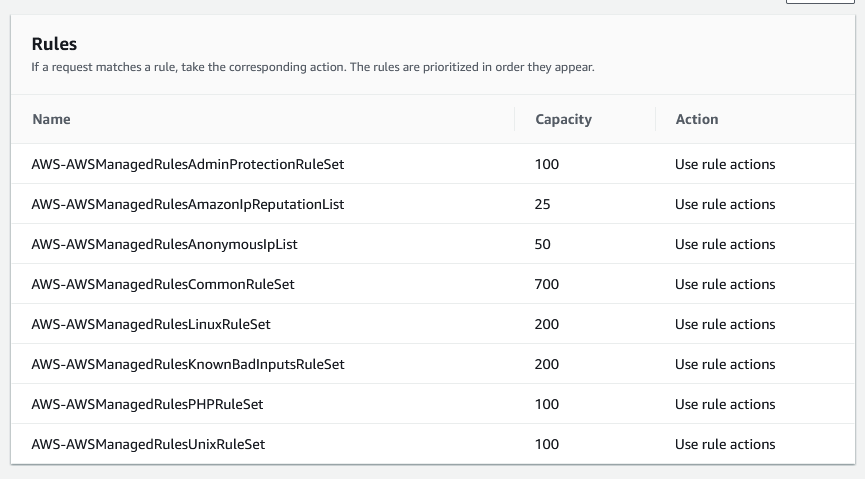
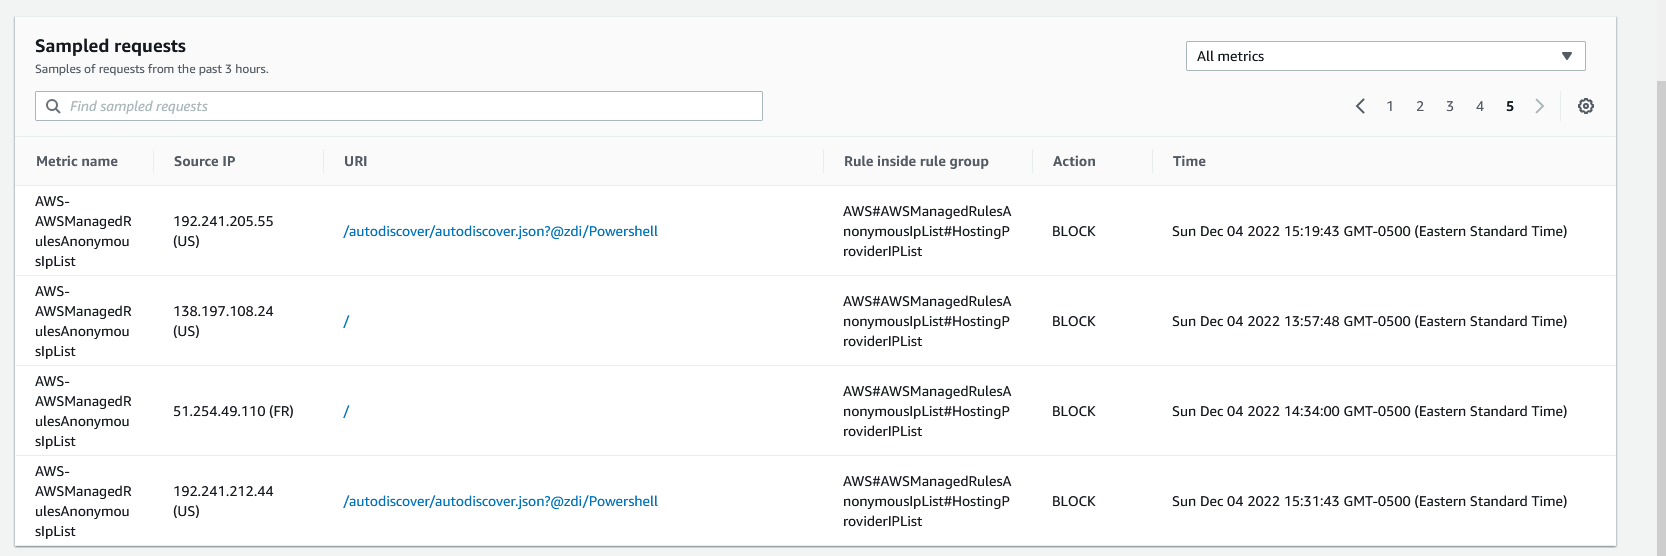
Now that the WAF Web ACLs have been created, we can see the WAF dashboard
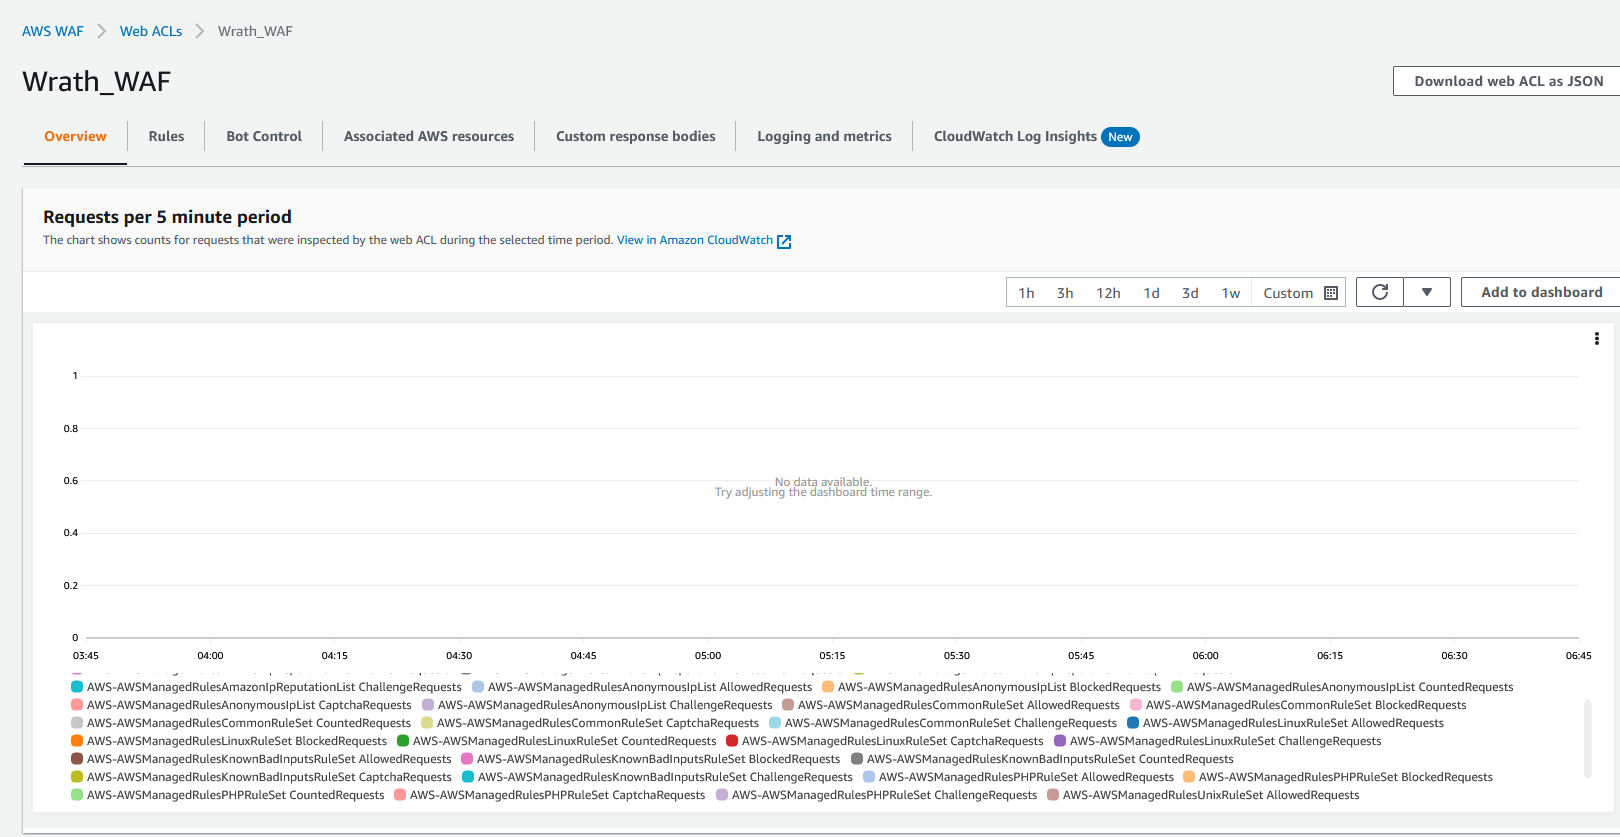
Now that I have let the WAF run overnight, we can start to see traffic going to the Webserver. We can see that multiple requests are being sent to the web server, and some are being blocked for malicious behavior
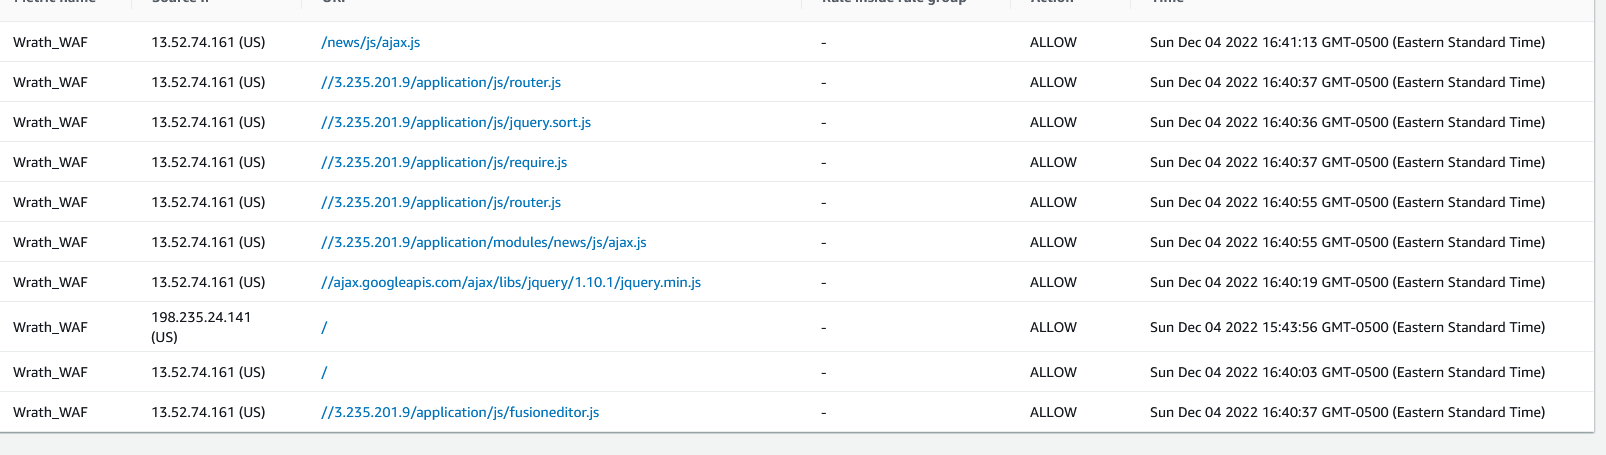
And looking at the newer request, we can see that some of these are being allowed
I want to add a rule to block traffic from outside the US. Though this doesn't stop threats completely, it will help block off unneeded traffic from reaching the Web server, and I will open rules and then go to add rules and add my own rule.
And I will call this rule GeoIPBlock
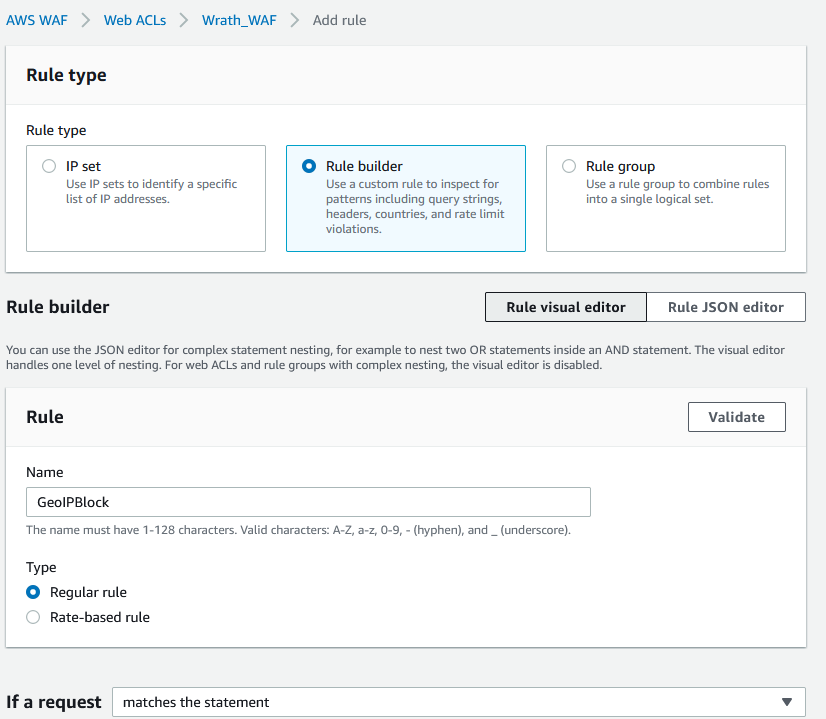
Then I will add the statement Originates from a country in and add everything except the US
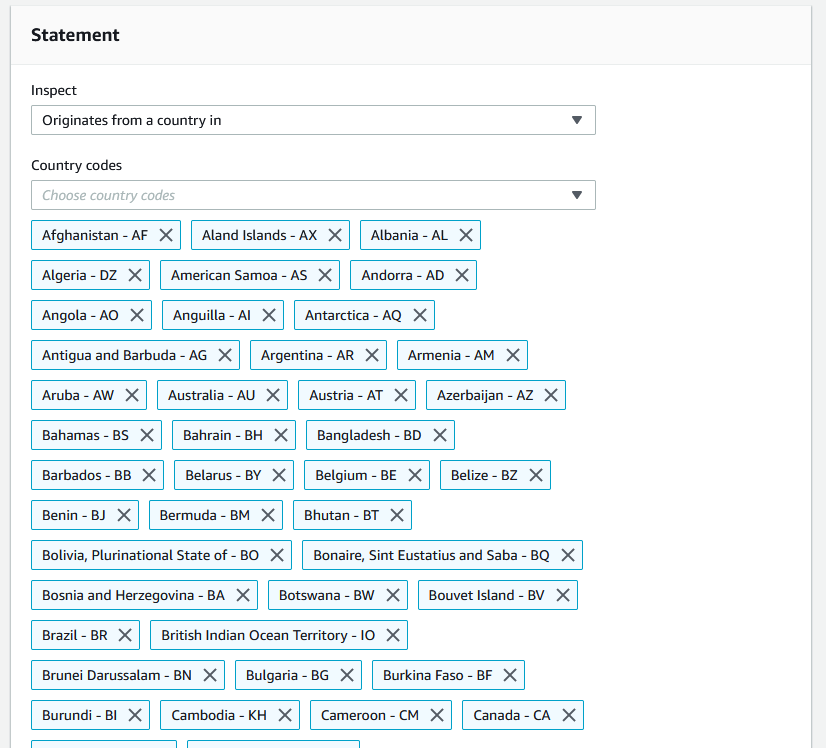
And then, I will set the action to block
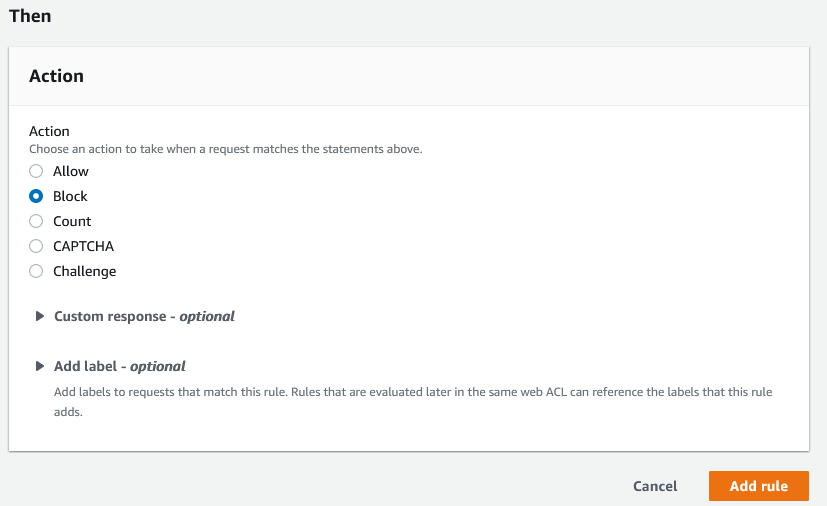
Now the rule will be created, and it will begin blocking traffic that does not originate from a US-based IP address.
Security Hub#
Now that the WAF has been implemented, I want to set up the security hub. I will move to the Security Hub dashboard and start configuring the security hub
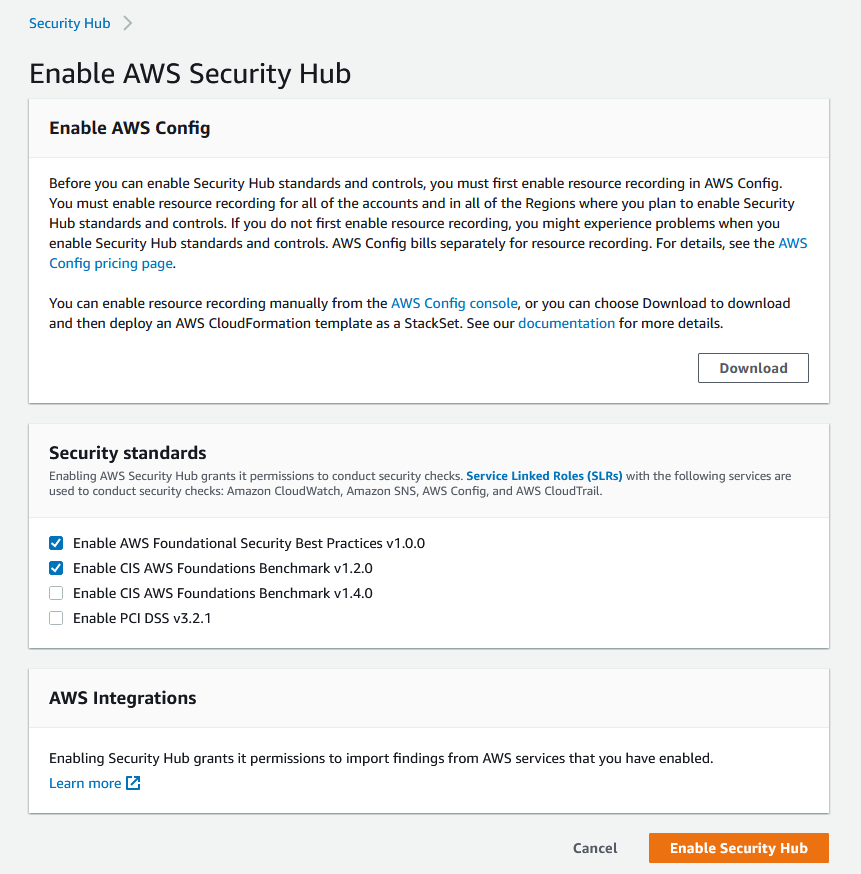
I am going to use the standard setting for this because this is a project I won't need PCI compliance. Now that the security hub has been enabled, it will scan the environment and build its security score.
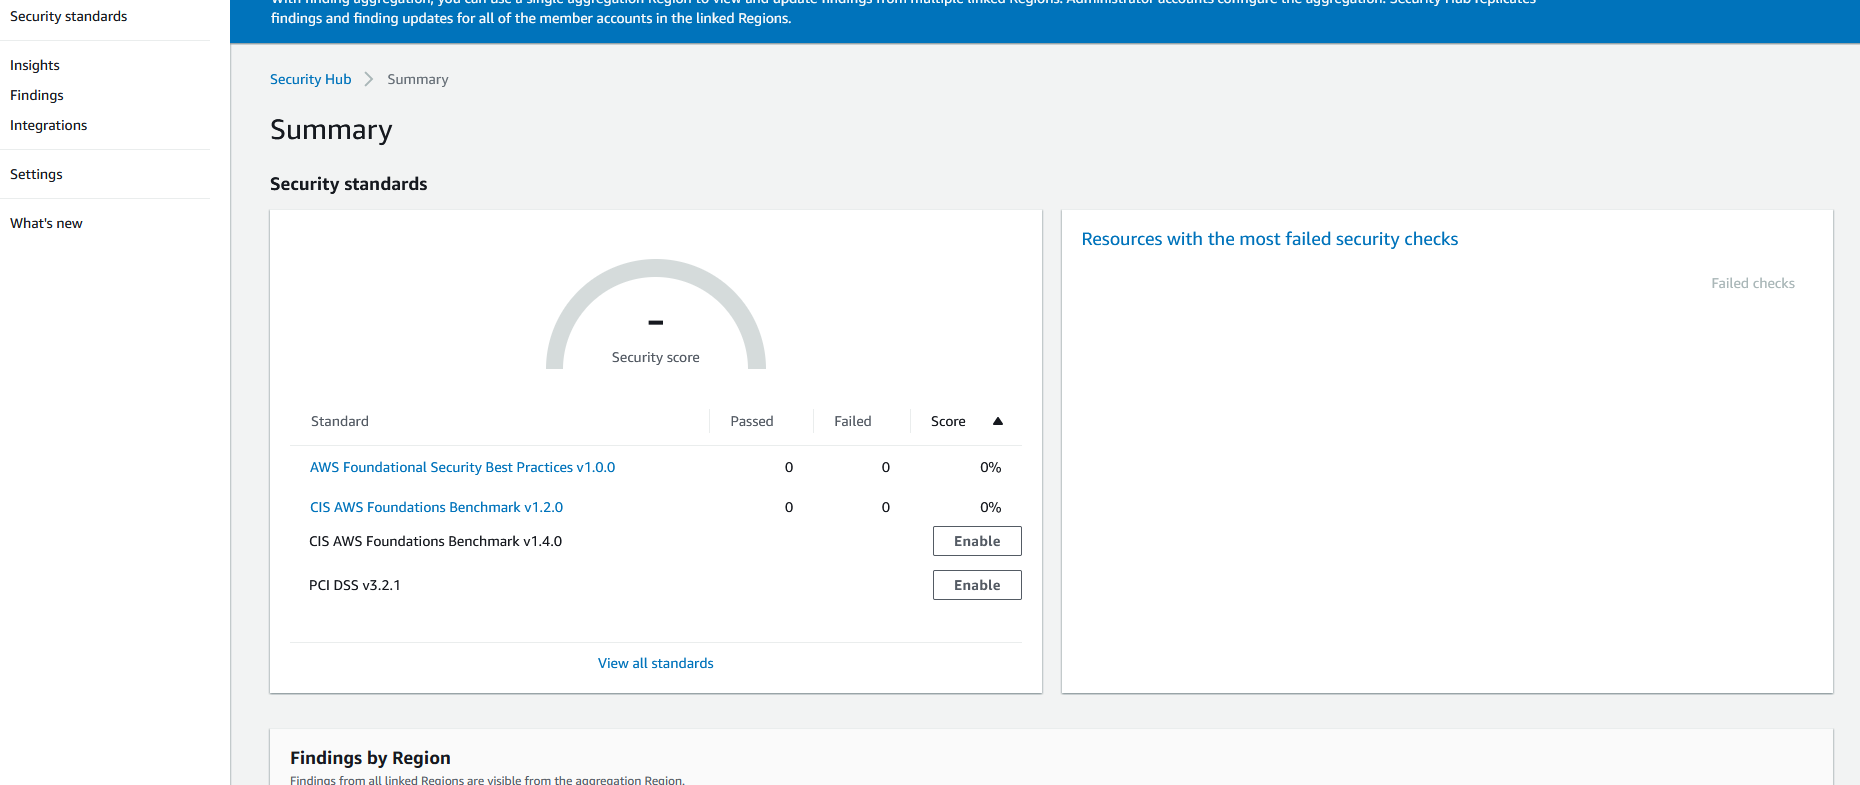
I am using the security hub as a basis for security issues. I can see what issues might be occurring within the wrathenv VPC.
Now that the security hub has been running, we can see it has found some issues in the environment

If we look at the findings, we can see more details about the issues in the environment
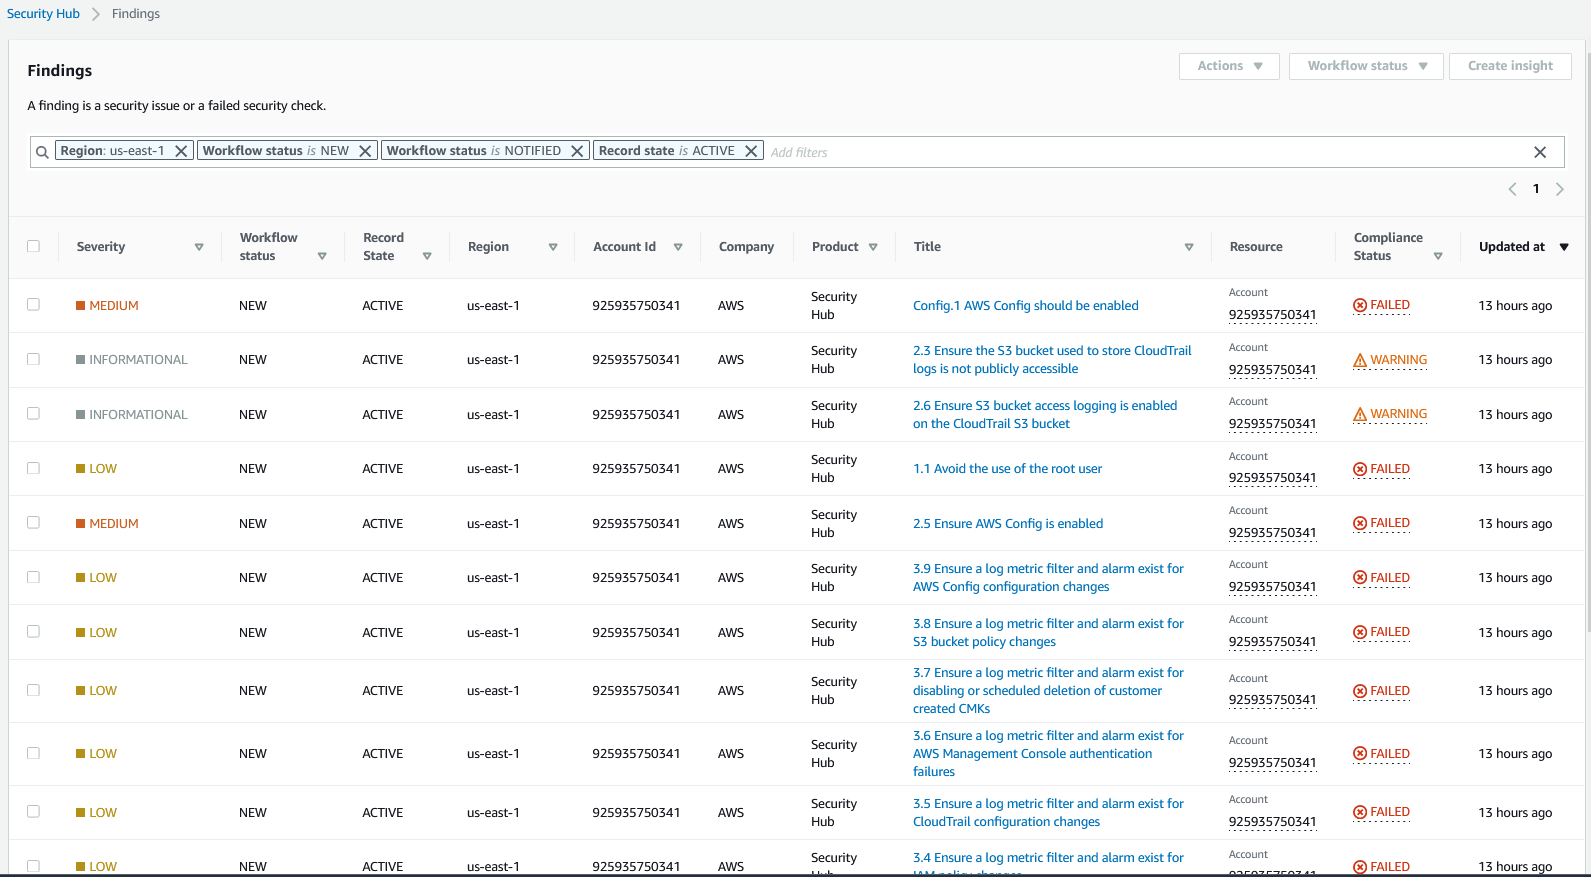
If we open the first alert, we can see more details on the issues found in the environment
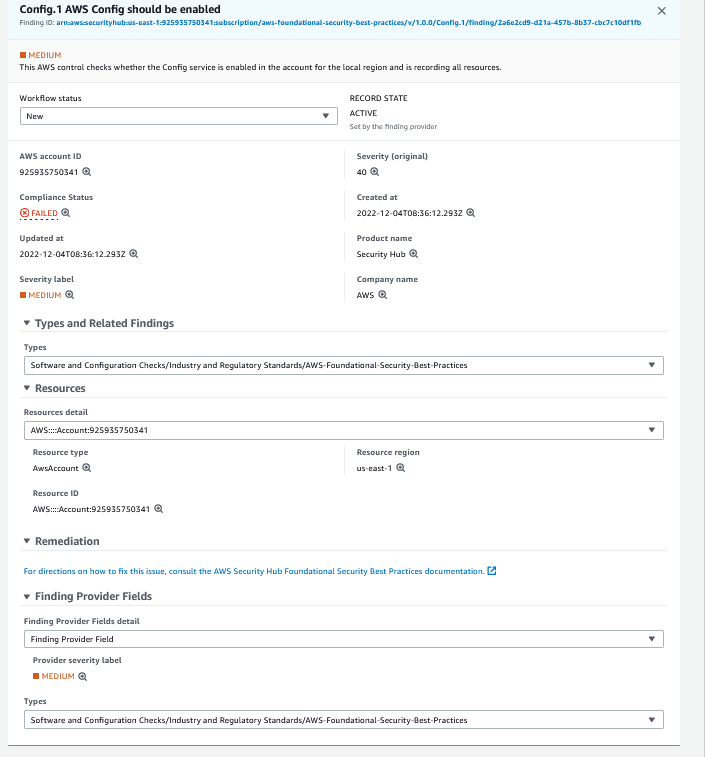
SecurityHub also offers remediation advice for issues in the environment. This specific issue can be found here.
Cloud deployments can include a lot of services and many environments. SecurityHub is an excellent resource for finding issues in the environment. Security Hub scans for issues by the region so that it will collect information on everything.
Summary#
My goal for this project was to deploy a well-developed version of a previous project, while a lot of this project went above what is needed to host a game server. It was nice to develop a well-planned version of this project. That has built-in security insights. A lot of this project was reproducing things I have built on the AWS platform before; one of my personal goals was to include services I wasn't sure how to deploy. I think the one service that was the most difficult to deploy was the lambda functions. At the same time, they seem to be an easy service to deploy. It took me a while to deal with importing the layers correctly. The lambda service does not support the python import request, but it was a critical part of connecting to the discord webhook. After some configuring, Once I got the lambda function to work correctly. I had something in place to alert the Userbase of outages very handy when hosting a game server like this. Another pain point I found was the use of the AWS CLI. I planned on using this extensively, but after multiple attempts, I found the specification of the commands far more taxing than building it through the GUI. Looking at the two cloud platforms, I worked with in this project. I feel Azure excels at the CLI level but lacks at the GUI level, whereas AWS excels at both; you can create the same environment in either method.
Resources#
https://trinitycore.info/en/home